The challenge I faced with photography was that the instantaneous static viewpoint, provided by the camera’s lens and shutter, didn’t represent the continuous flow of the act of looking. It seemed as if the still photograph had been held back to the level of the dictionary; the single word. It was the visual equivalent of overlooking the potential to link words to convey ideas and meaning. I couldn’t accept the notion of an isolated, decisive moment being capable of encapsulating our experience of life.
(Myles, N. 2020)
With this quote reverberating round my head, it was time to relook at what I was attempting to achieve. It seemed I had spent a lot of time and energy researching trees and how to photograph them in the best way possible. However, this project isn’t about getting the perfect tree image. It’s about practice-based research, which requires EXPERIMENTATION!
When I looked at the images I’d created so far, I was very happy with the progress I had made technically. I was now taking a different approach to tree photography compared to the one I used in the AGM60 Research & Experimentation module. What was missing at this stage in the images was the element that made them distinctly ‘Jennie Meadows’. I also felt that I wasn’t being ‘creative’.
Editing and experimenting with images digitally is integral to my work. Why not now?
The fact that I hadn’t started this process for the current project was strongly sparked by the work and words of Noel Myles. Why should my images be restricted to one view point?
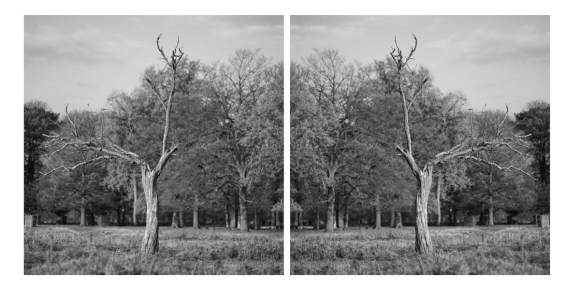
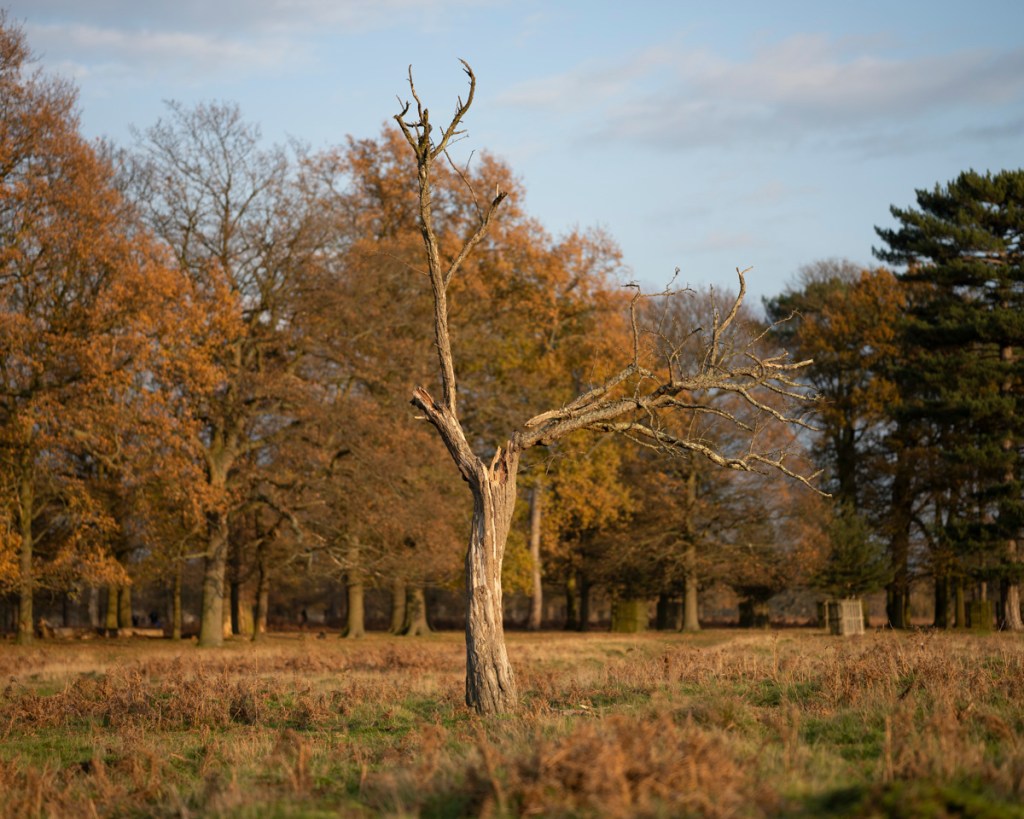
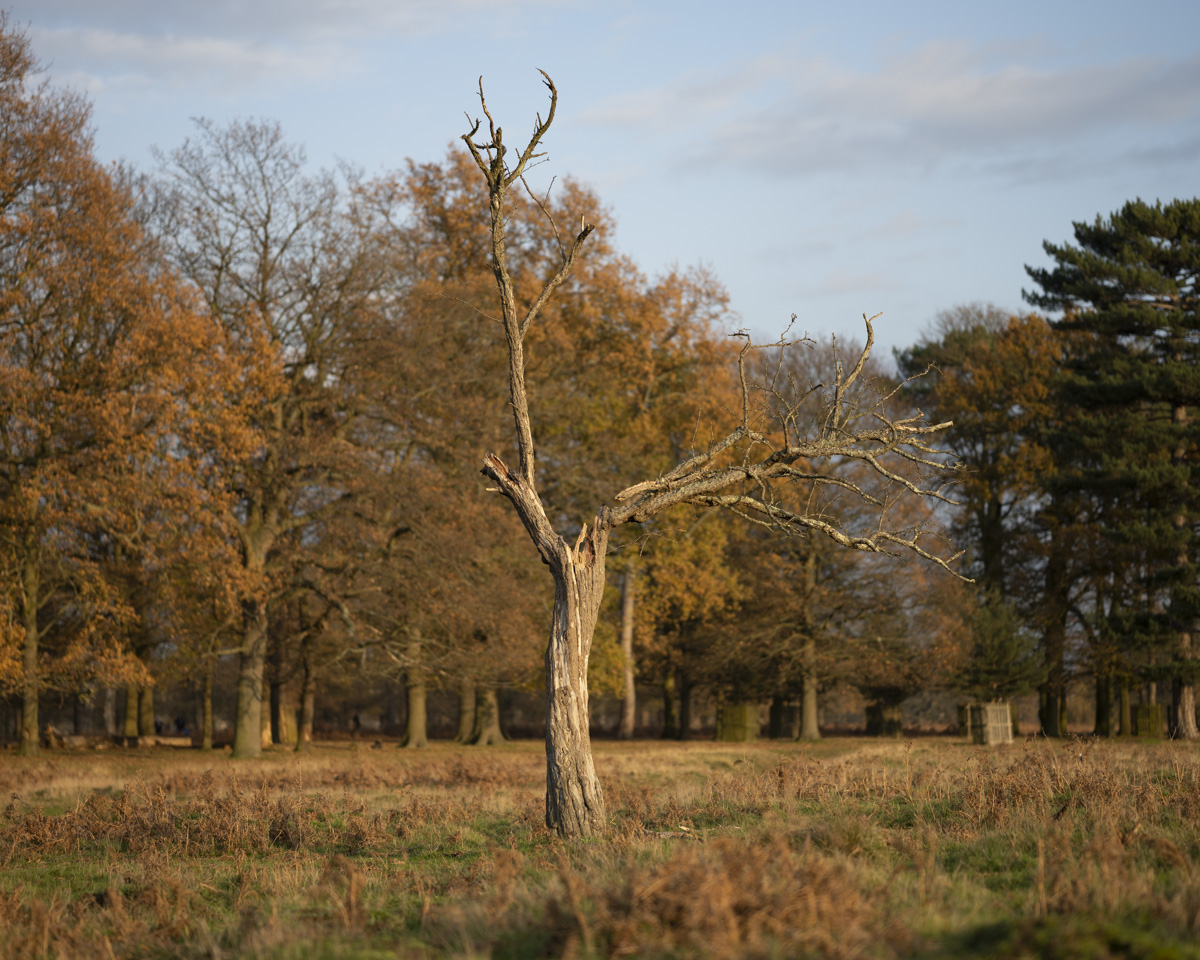
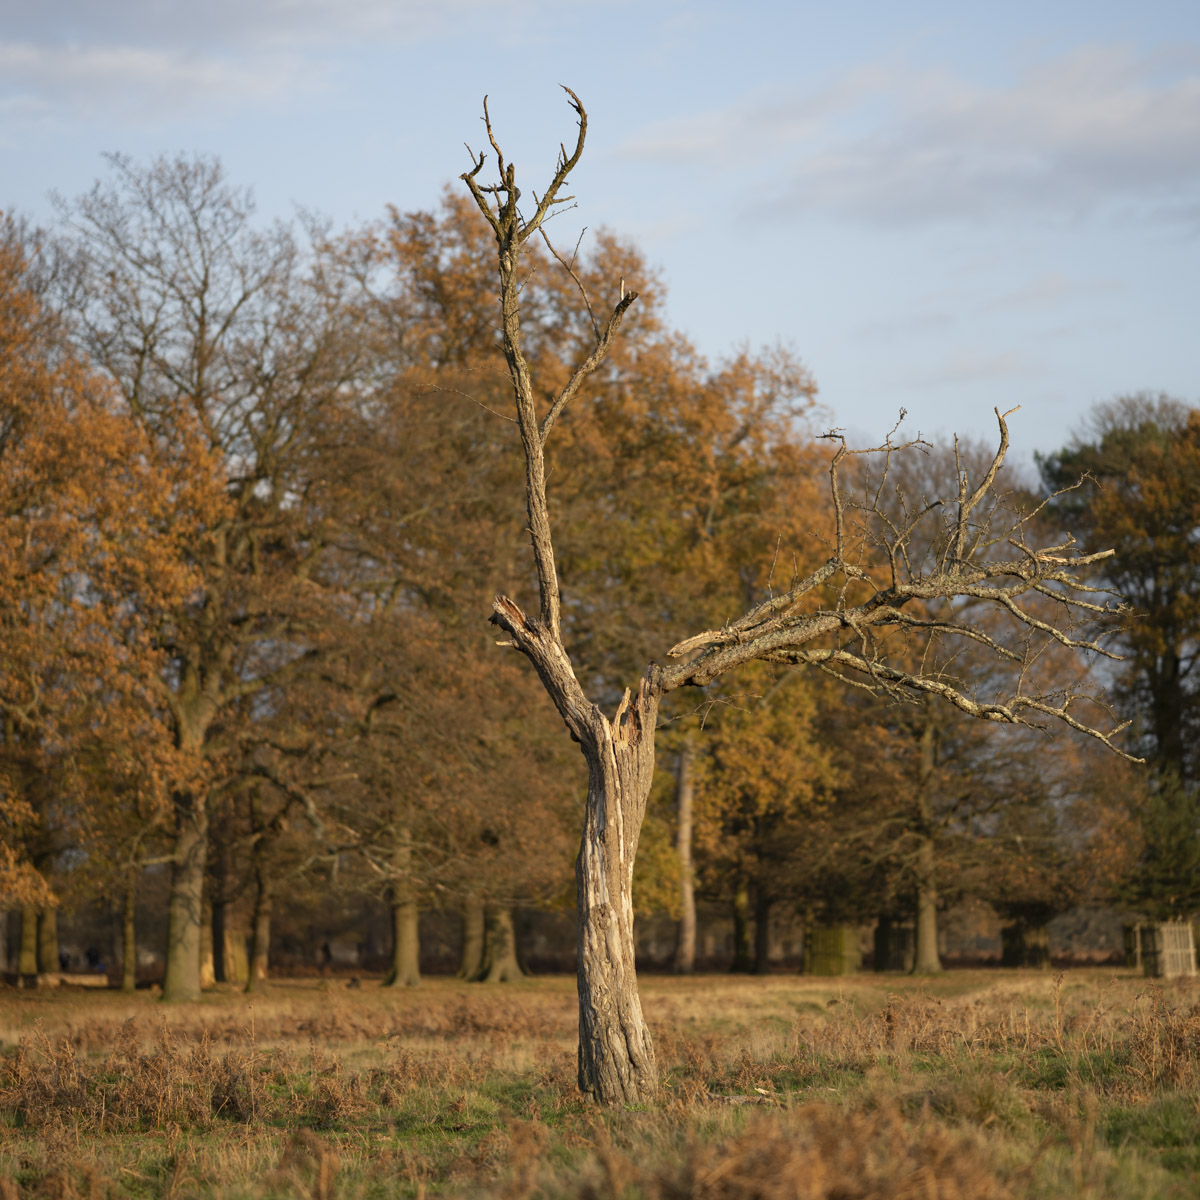
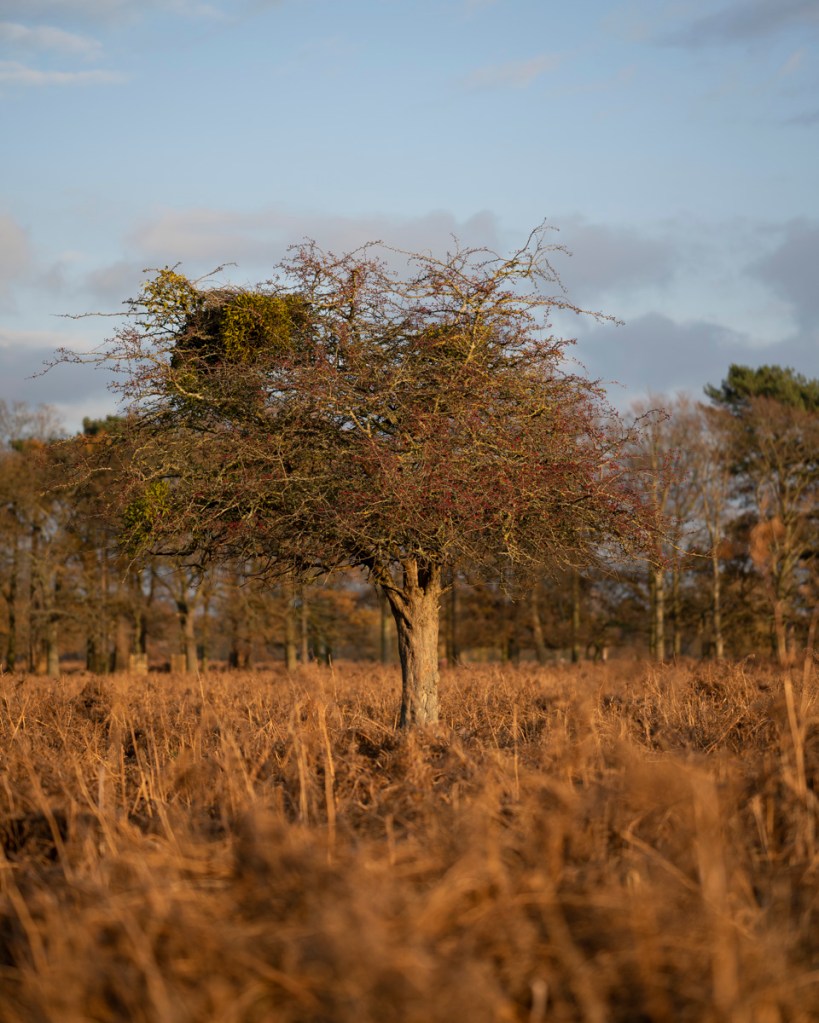
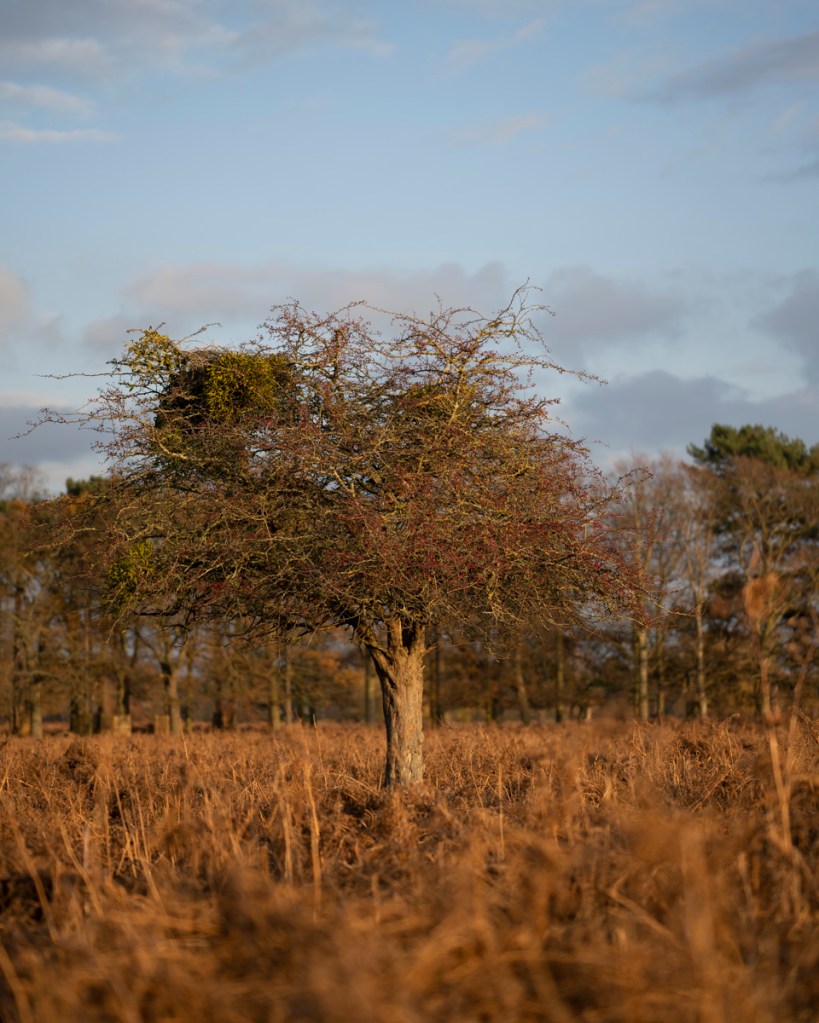
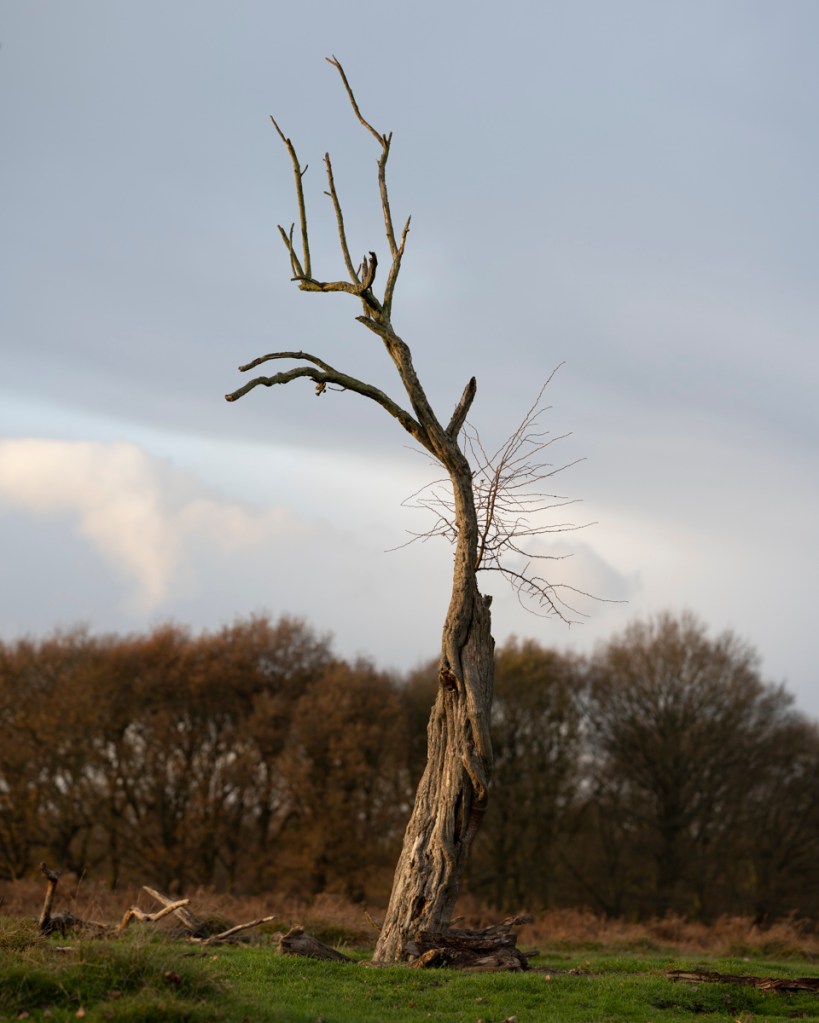
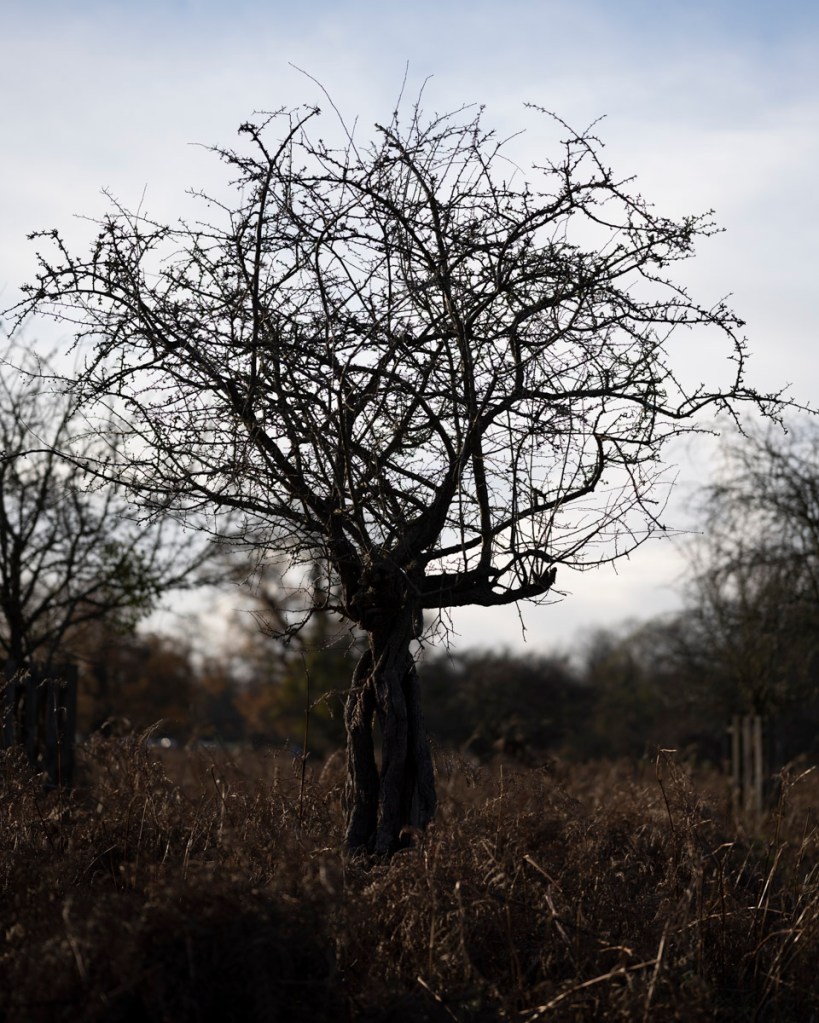
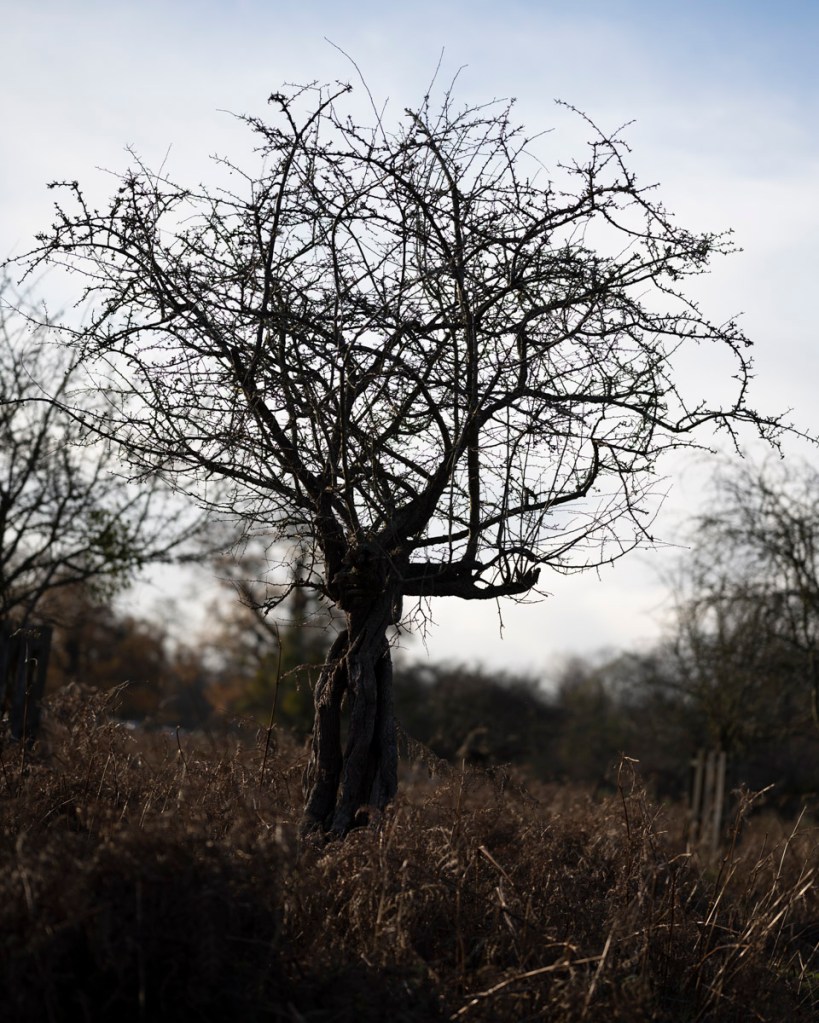
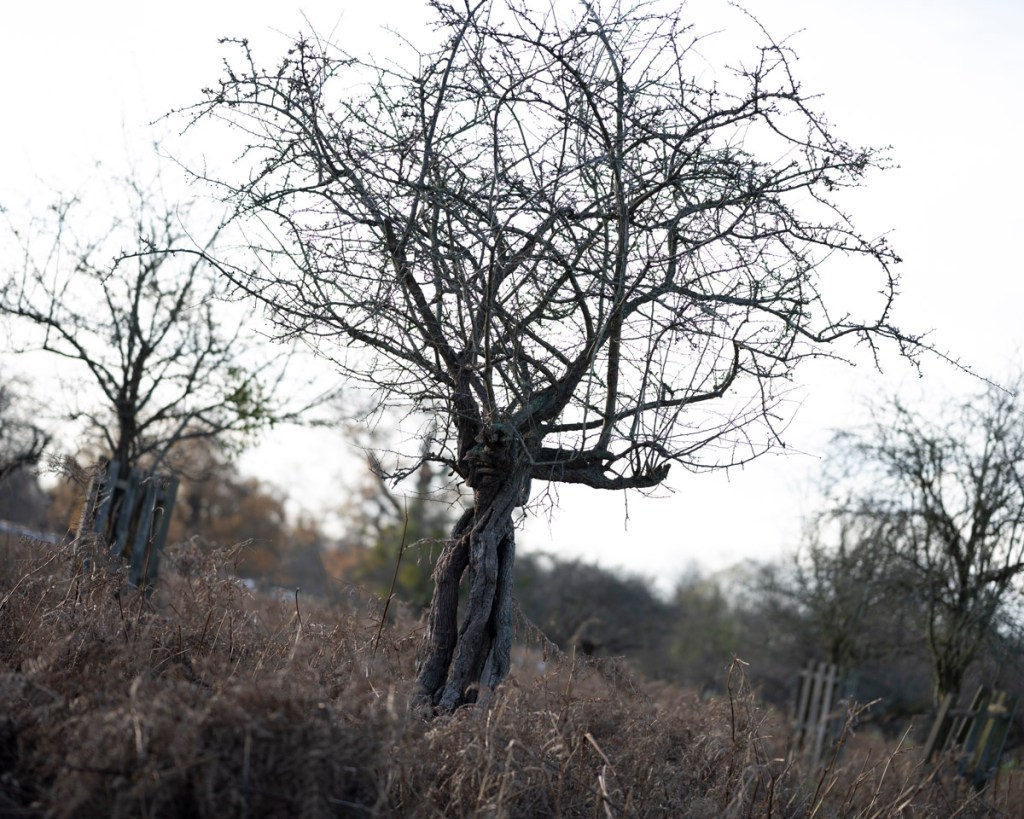
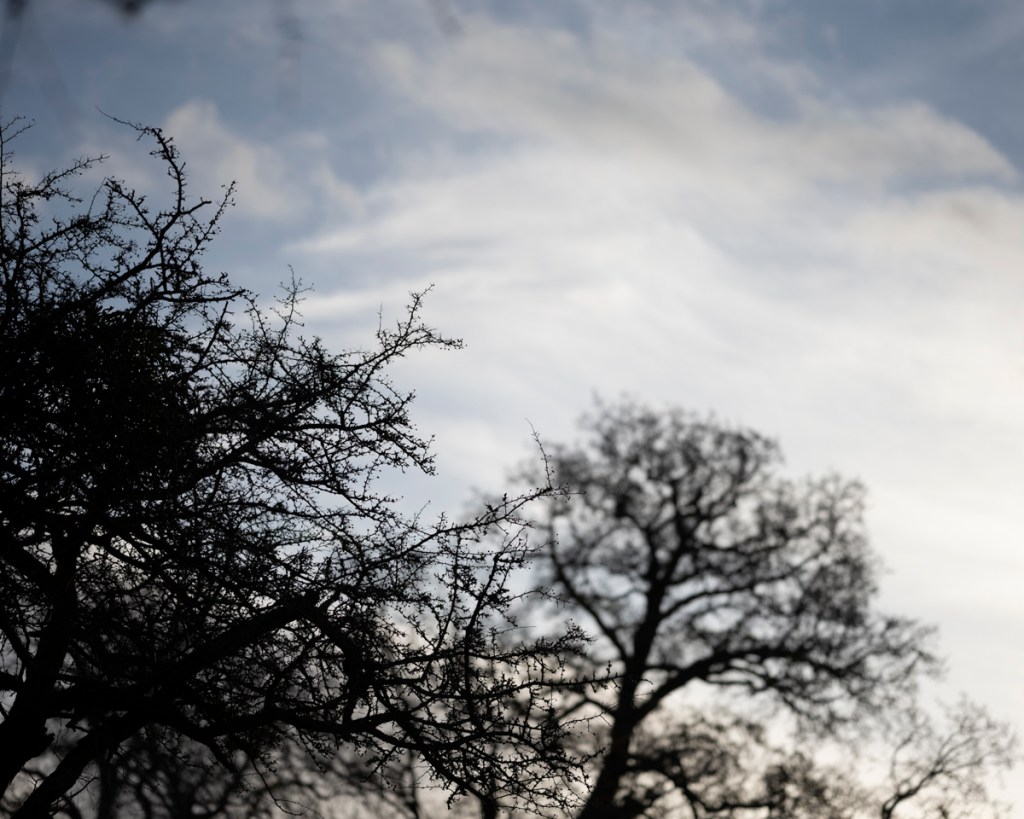
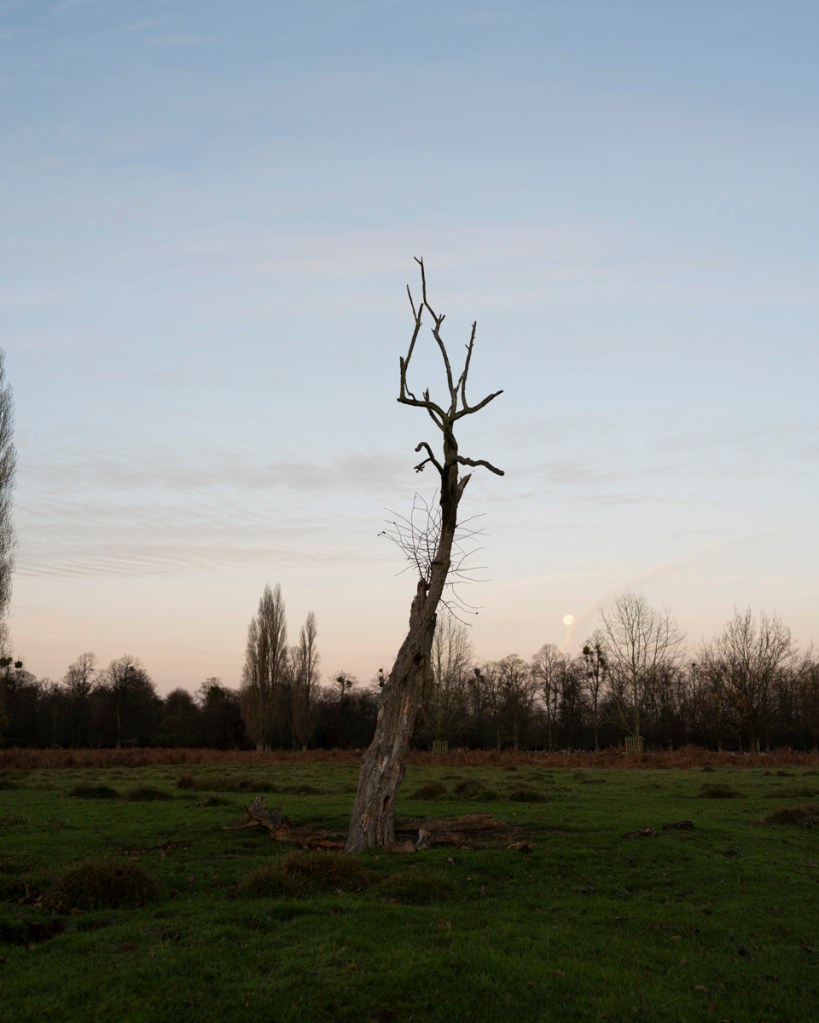
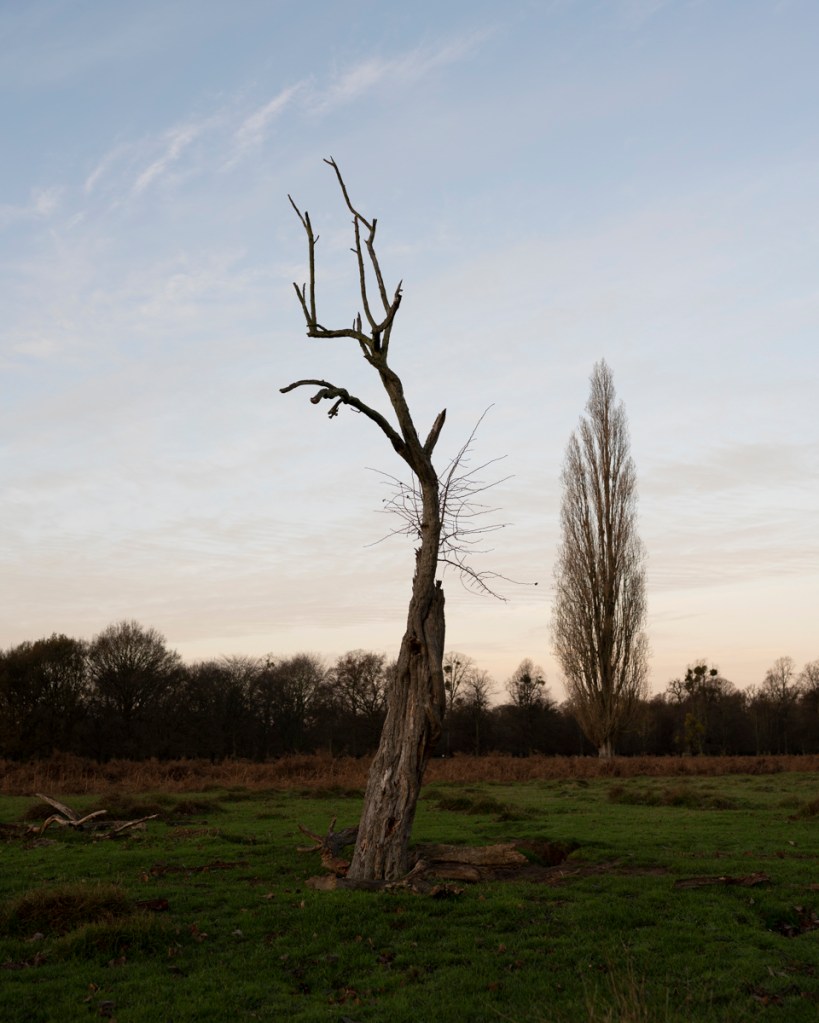
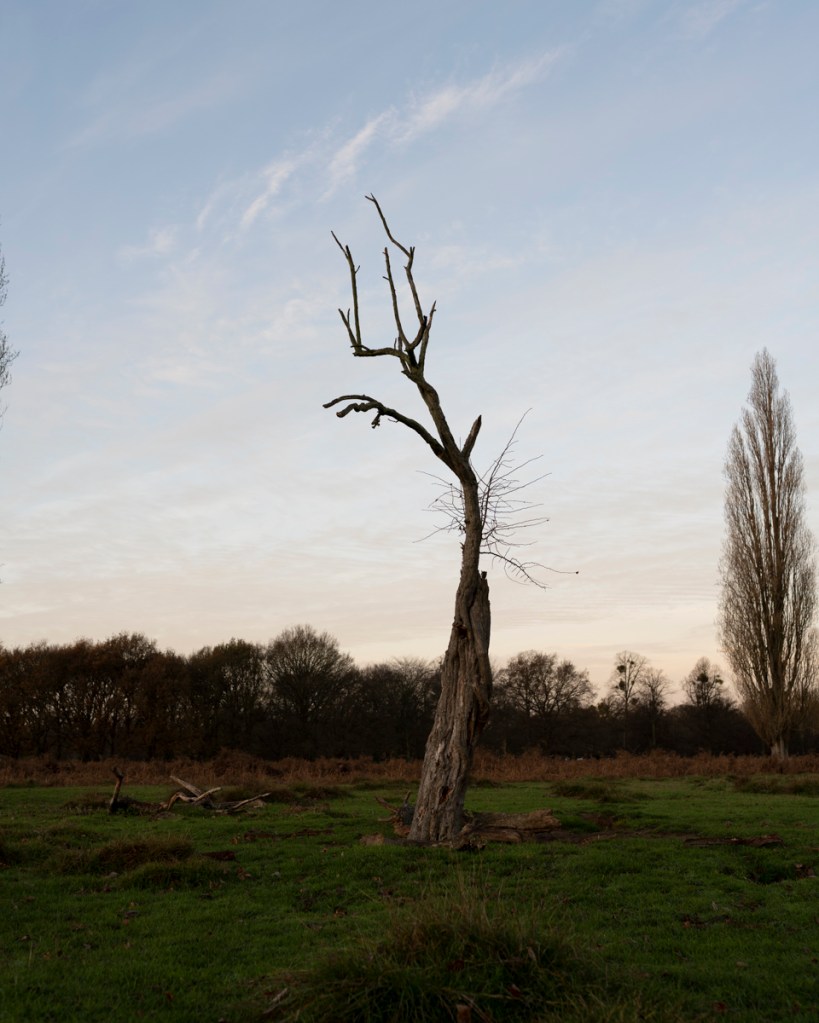
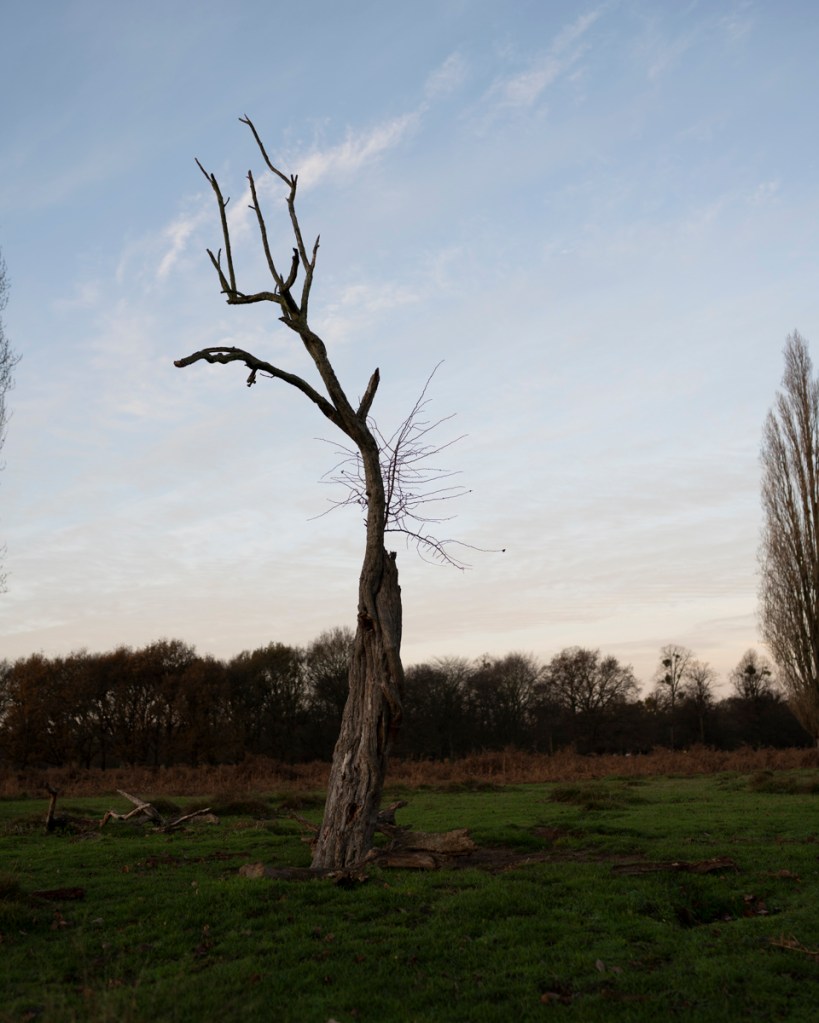
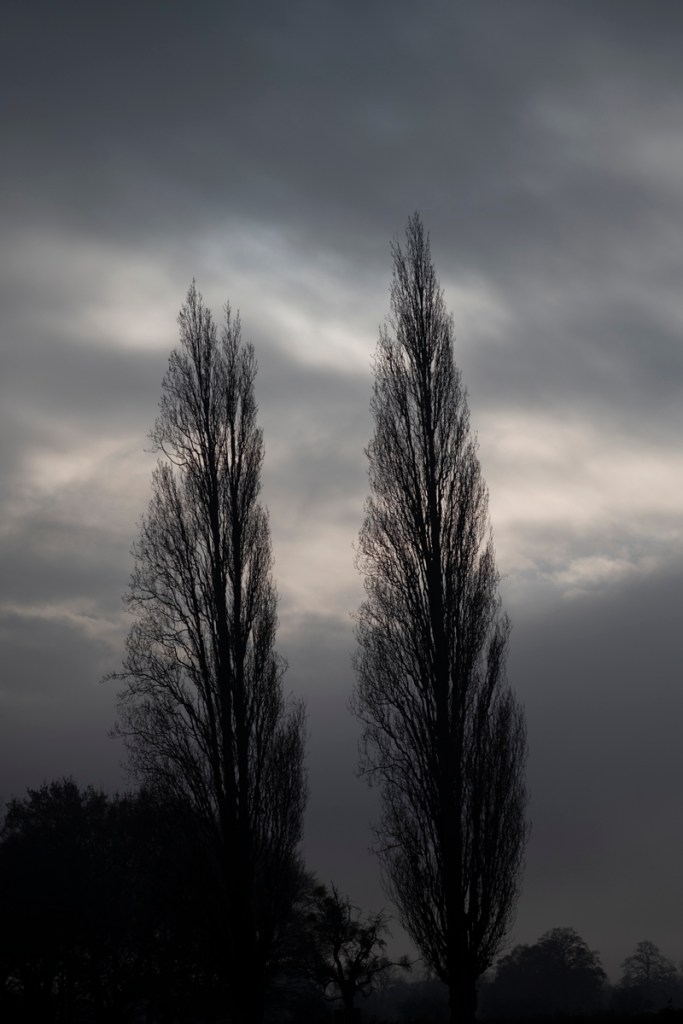
My first experiment involved a Black & White conversion of the following image.
Next, I flipped the image 180 degrees.
I then combined to two images in Adobe Photoshop.
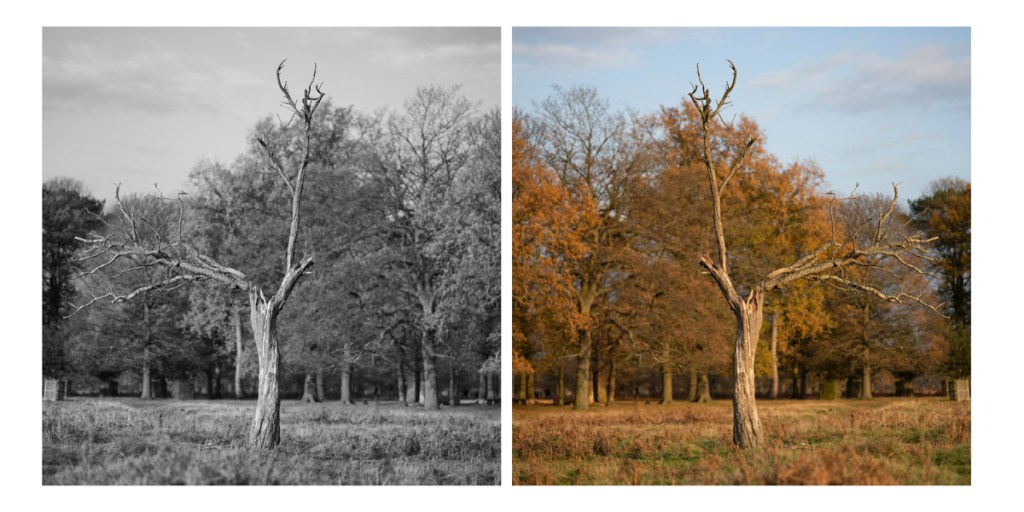
I wasn’t sure about the two images connecting. I thought the middle section may be two distracting. So I also created a version with a small between them. I also tried a third version showing one in Black & White and the other in colour.
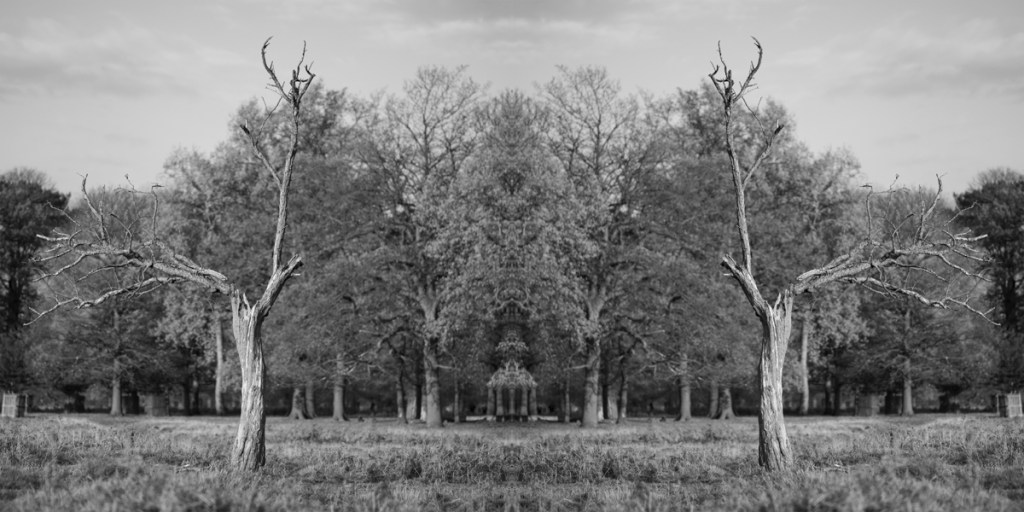
Something was starting to evolve. Further experimentation was required. My classmate, Mark, suggested putting the two trees together. I planned to do so later that day.
There are centuries worth of modes of depiction that are not restricted to the single viewpoint, for photographers to inspect.
(Myles, N. 2020)
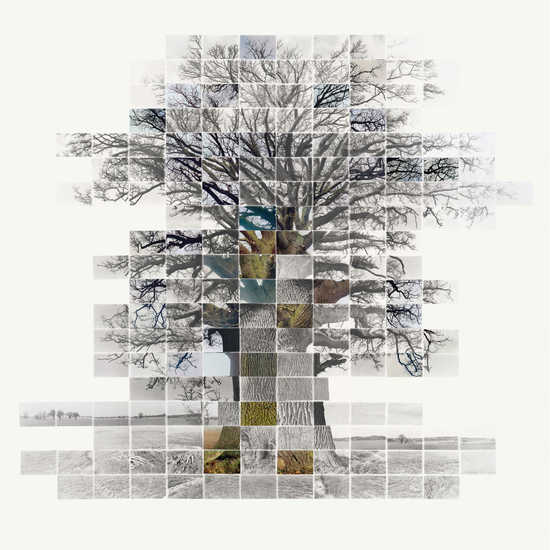
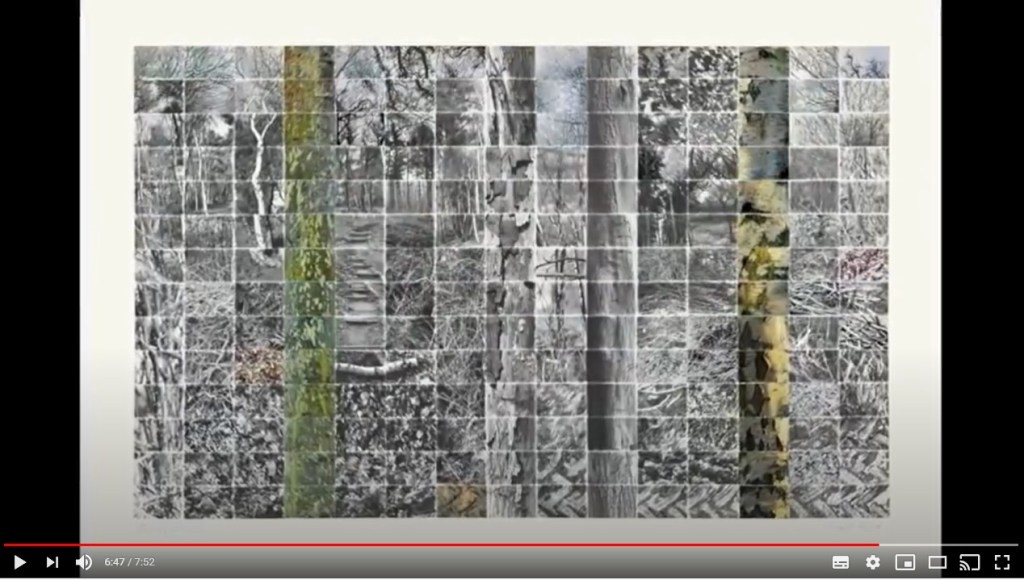
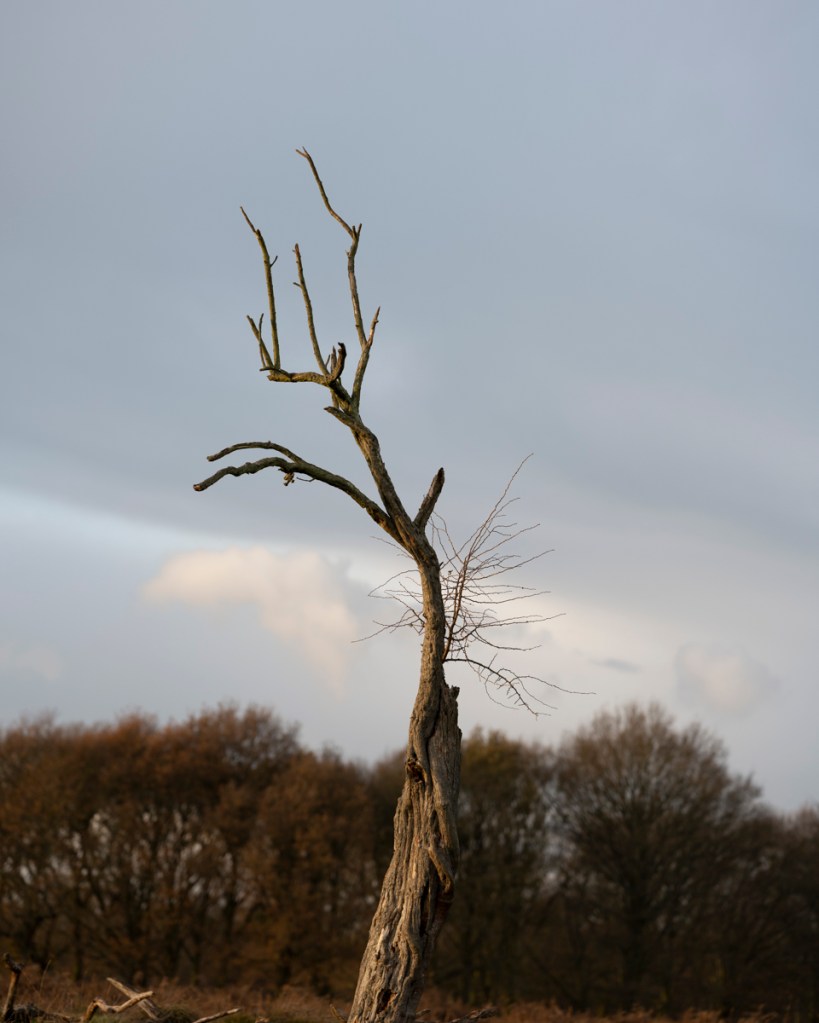
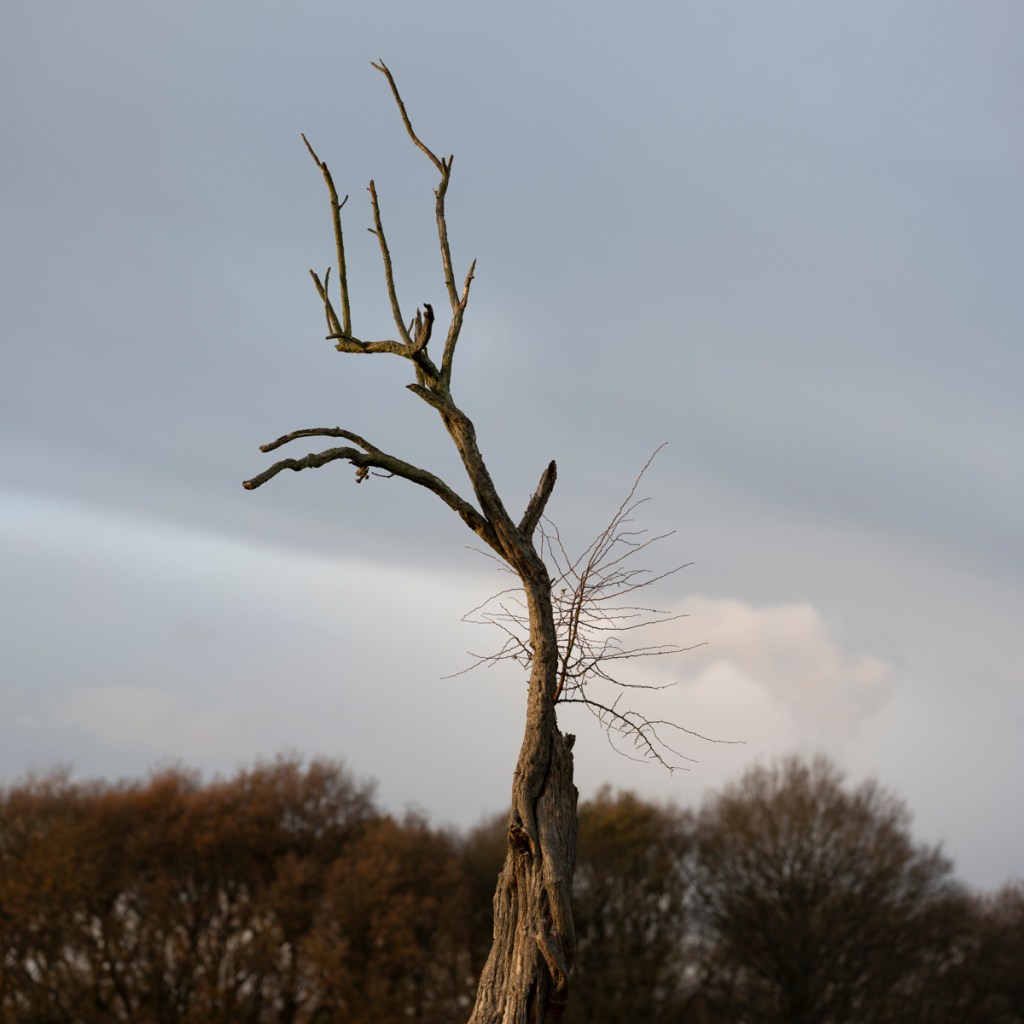
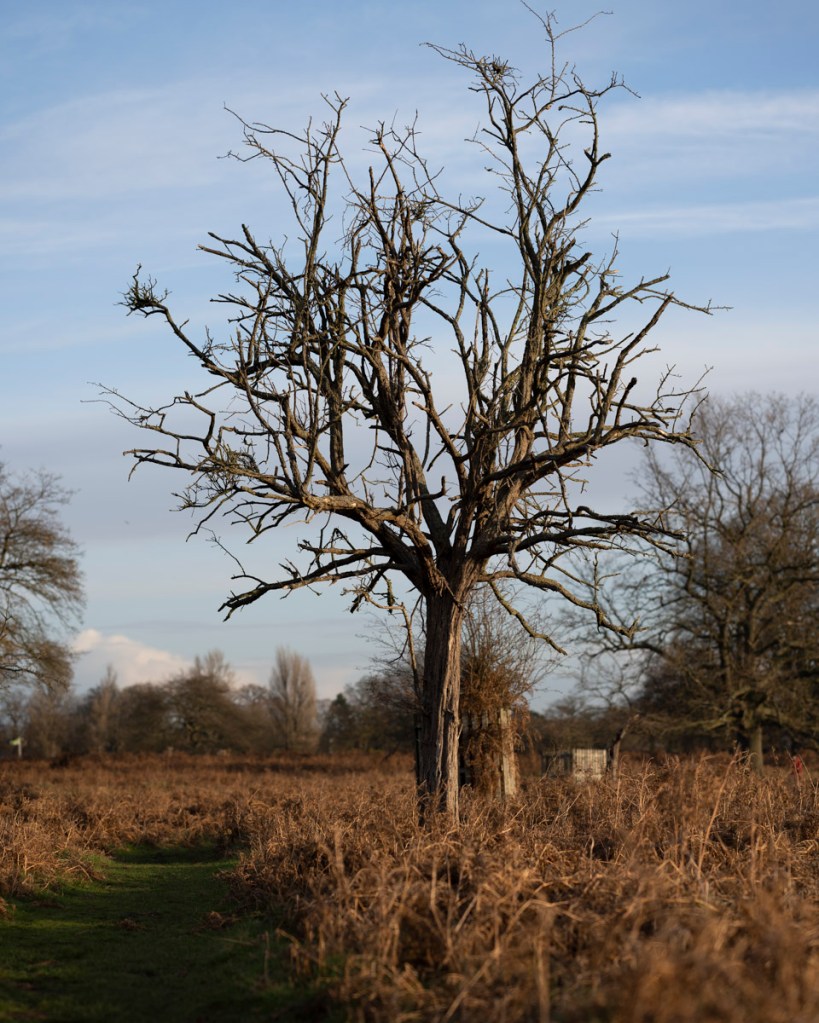
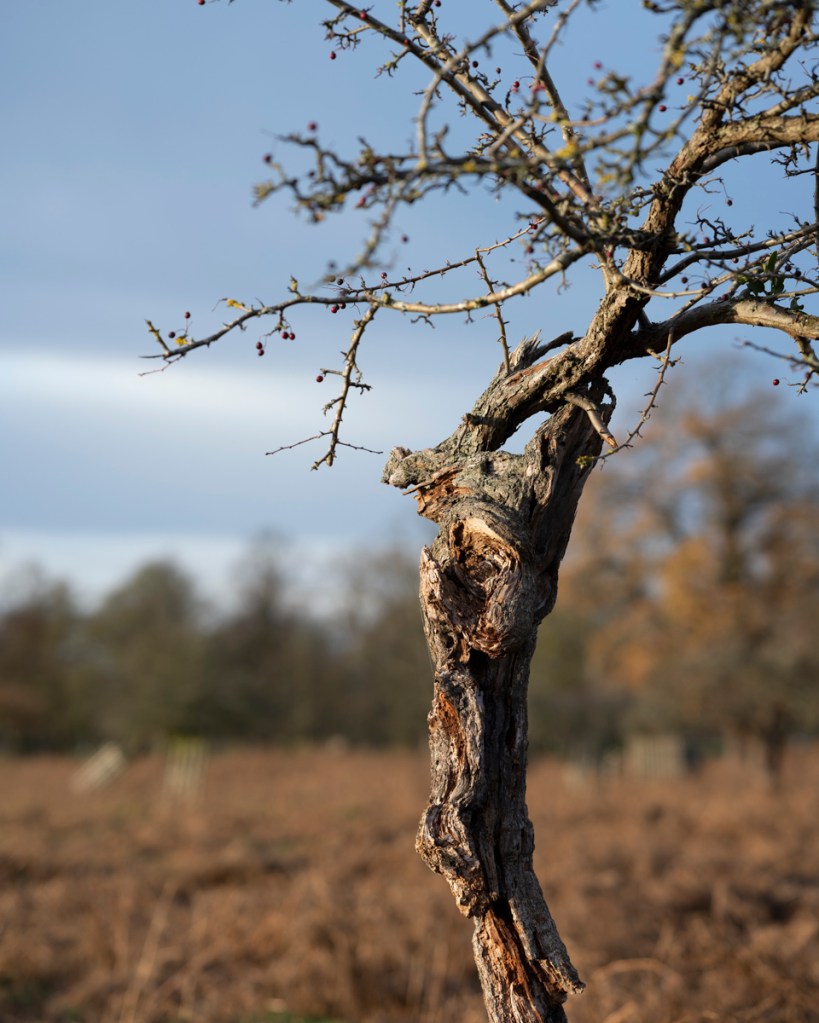
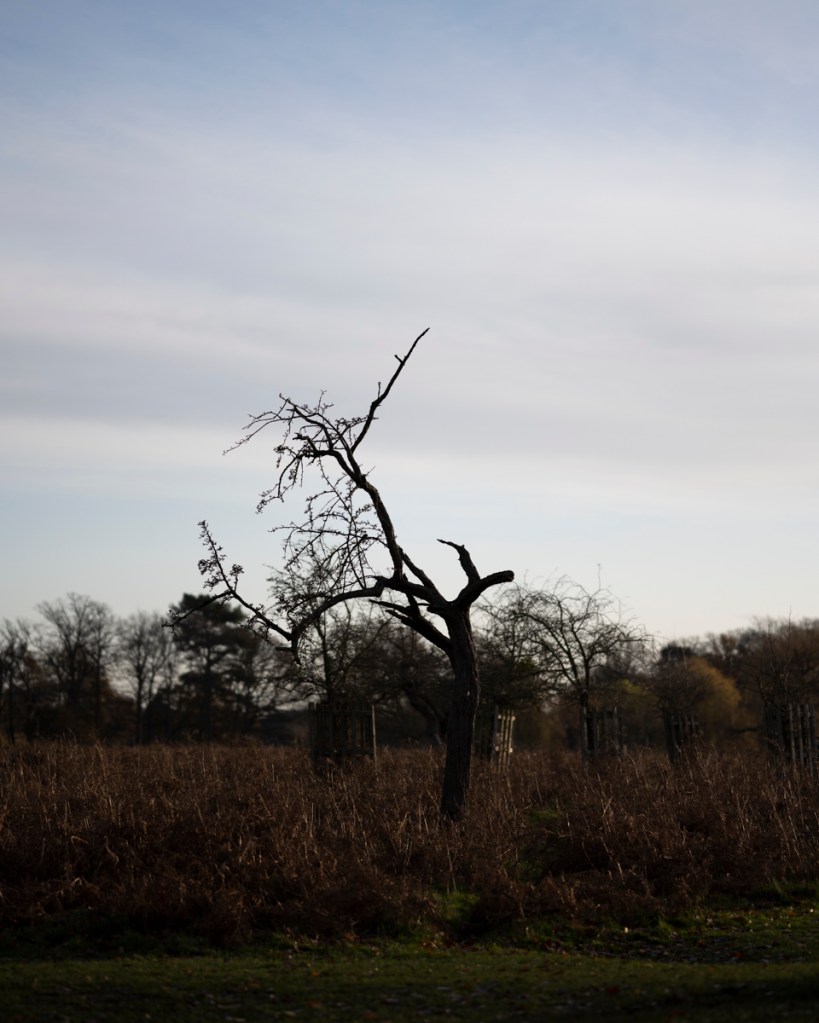
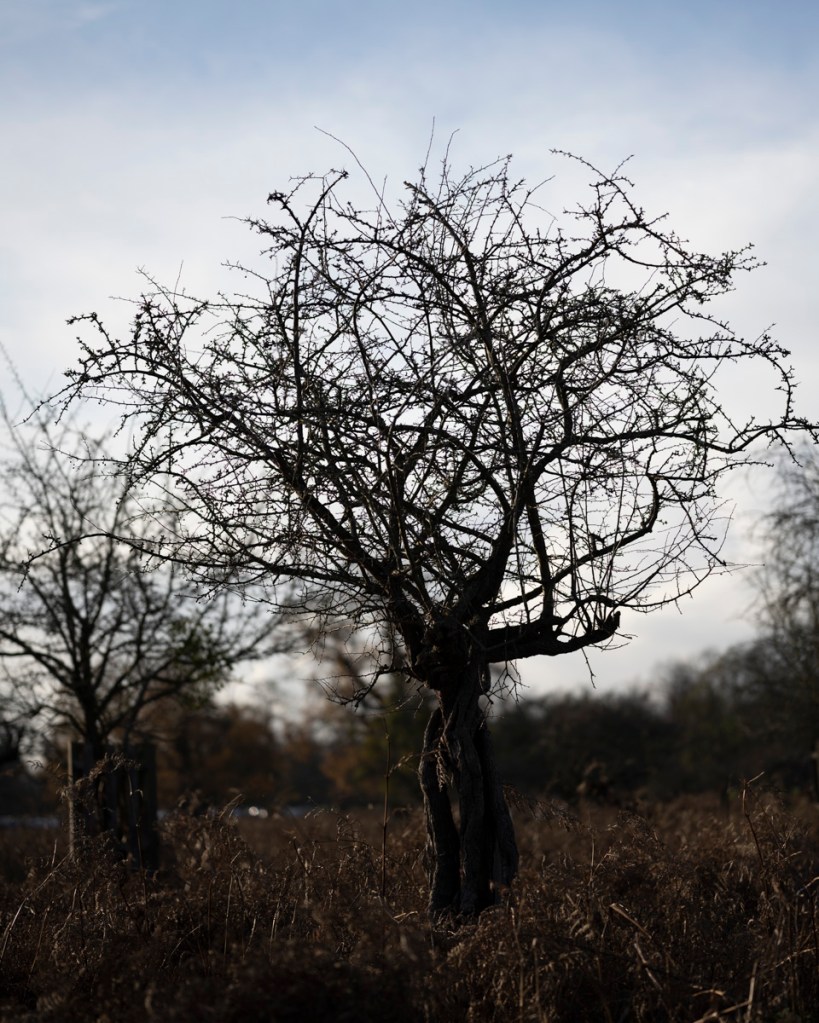
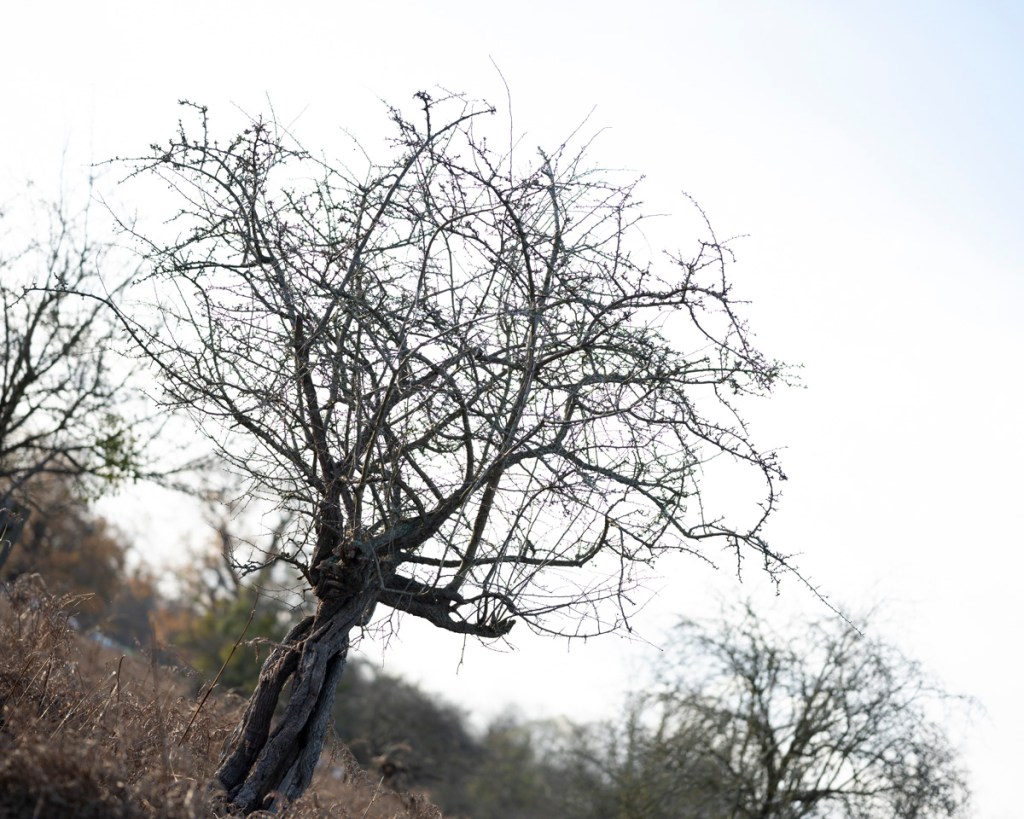
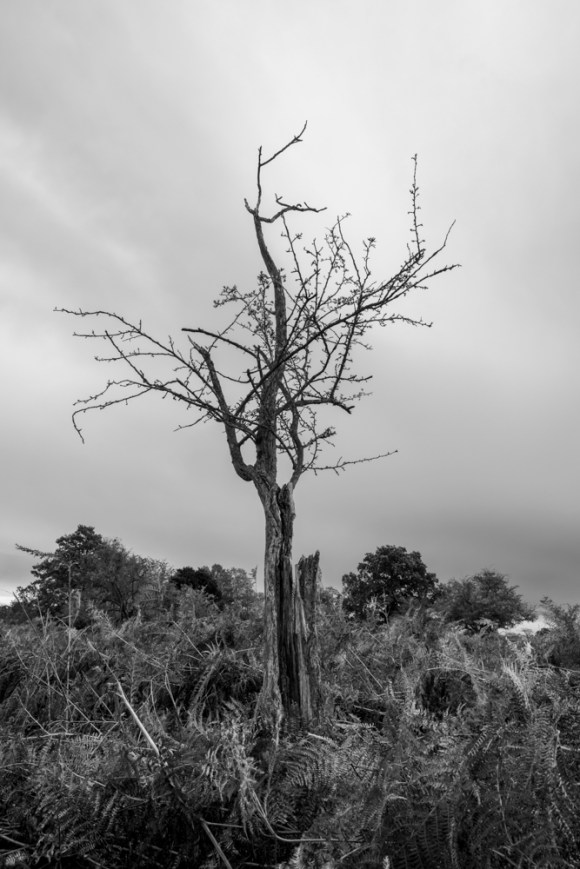
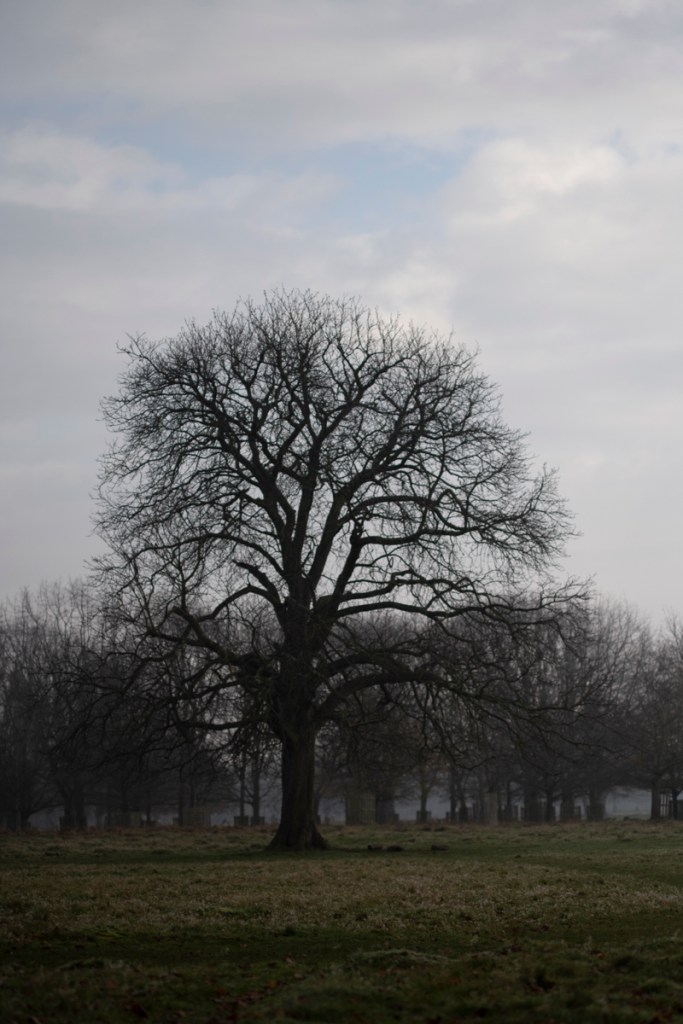
Figure 1
When investigating Noel Myles’ work further, I realised that there was more than just a passing affinity with my own practice. This was initially sparked by seeing the above image. I had first seen this as a reproduced, fully Black & White palladium print in Into The Woods. When I saw this version that features both colour and Black & White, I knew I had to dig deeper.
In this video, Noel Myles discusses his work shown at the Minories Gallery in 2013.
The following are relevant transcripts and notes taken from this video:
“Single frame photographs don’t really depict our continuum of life and our sense of transition. I don’t feel that the static viewpoint and that fractional moment that might be comitance to the ‘decisive moment’ adequately conveys our experience of being alive. So I started to explore the pulling together of individual single frames taken over an extended period of time from several viewpoints.”
When discussing two composite images of the same tree using different images, Myles says that, by hanging them side-by-side, it shows:
“There is no definitive view, there’s no definitive composition: you can make as many versions and approaches as you like. And the more you look at these two, the more you see the differences.”
Myles continues with a further breakdown of the story behind these images:
“They started life as palladium prints and what I wanted to do at that time was to break away from the rectangle, the rectangular photograph and, even in some cases, break out of the little individual rectangle.”
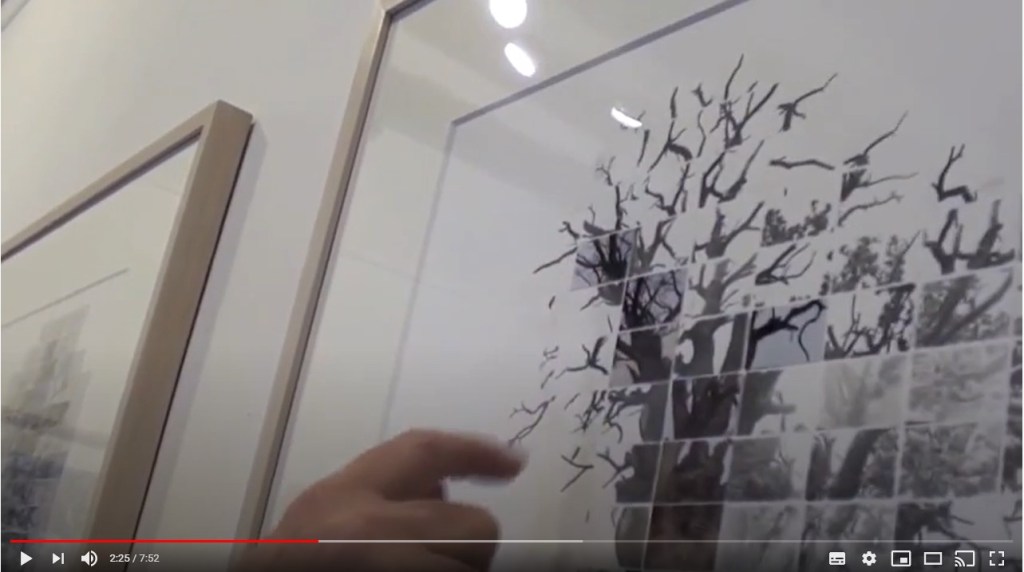
When looking at this image, Myles focuses on the details on the upper part of the piece to point out how the individual branches have broken the lines further. Myles states ‘why’:
“I was trying very had to break out of this normal rectangular framework.”
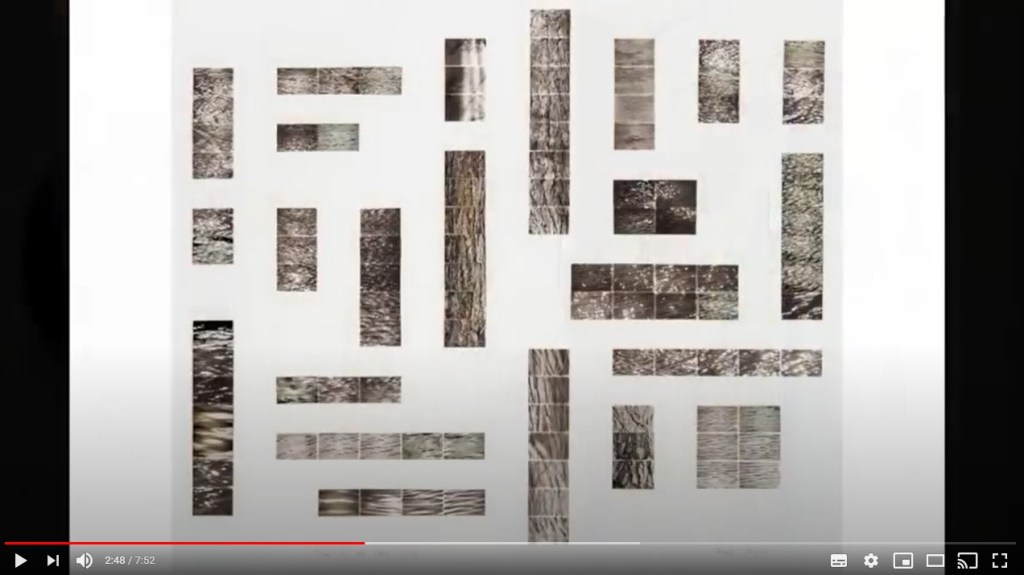
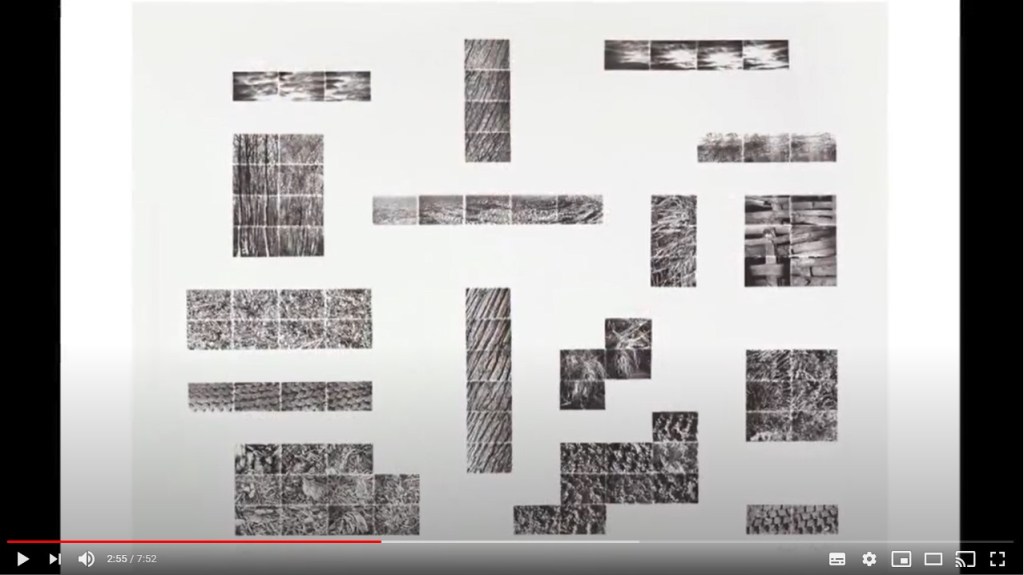
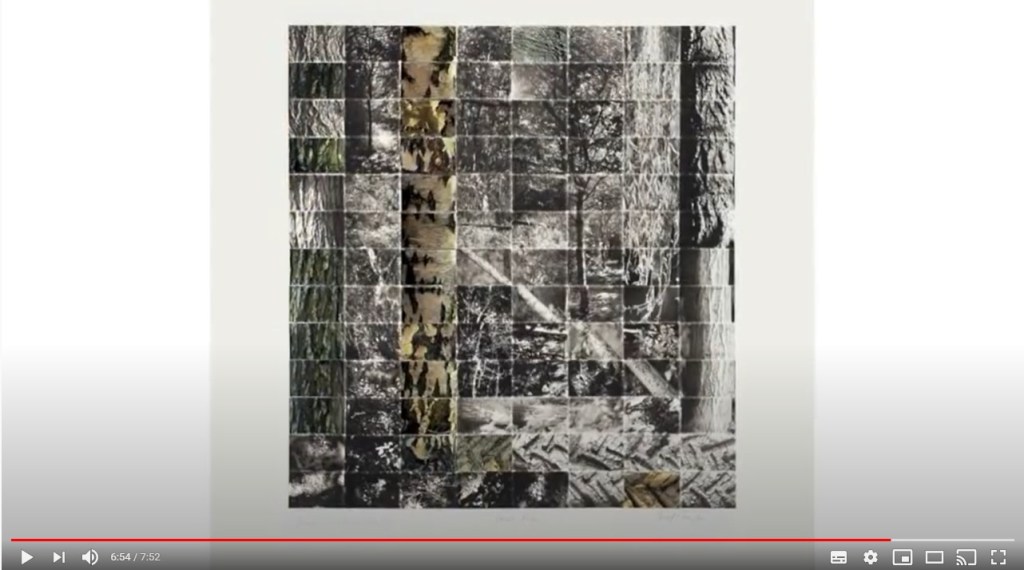
Myles then moves onto these three pieces in which the images have been split up.
The reason behind it, Myles explains, is:
“To try to give a nod to the way the eye moves over a subject. Although the world is not broken up in our vision, we concentrate on certain aspects and half ignore what’s surrounding them. This is one of the motivations behind making these images. The other concern was to try to bring the image up to the surface of the paper to try and deny this recessive depth that you get with in most photographs. You sort of look ‘into’ and you look ‘down’ and I wanted to bring the image up to the surface and stay on the surface.”
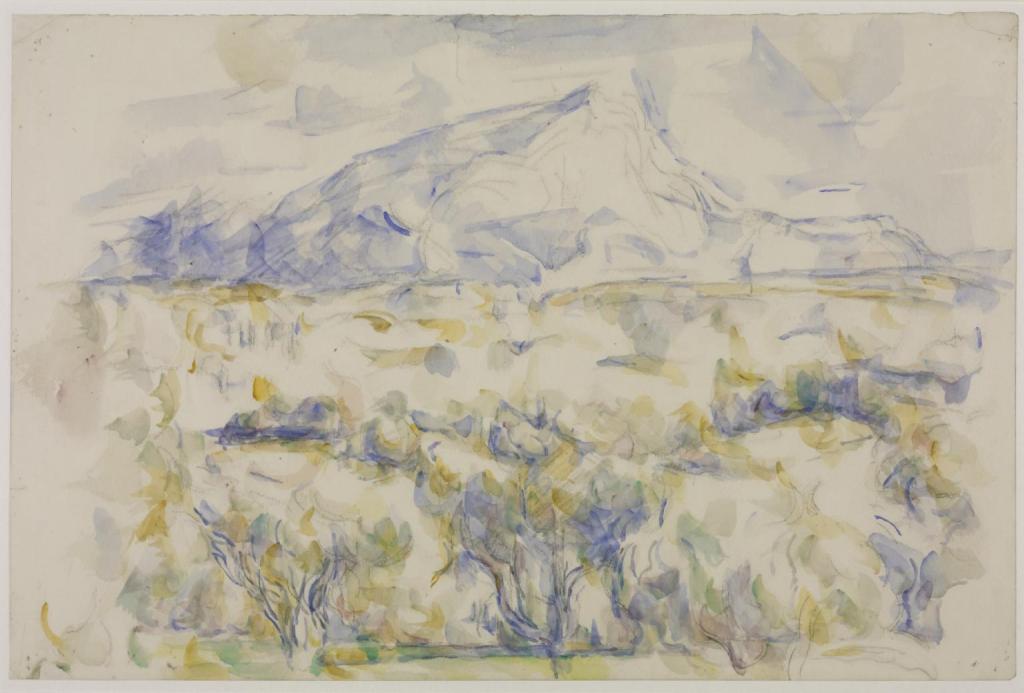
“I was also very much aware of one my strongest influences and strongest likes and loves was Cezanne’s watercolour paintings where there are just small, discreet areas of colour and pencil and large areas of white, and the white of the paper is the white of the Provencal light. They’re wonderful evocations of this intense light and it’s almost as if what he was just painting, the little bits of colour you would see, are what was going on in the shadows. These (images) refer to that.”
Myles then moves onto another compound image called ‘A Short Film of Rough Water’.
In the same way Myles photographs his trees by returning to the same one multiple times, he took these images of water from the same bridge over the River Stour. This is of another river, which was taken over a relatively short period of two days.
Myles explained that there is a central image, which was taken when the water was at its shallow-most point. This gives a ‘central weight’ to the image. Myels then ‘builds’ two ‘wings’ (one either side) coming out from this central point, a method that he has used in many of his pieces.
With this work, Myles is questioning ‘what constitutes a photograph as depicting landscape and how varied that depiction can be’.
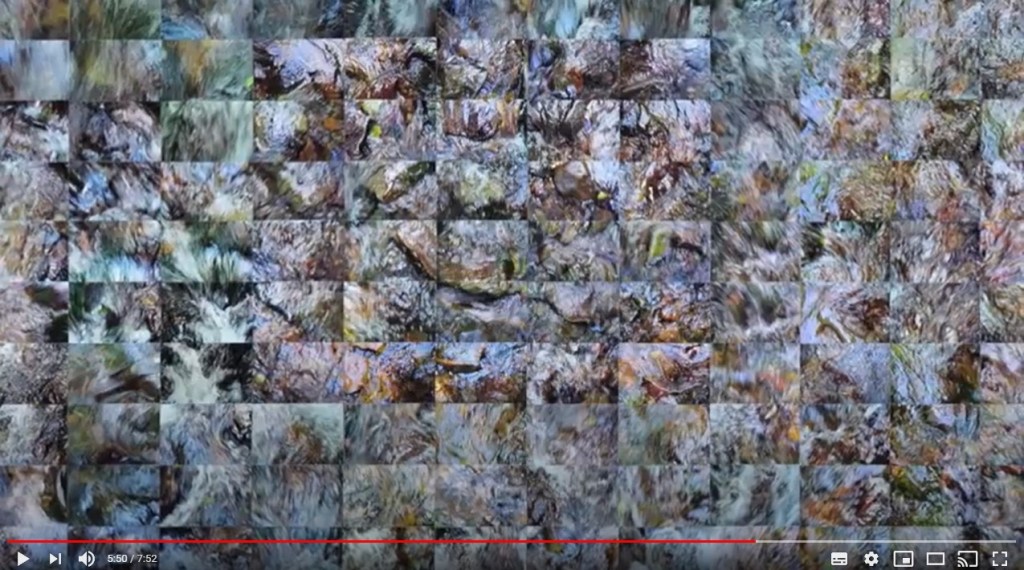
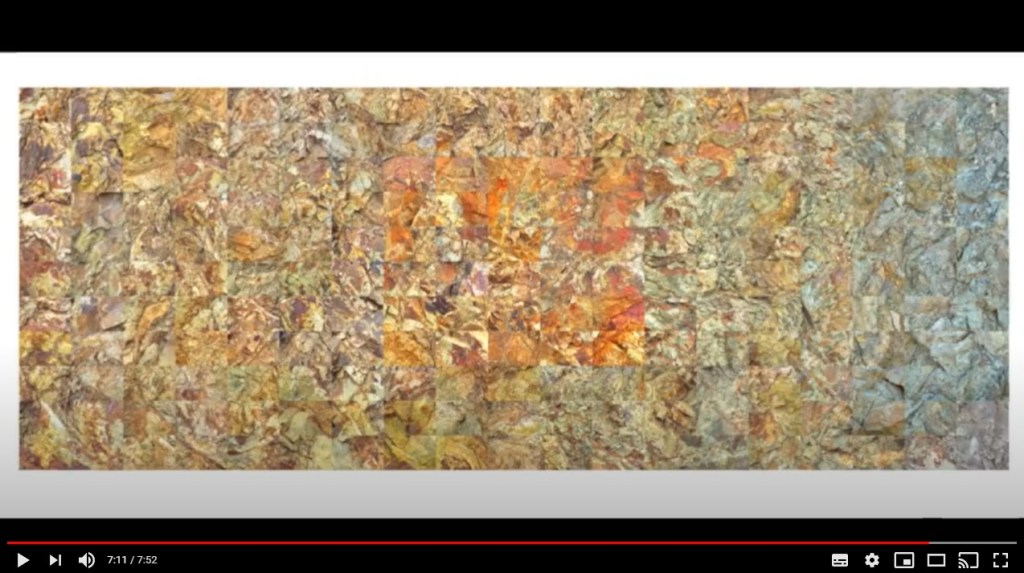
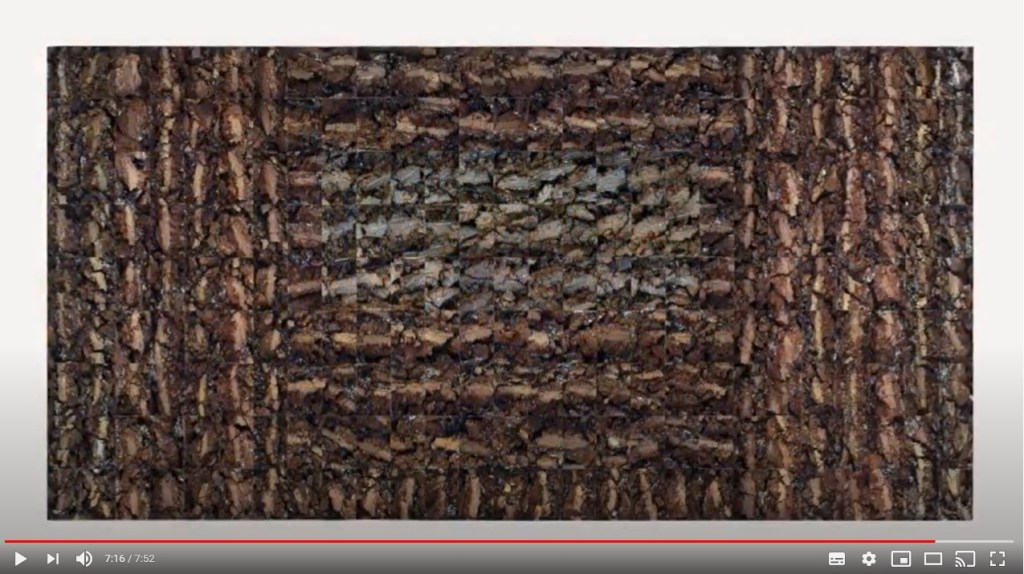
This video ends with showing further examples of Myles’ compound photography work.
To give a deeper understanding, this an extract from Reframing Photography written by the photographer regarding his Still Films series:
The challenge I faced with photography was that the instantaneous static viewpoint, provided by the camera’s lens and shutter, didn’t represent the continuous flow of the act of looking. It seemed as if the still photograph had been held back to the level of the dictionary; the single word. It was the visual equivalent of overlooking the potential to link words to convey ideas and meaning. I couldn’t accept the notion of an isolated, decisive moment being capable of encapsulating our experience of life.
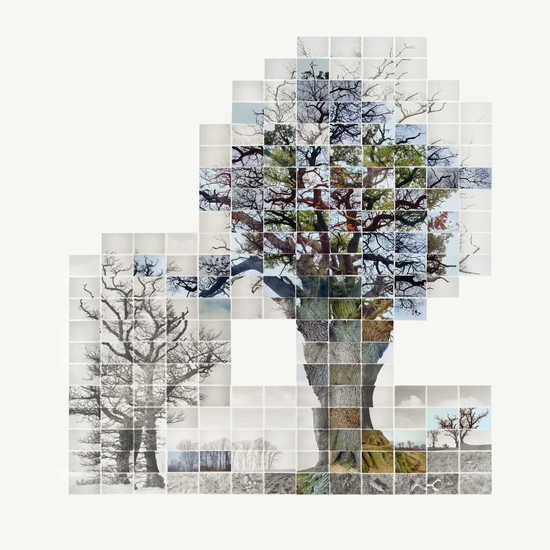
I photograph whatever catches my eye; accumulating this material over hours, days or weeks. Several visits might be made to the same location. I think of these frames as the components of the photograph, not photographs themselves. The creative part of the process takes place in the studio, away from the camera. I look for formal qualities of line, tone, texture and colour, as well as subject matter, to link the individual units. The composition evolves by adding and removing; searching for harmonious connections. I have worked with both negatives and prints. The negatives were exposed onto a single sheet of platinum and palladium paper. Recently, I have added colour contact prints to earlier palladium photographs; in some cases photographing the same tree a decade later.
It seems to me that photographers have largely adhered to the pictorial conventions that prevailed at the time when photographs were first made permanent. I am surprised that when painters broke away from following renaissance laws of perspective at the end of the 19th century, photographers didn’t go with them. It makes no sense to say photography liberated painters to explore new modes of depiction. It is worth noting the first exhibition of Cezanne’s watercolours in America, was held in Stieglitz’s own gallery, ’291’ in 1911 but seemed to have had little influence on photographers. There are centuries worth of modes of depiction that are not restricted to the single viewpoint, for photographers to inspect.
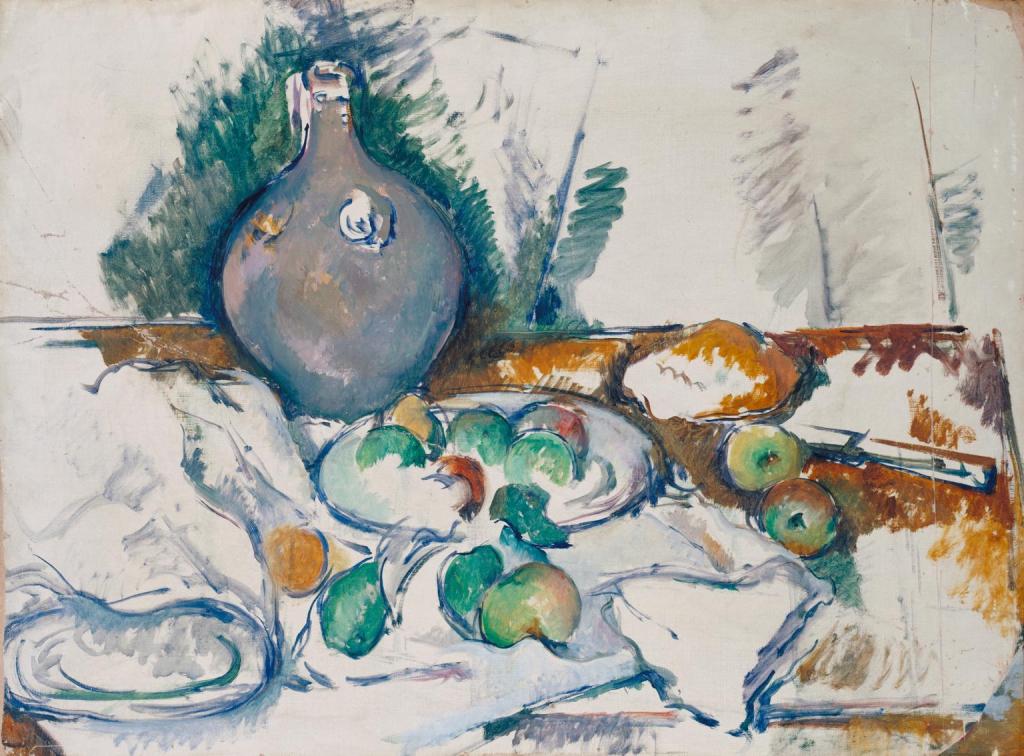
Perhaps it’s true that good photographs are made, not shot, taken or captured. The task for photographers is to transcend the mirrored anecdote to reveal significance in our surroundings that makes us pause for thought. Perhaps it’s always been this way. I think of my own work as exploring the territory between still photography and moving image, hence the umbrella title ‘Still Films’. My reference points are within painting, not photography. I find constant stimulus in Cezanne’s watercolours, Cubism, Romanesque art and Rothko’s painting.
At the time of writing, I was still processing the information I had discovered. I knew I would have to let it simmer, reread it then see what would result.
After posting this entry, I came across the following video featuring Myles and the collage piece he created while Artist in Residence at ITN.
Images
Figure 1: Noel Myles, Still Film of an Oak at Wormingford No 7, 2011
Figure 2: Montagne Sainte Victoire 1905-6 Paul Cezanne 1839-1906 Bequeathed by Sir Hugh Walpole 1941
Figure 3: Still Life with Water Jug c.1892-3 Paul C?zanne 1839-1906 Bequeathed by C. Frank Stoop 1933
Tate. 2020. ‘Still Life With Water Jug’, Paul Cézanne, C.1892–3 | Tate. [online] Available at: <http://www.tate.org.uk/art/work/N04725> [Accessed 9 December 2020].
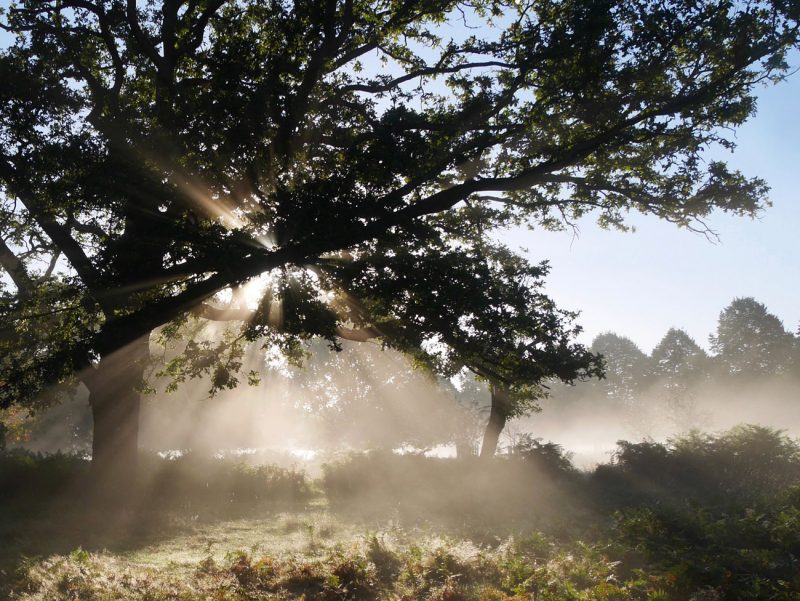
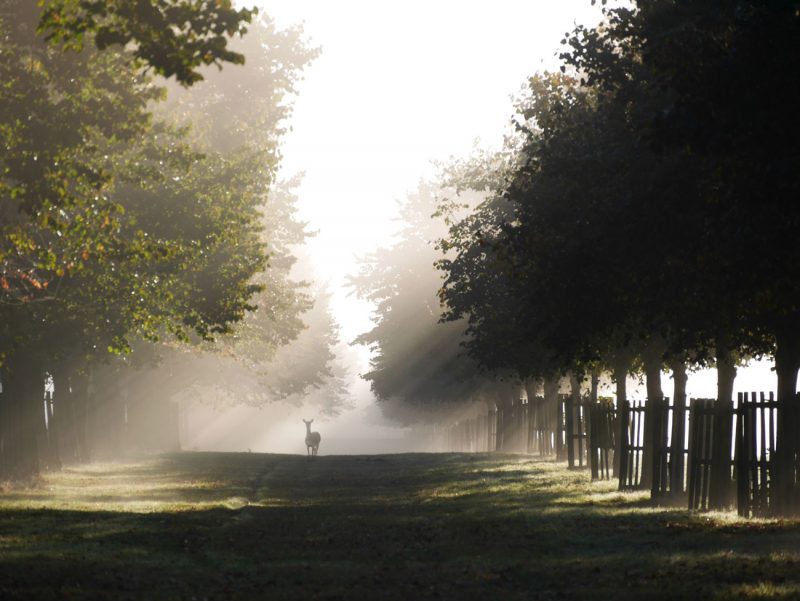
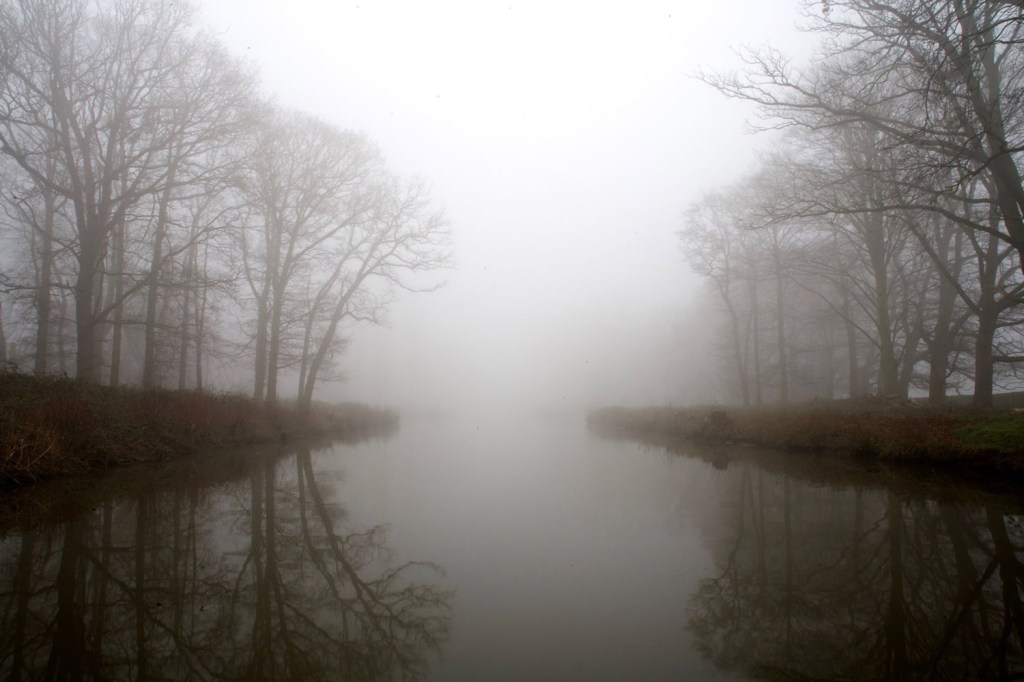
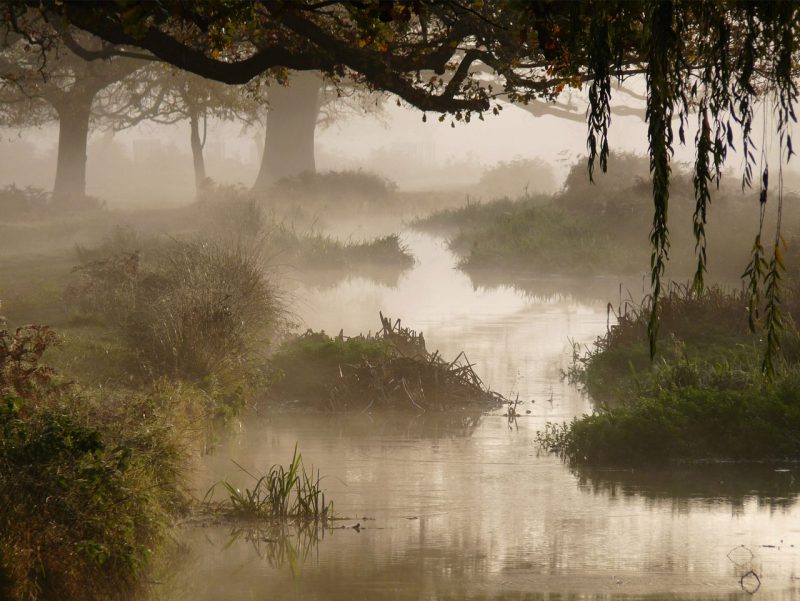
The following is a visual reference that has influenced this current project.
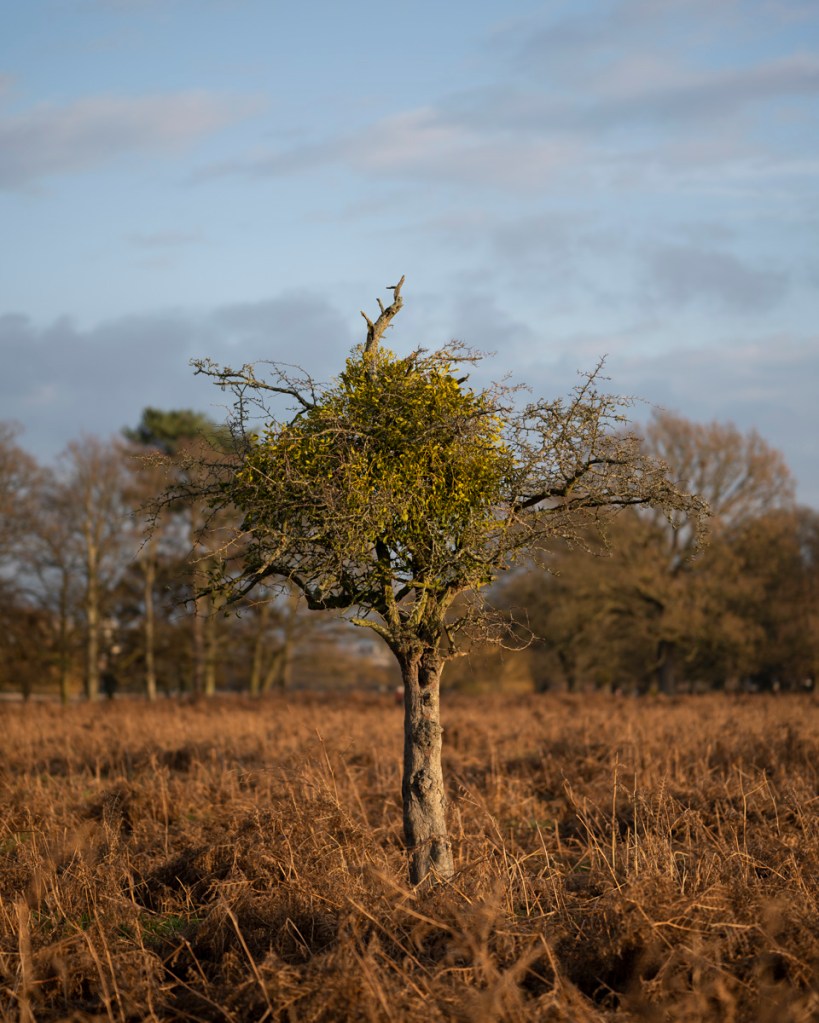
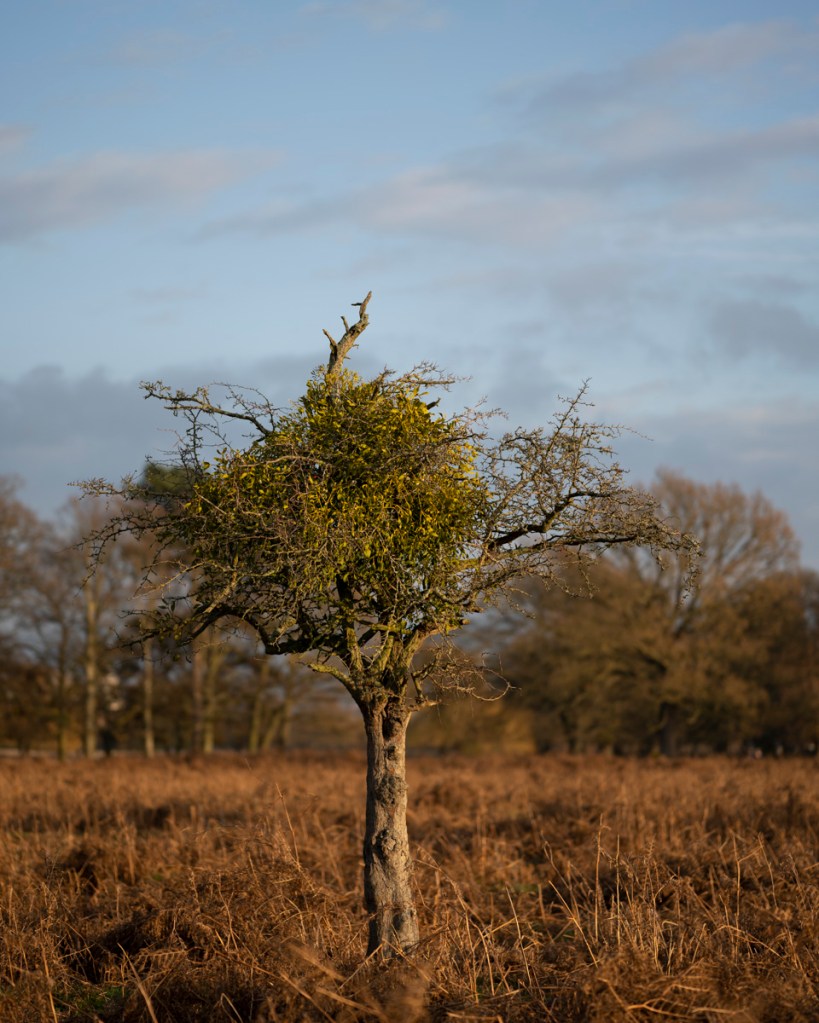
When searching for images of Bushy Park, there is a particular set of attributes that always appears. Lush green space, deer, misty sunrises, waterfowl and waterways, plus (of course) trees.
This collection of features has been diligently captured by photographer Joanna Jackson in her book A Year in the Life of Bushy Park. Through photography, Jackson has chronicled these elements over the year. The book is divided into chapters categorised by the four seasons.
When looking at these images, I noticed Jackson’s use of different aspect ratios, depth of field and combinations of images within the book.
Each image tells its own story of the park from a different perspective. This is what I will do in regard to the hawthorns.
References
Jackson, J. 2014. A Year in the Life of Bushy Park. London: Unity Print and Publishing Ltd.
Joanna, J., 2020. Joanna Jackson Photography – A Year In The Life Of…. [online] Joannajackson.co.uk. Available at: <https://www.joannajackson.co.uk/> [Accessed 8 December 2020].
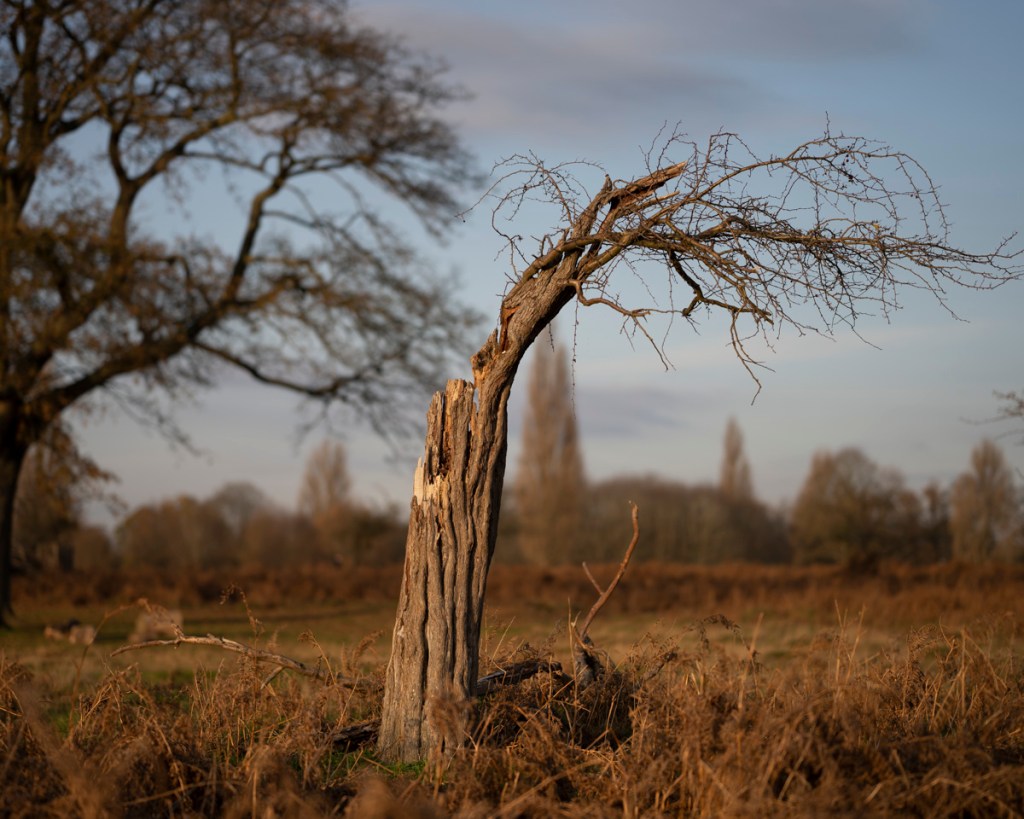
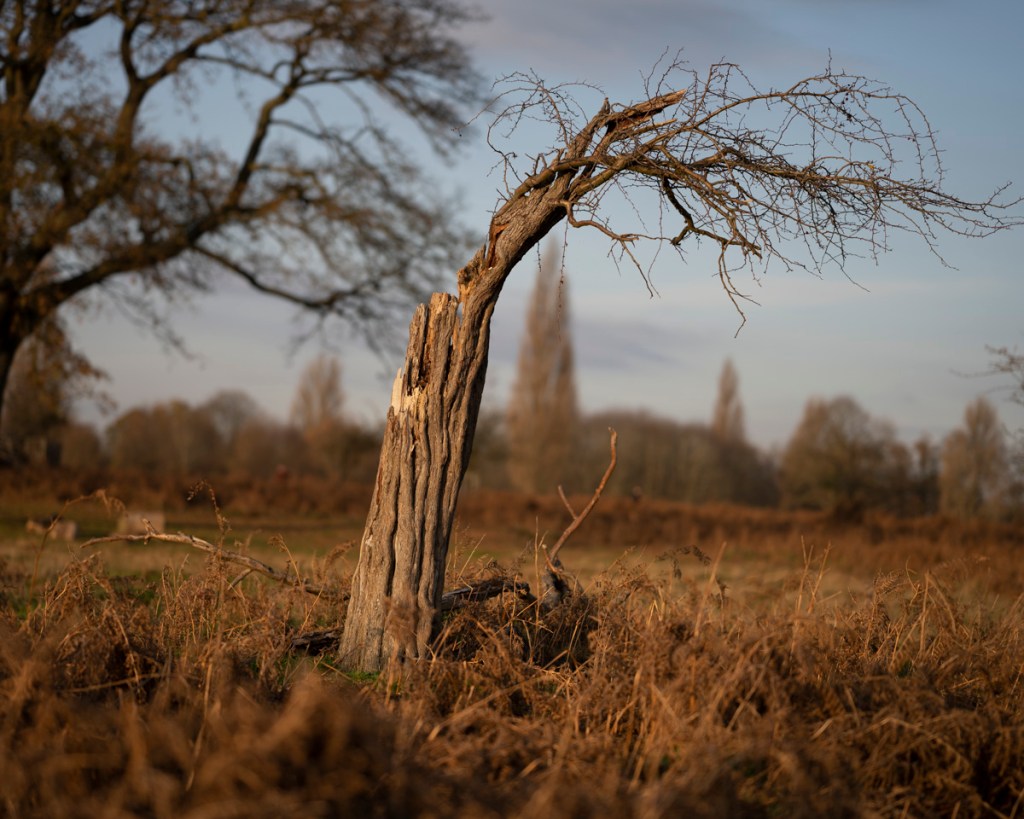
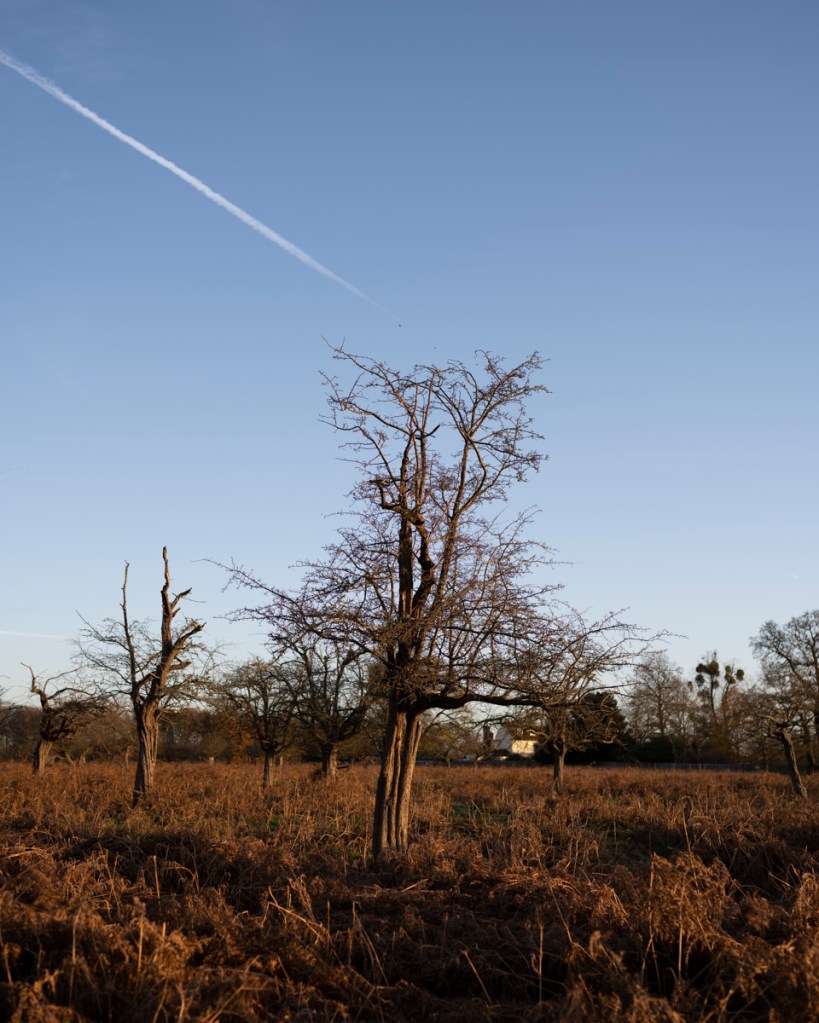
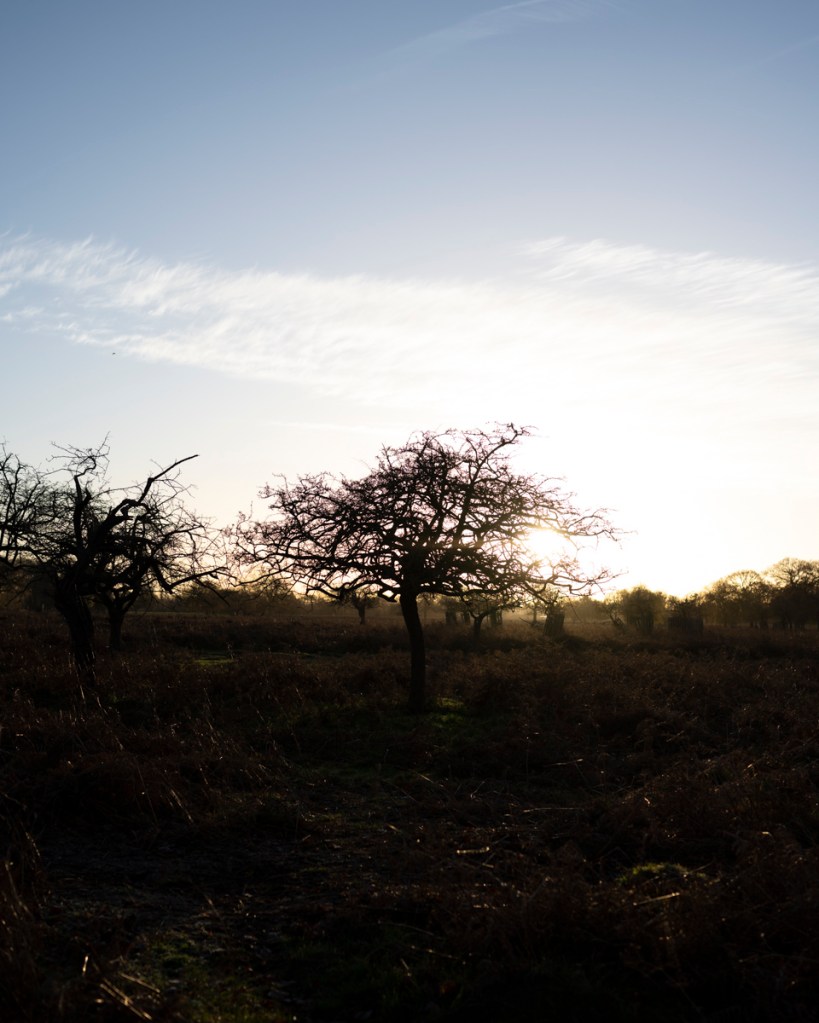
Despite the starting off dull and wet, the clouds lifted and the sun broke through after lunch. As such, I thought it the ideal opportunity to see how the light would be at this time of day.
I took both the 85mm and 35mm along with the tripod and made my way to Teddington Gate arriving at 2.30pm. I thought I would start with this tree (image taken on 1 December 2020). However, the light was totally blocked by the other tree in this image and it was totally in shadow.
Despite this disappointment, the sunlight was illuminating the hawthorns on the left of Hawthorn Lodge.
The following were taken using the 85mm lens and at 5:4 aspect ratio. All of the following images are low res JPGs taken directly from the RAW file with no editing, unless stated.
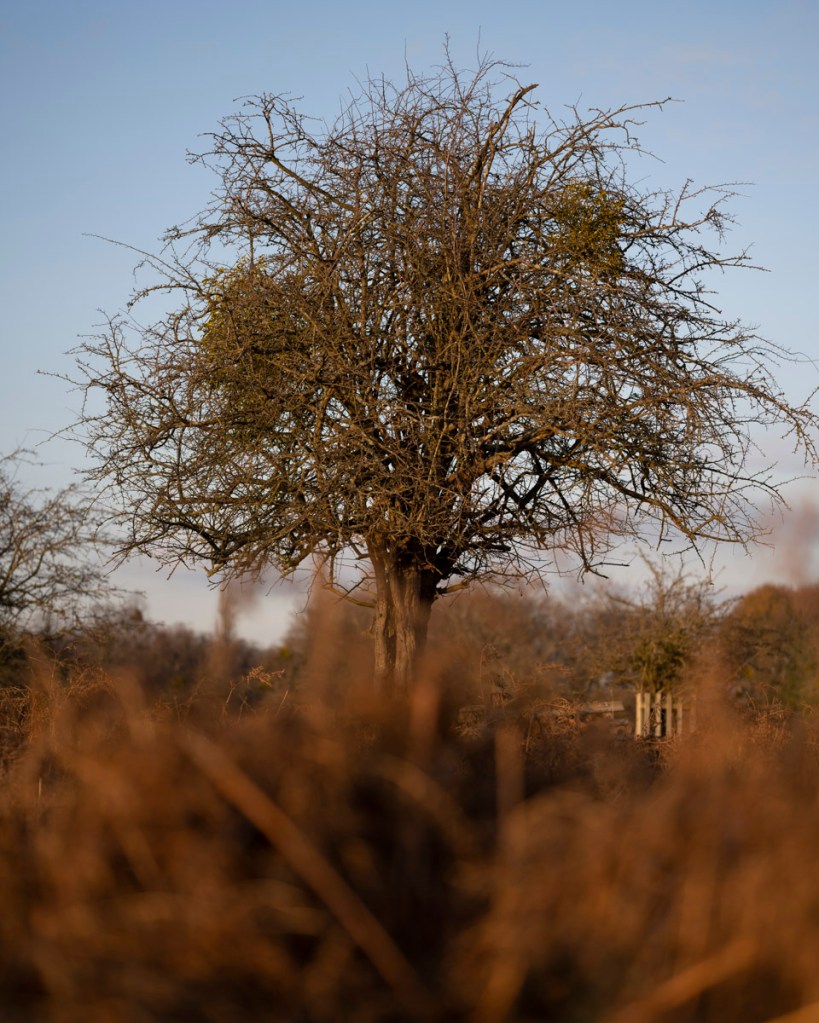
Tree One
When I arrived home, I cropped the first image to a 1:1 ratio. I thought the dark shadow on the grass in the foreground made the image look ‘heavy’.
I also produced a Black & White conversion to compare the two versions.
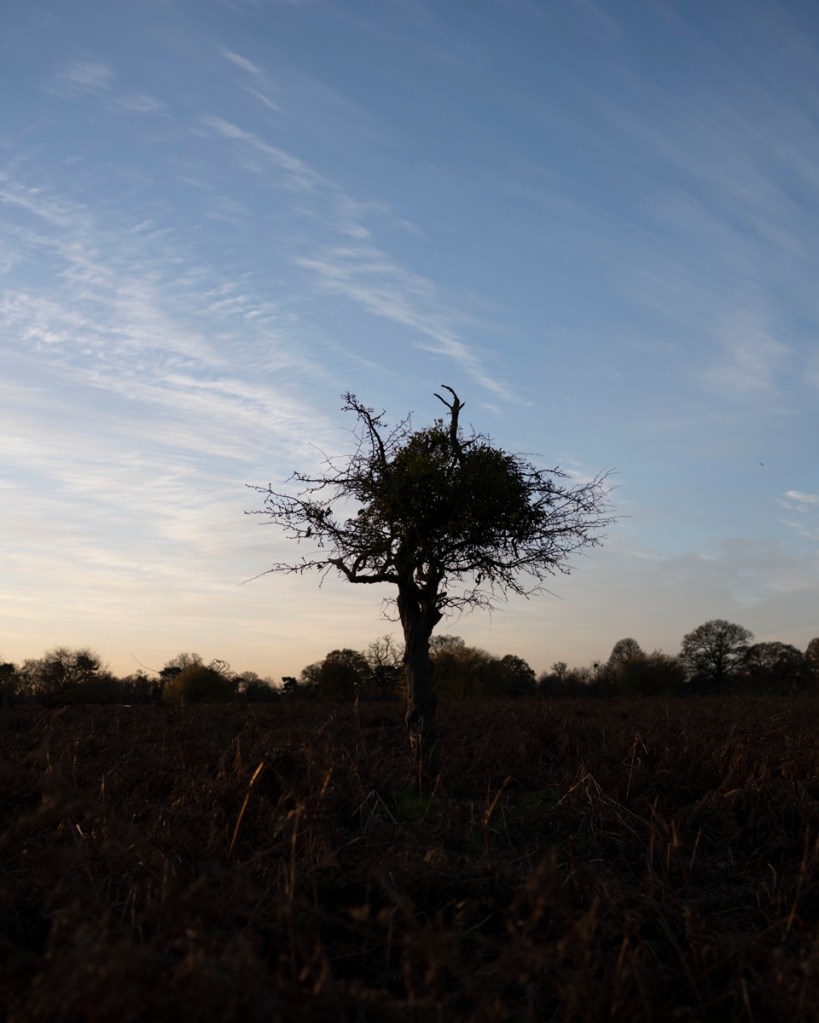
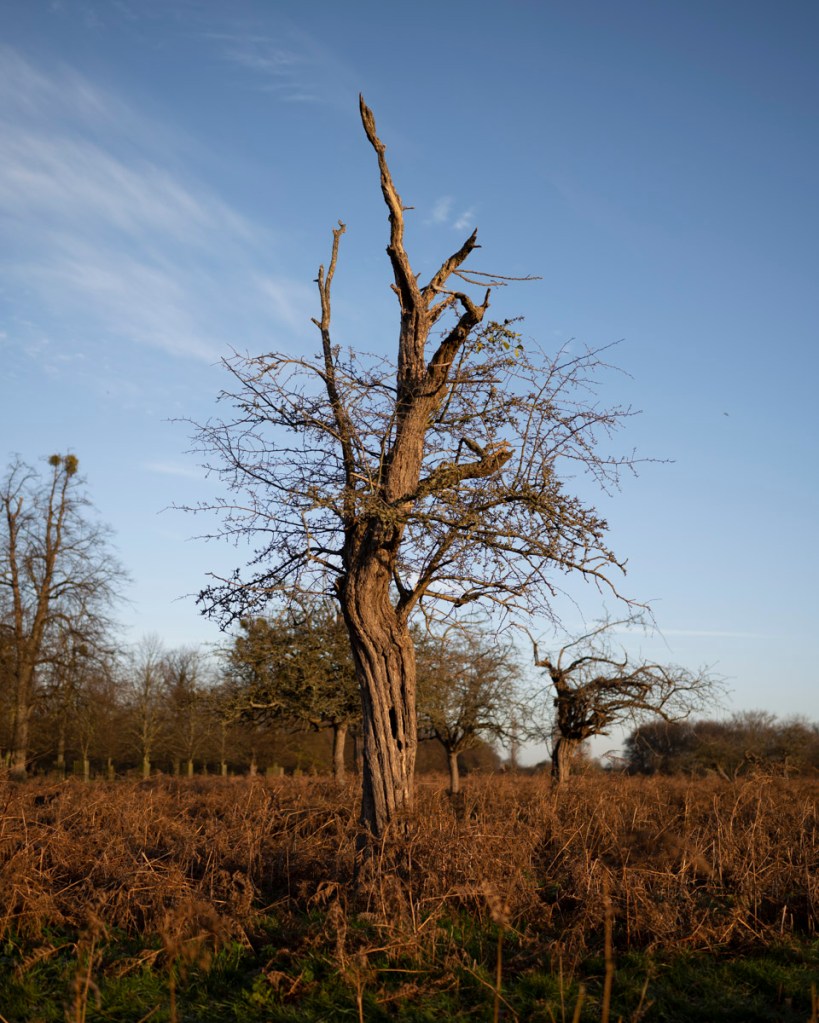
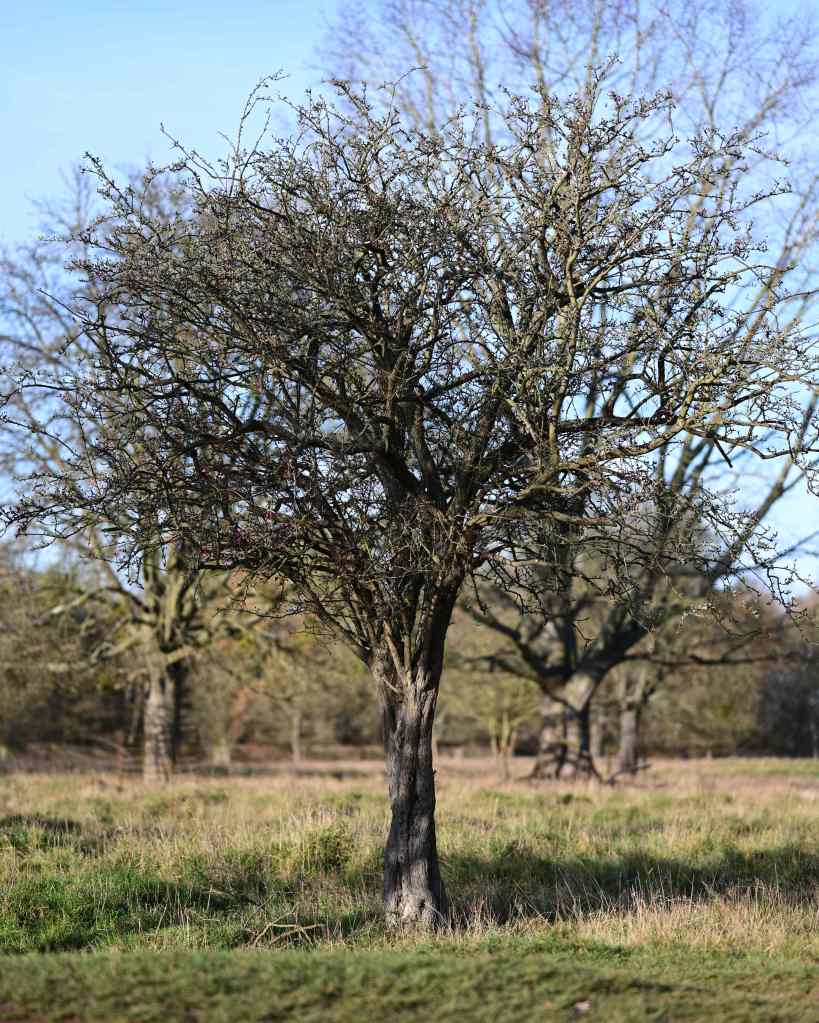
Tree Two
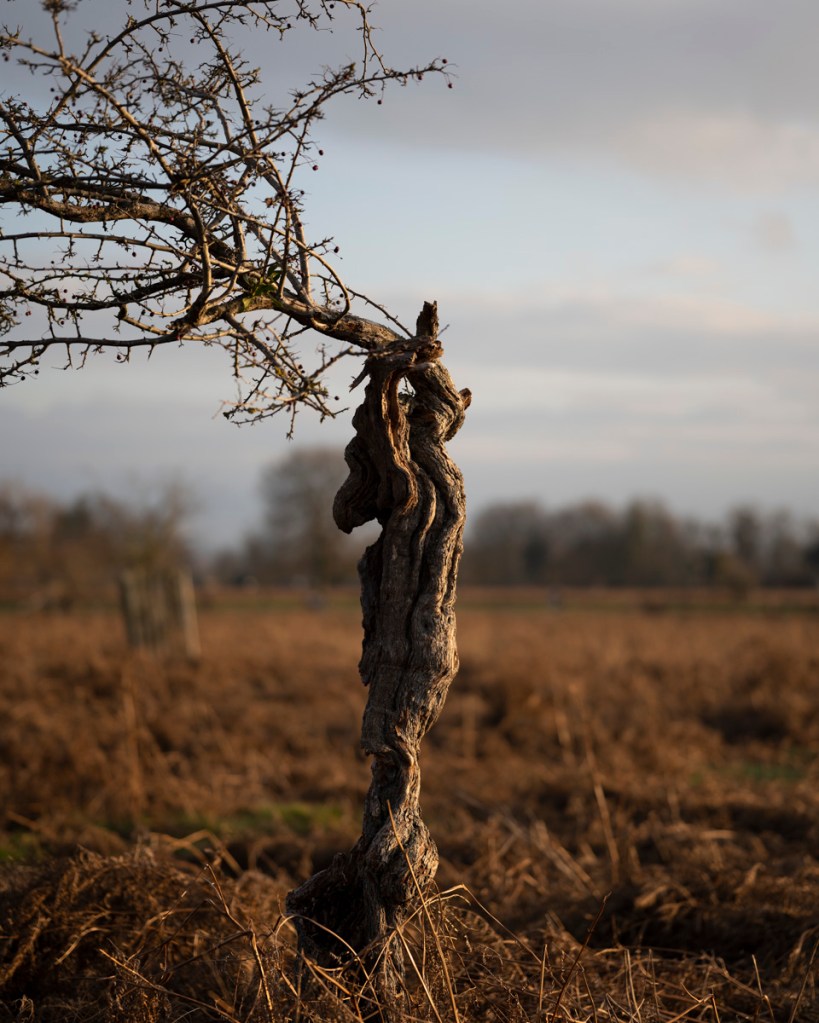
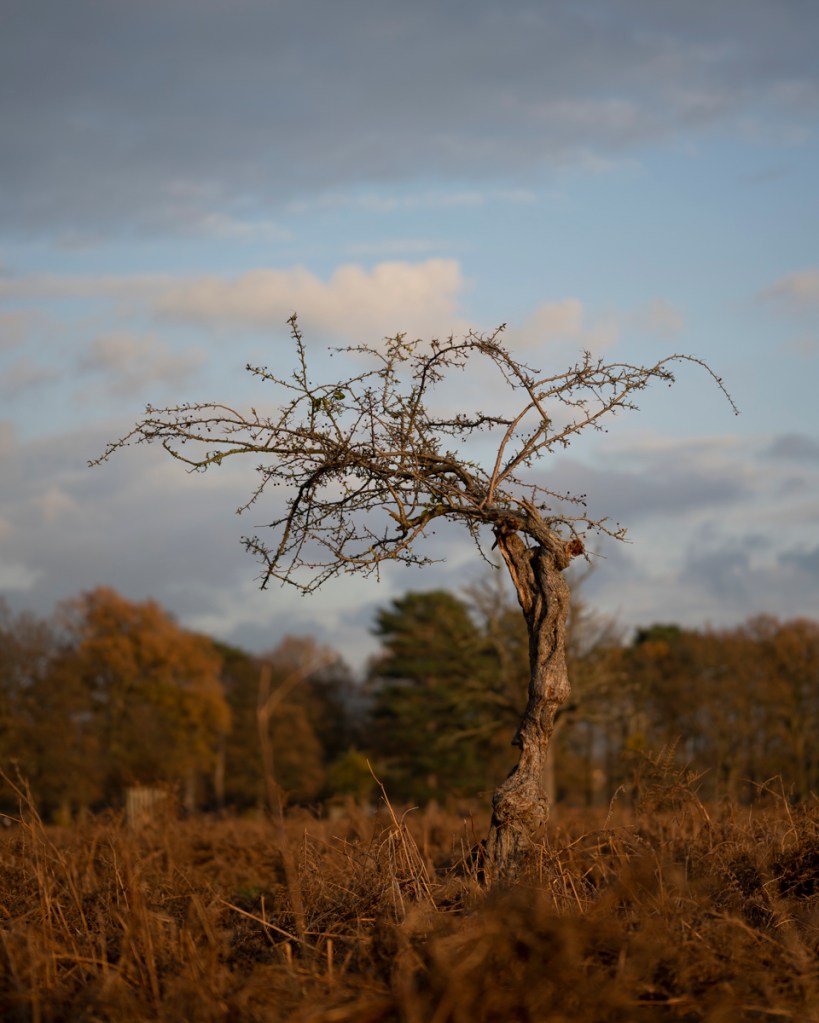
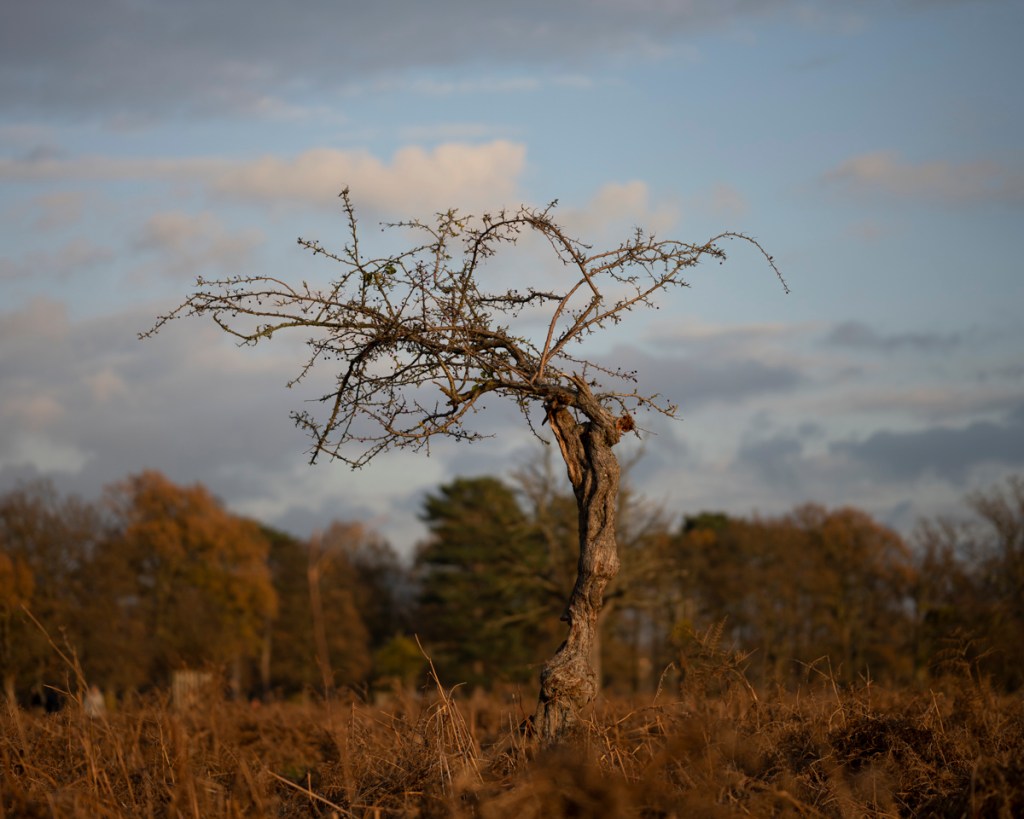
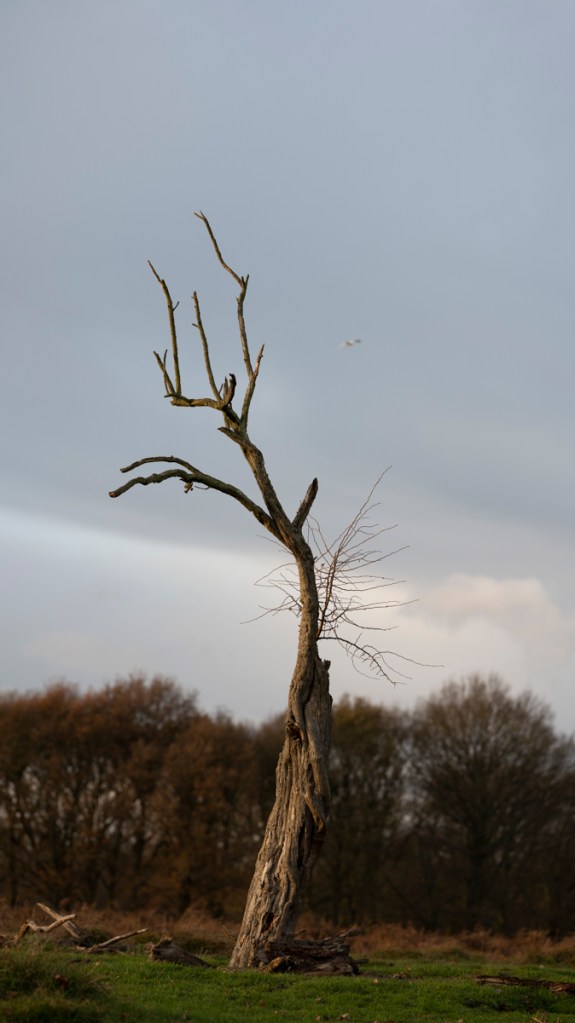
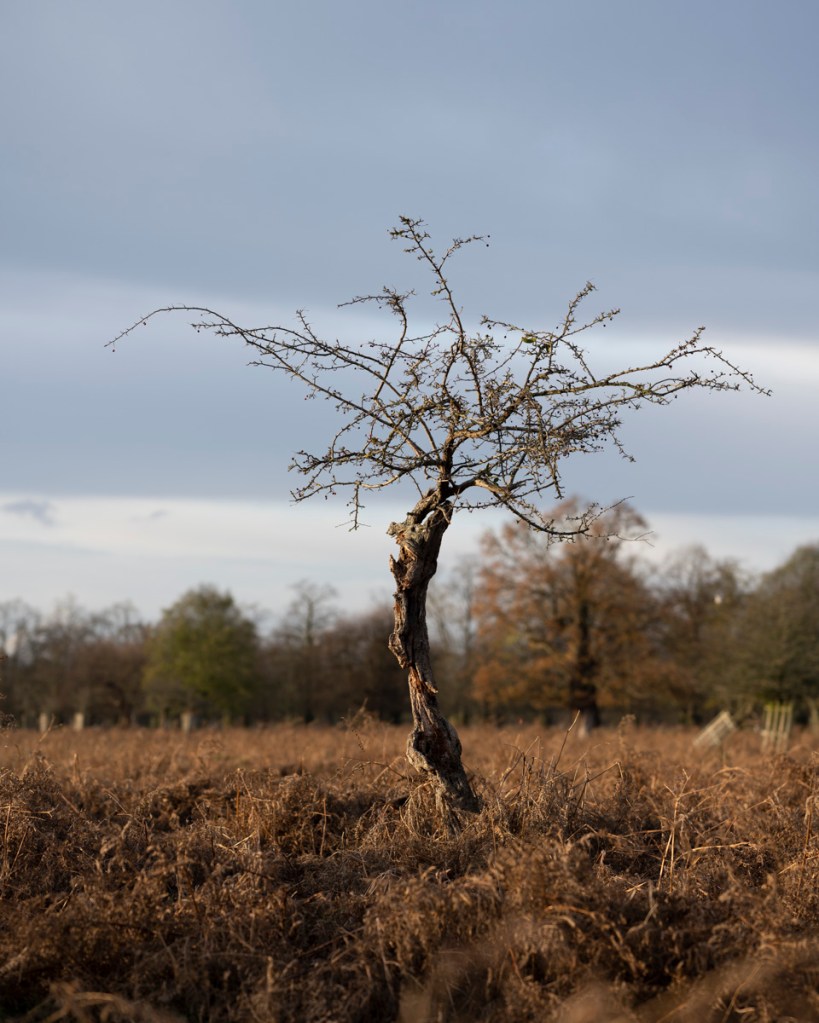
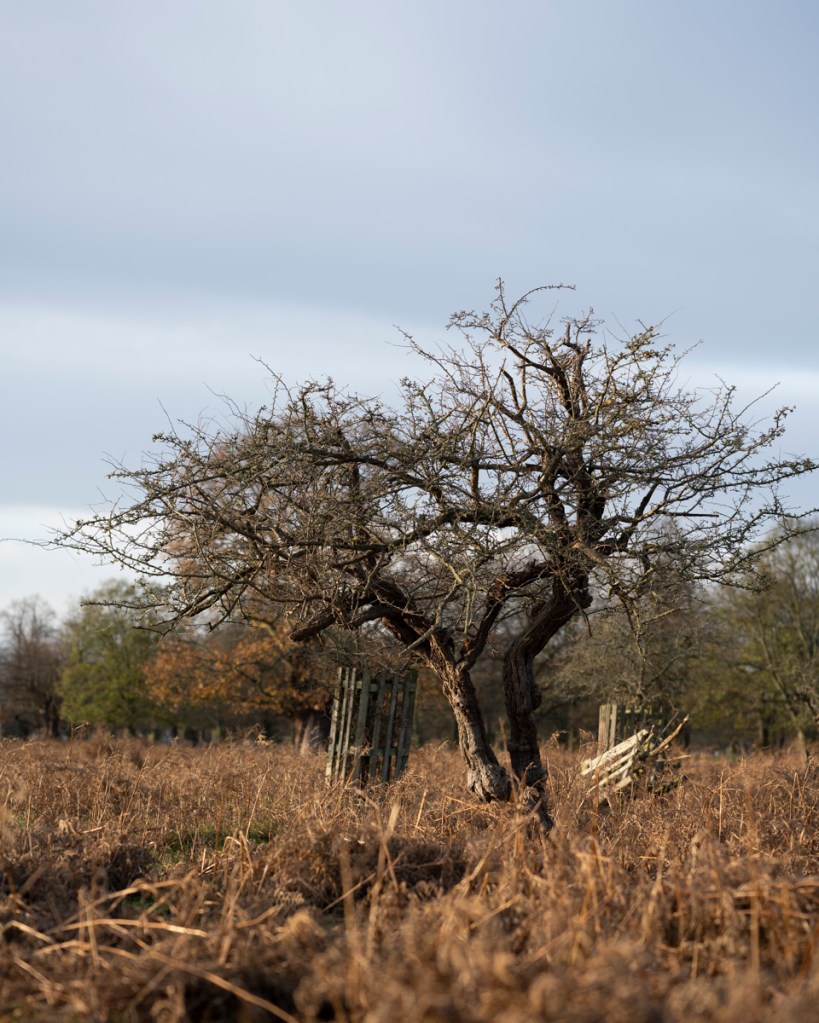
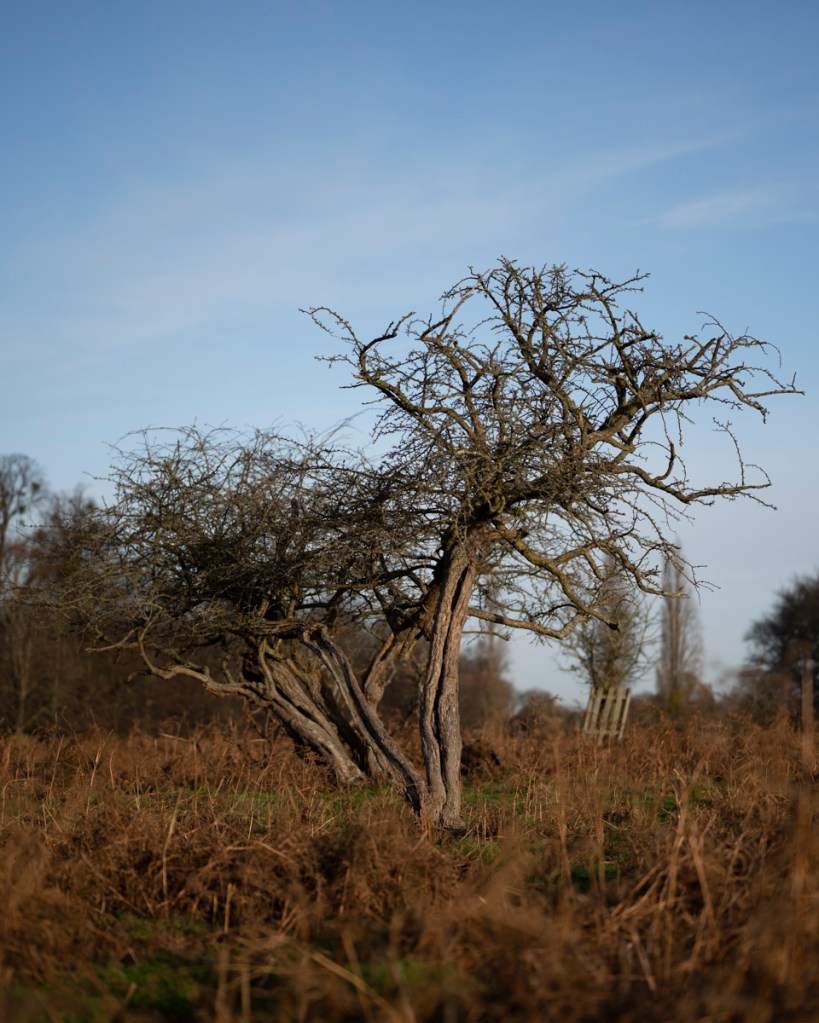
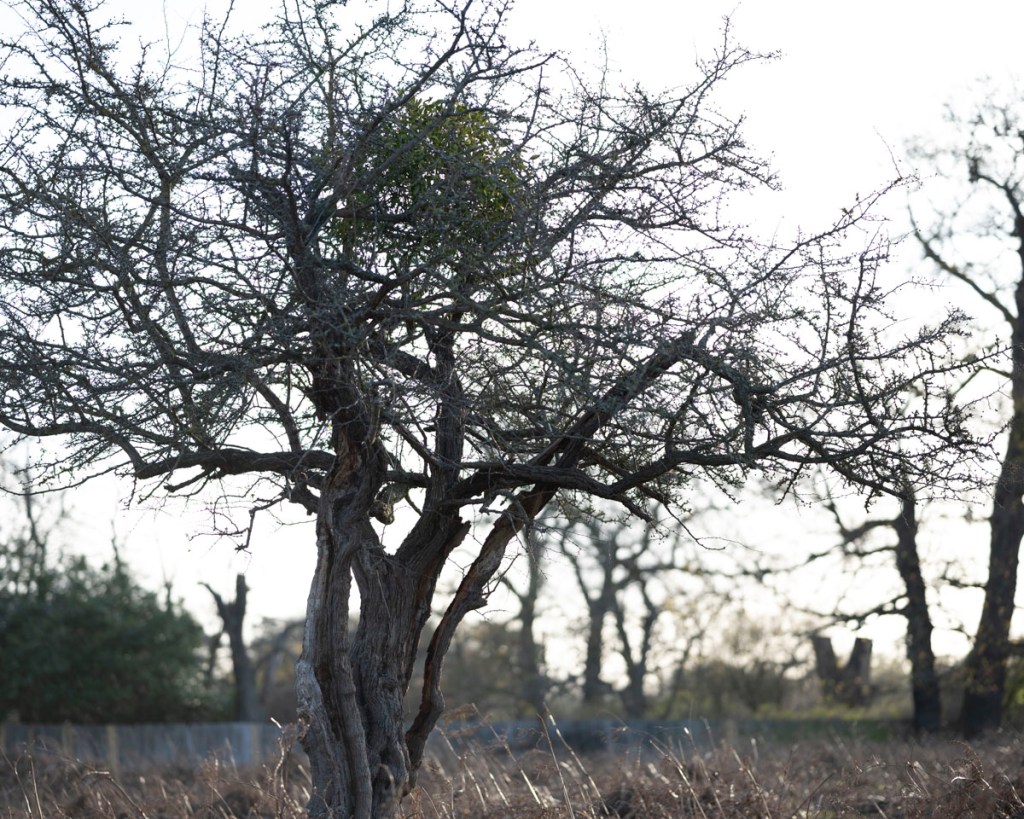
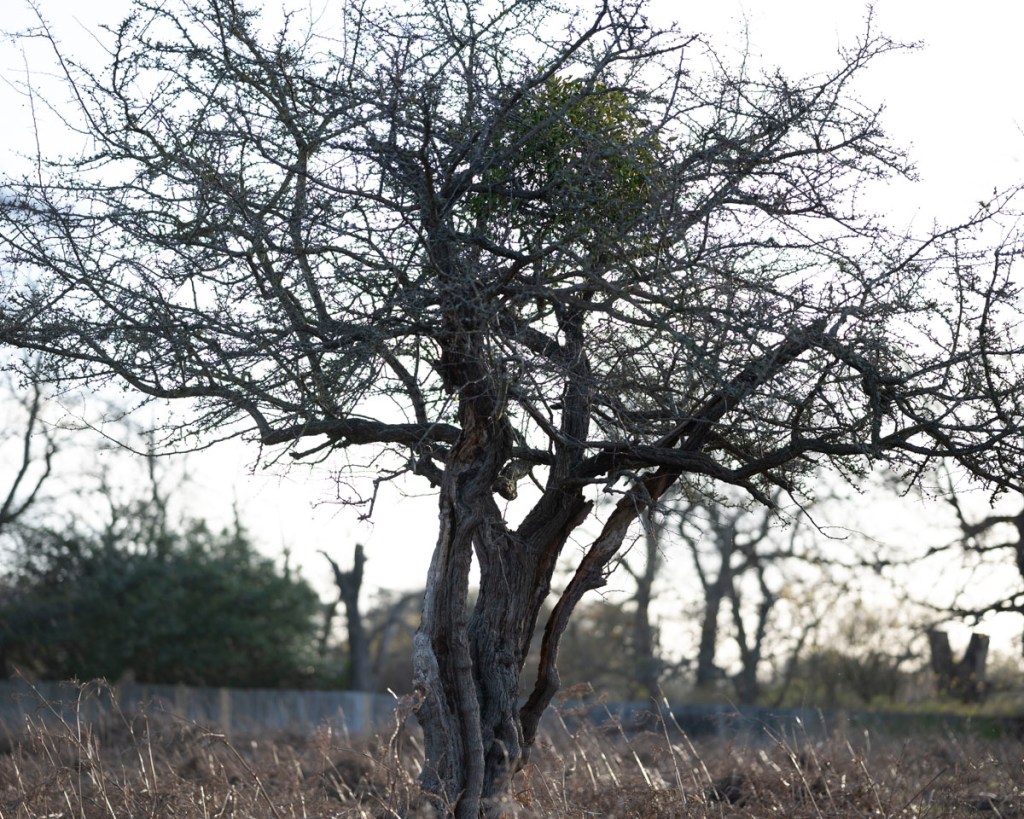
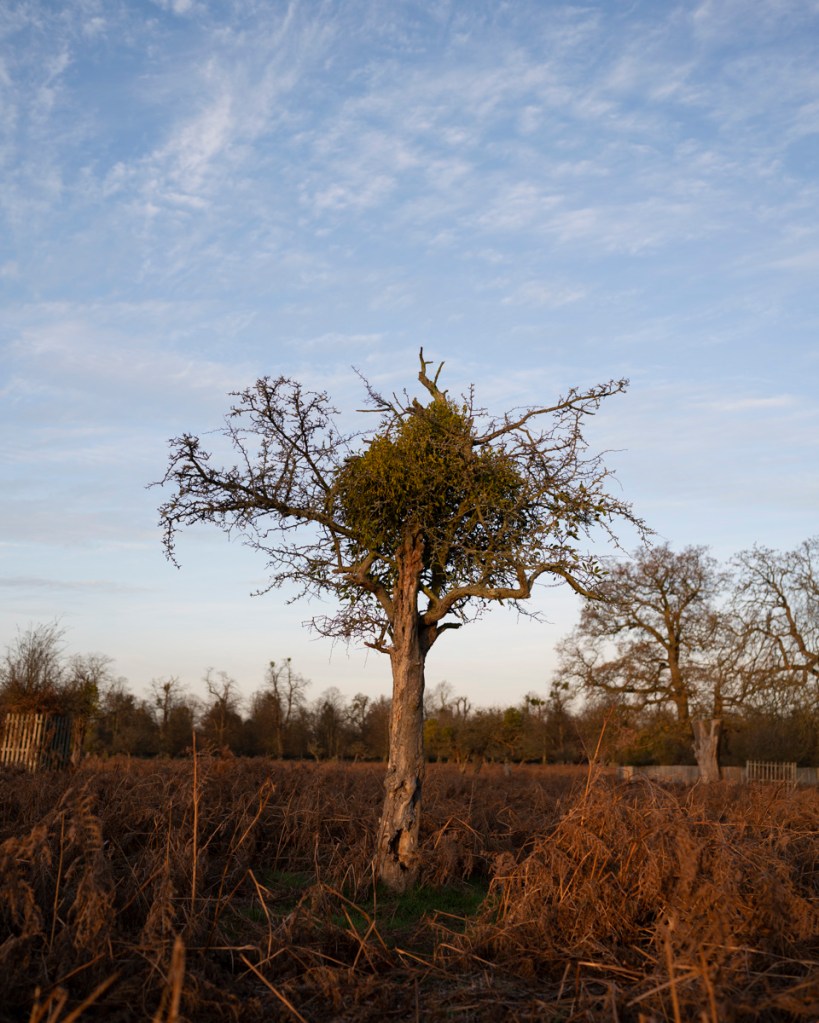
I then spotted this hawthorn, which I’ve not photographed before. I particularly like its ambiguity. Not sure of the composition, though.
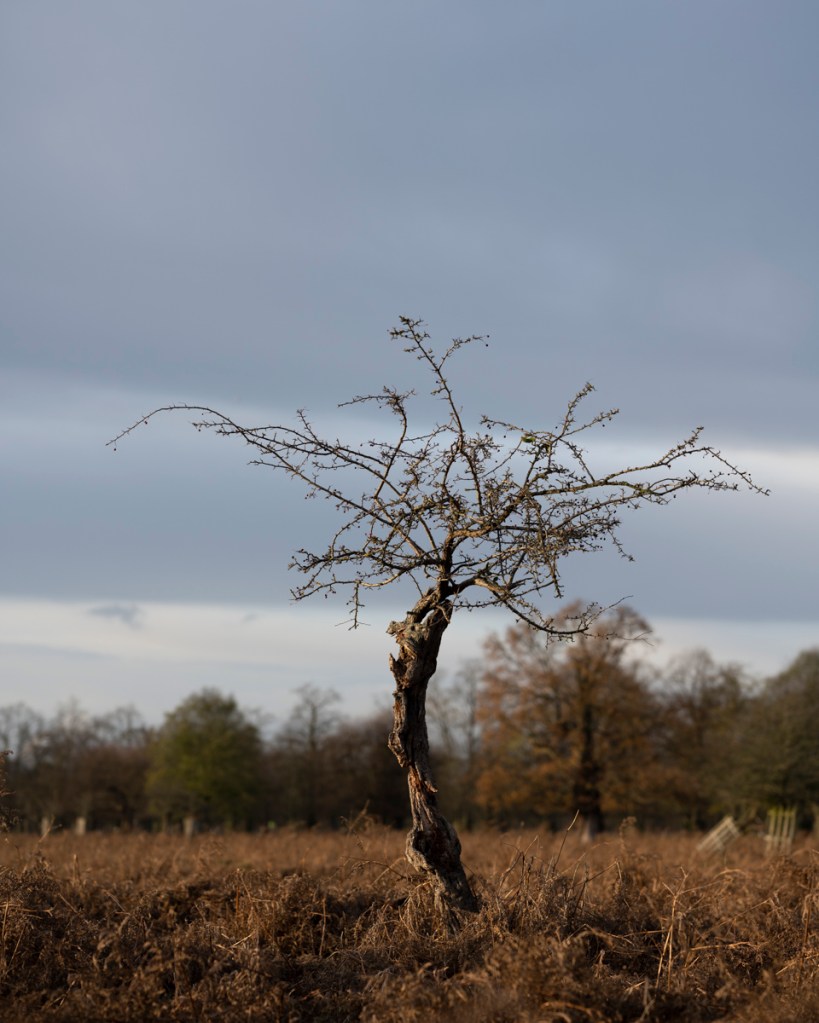
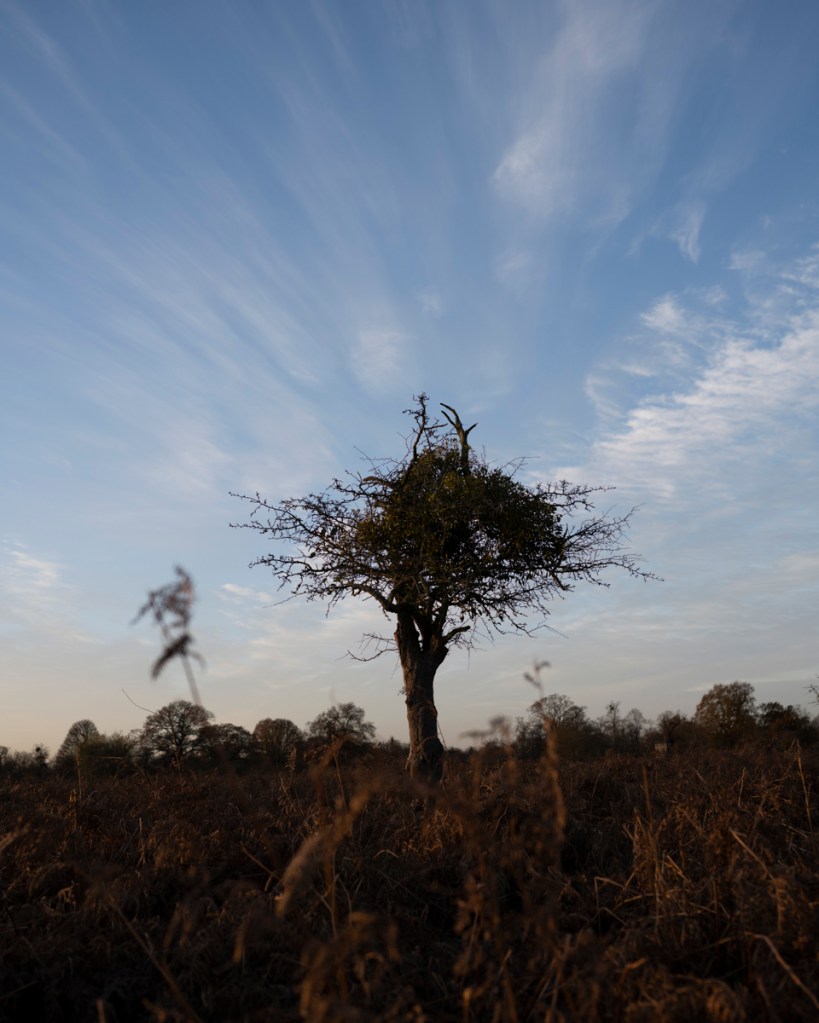
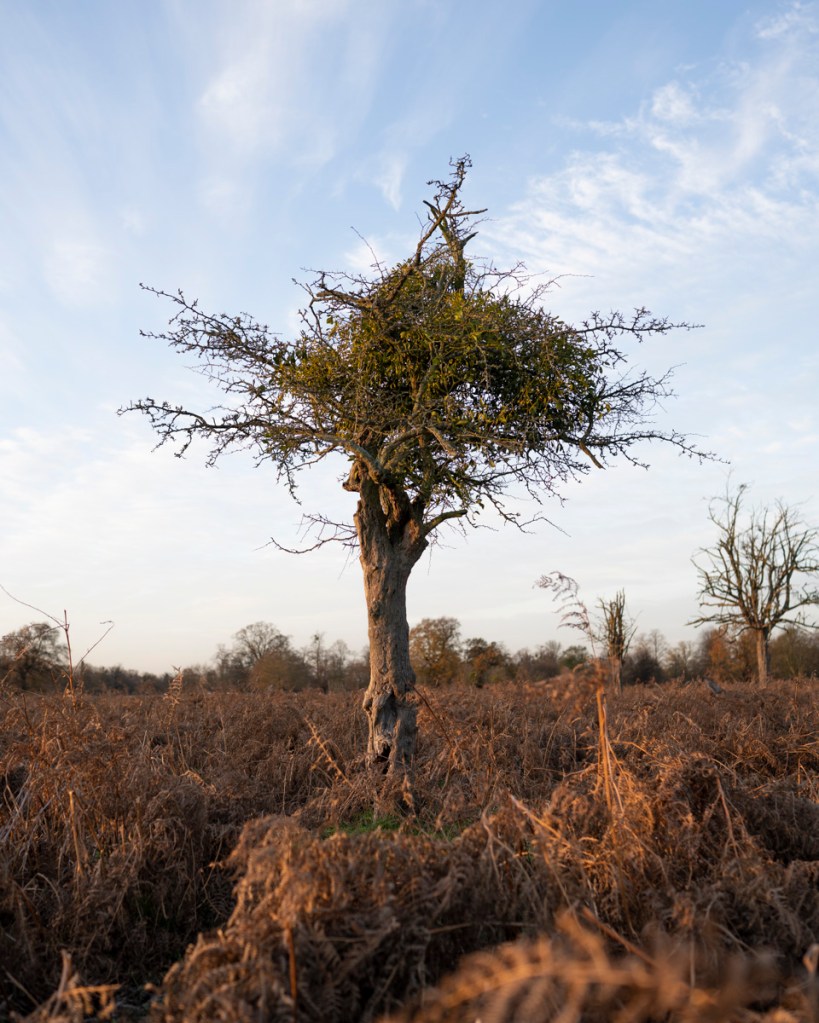
Tree Three
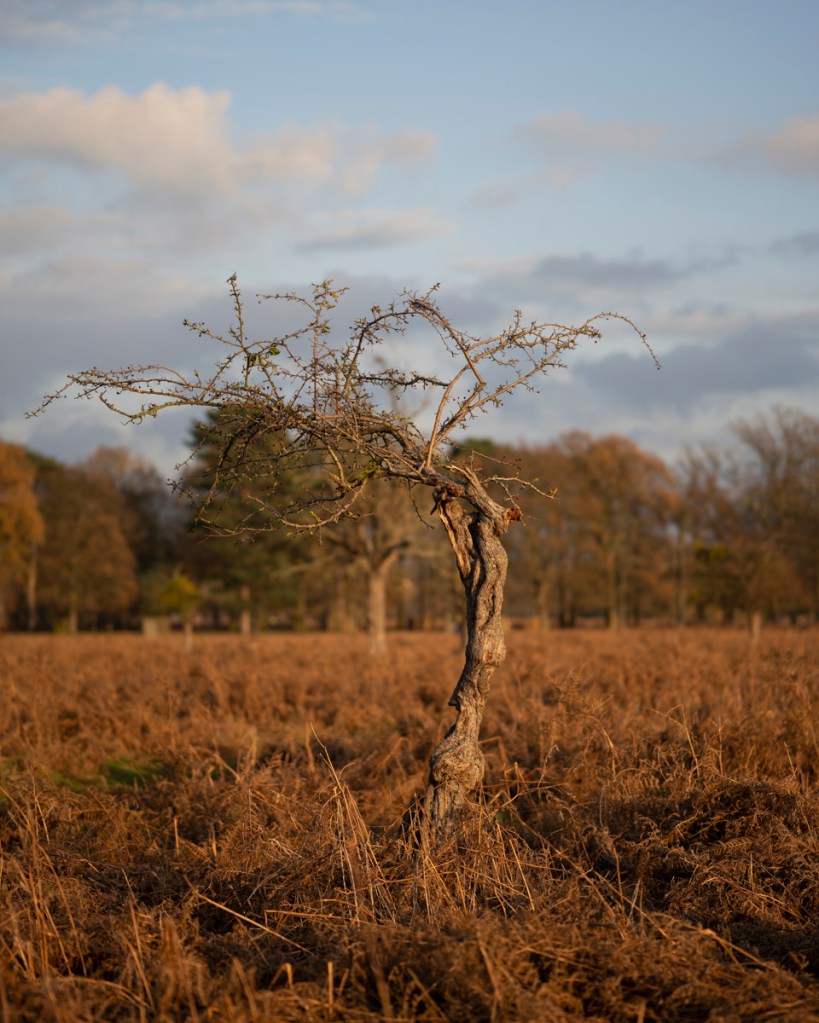
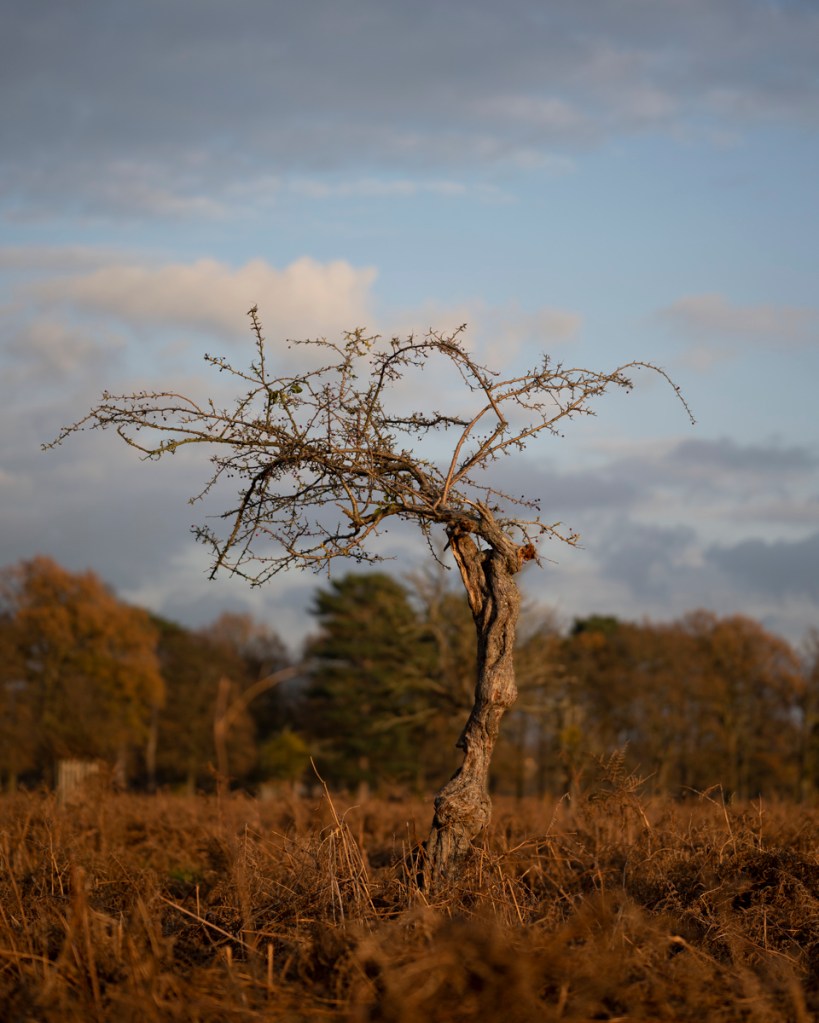
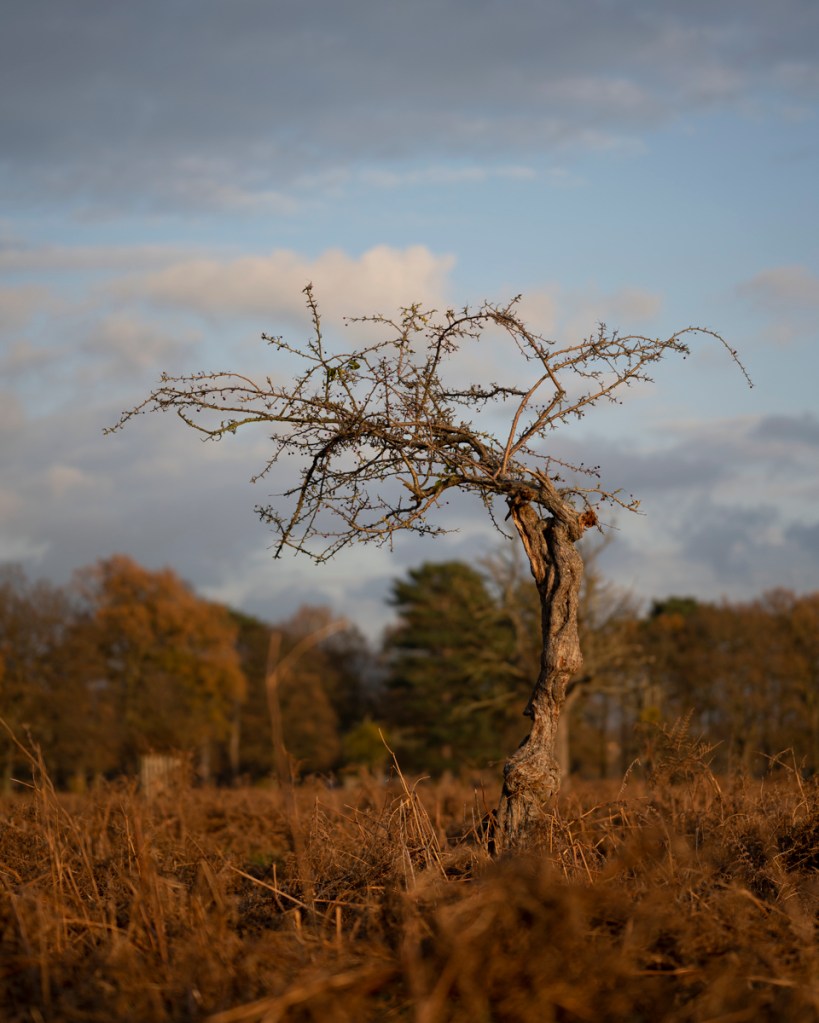
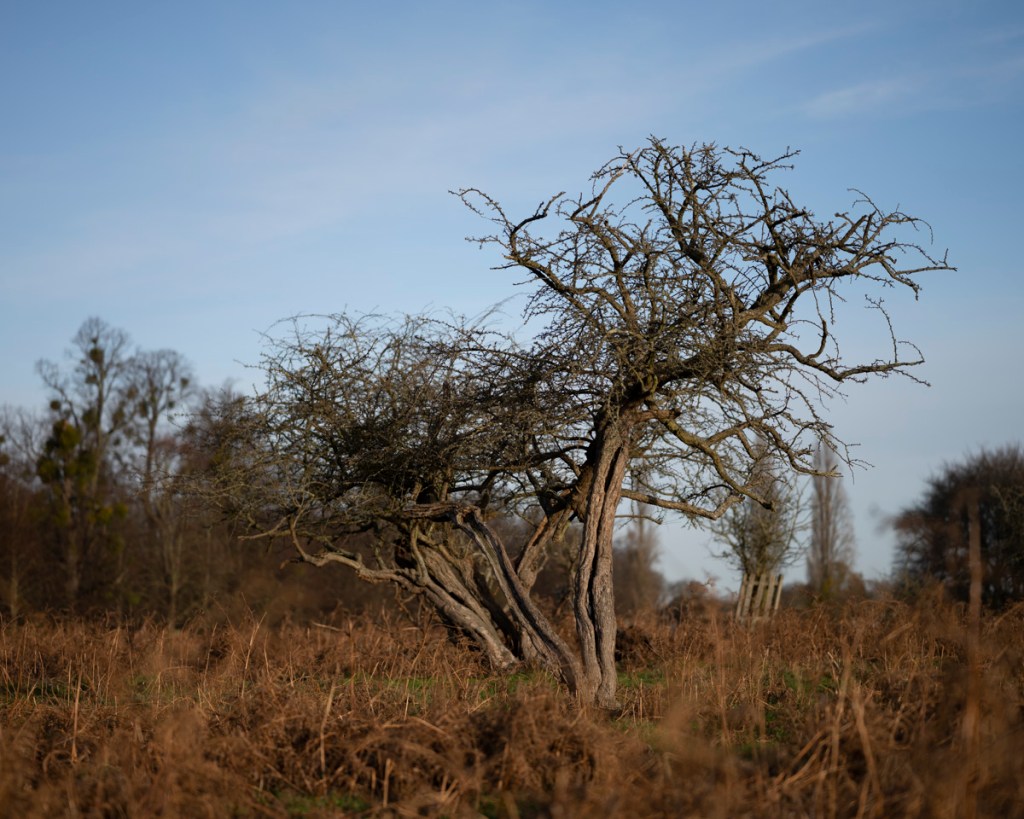
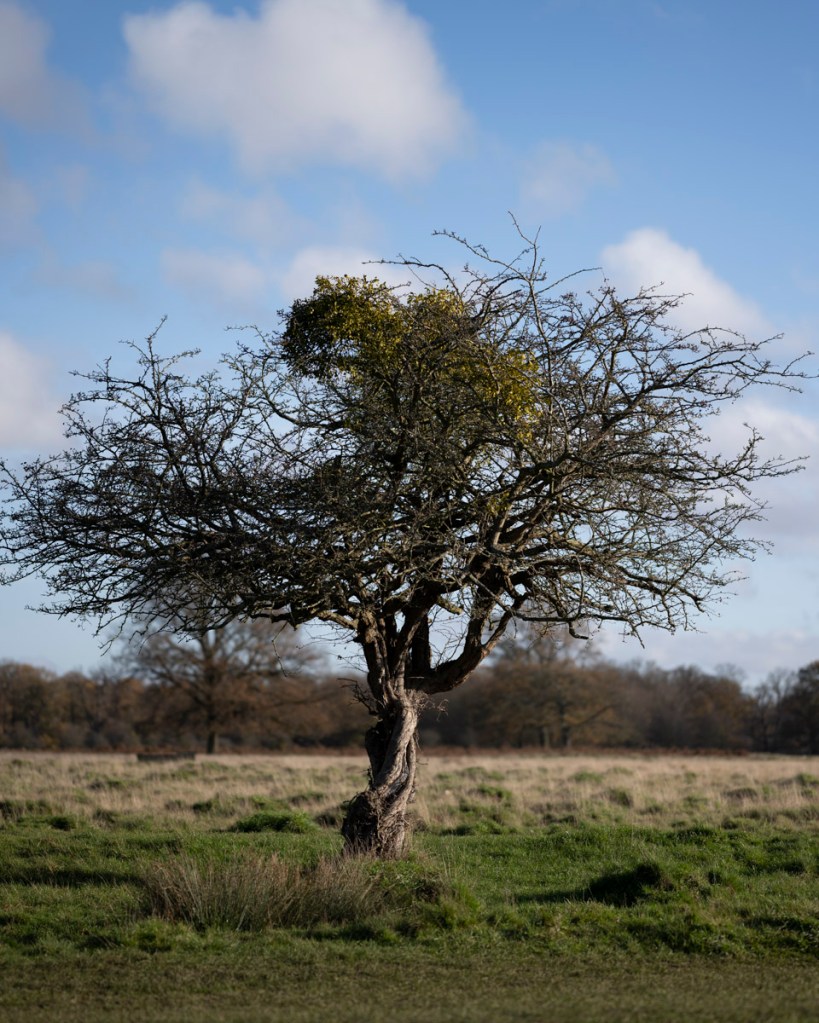
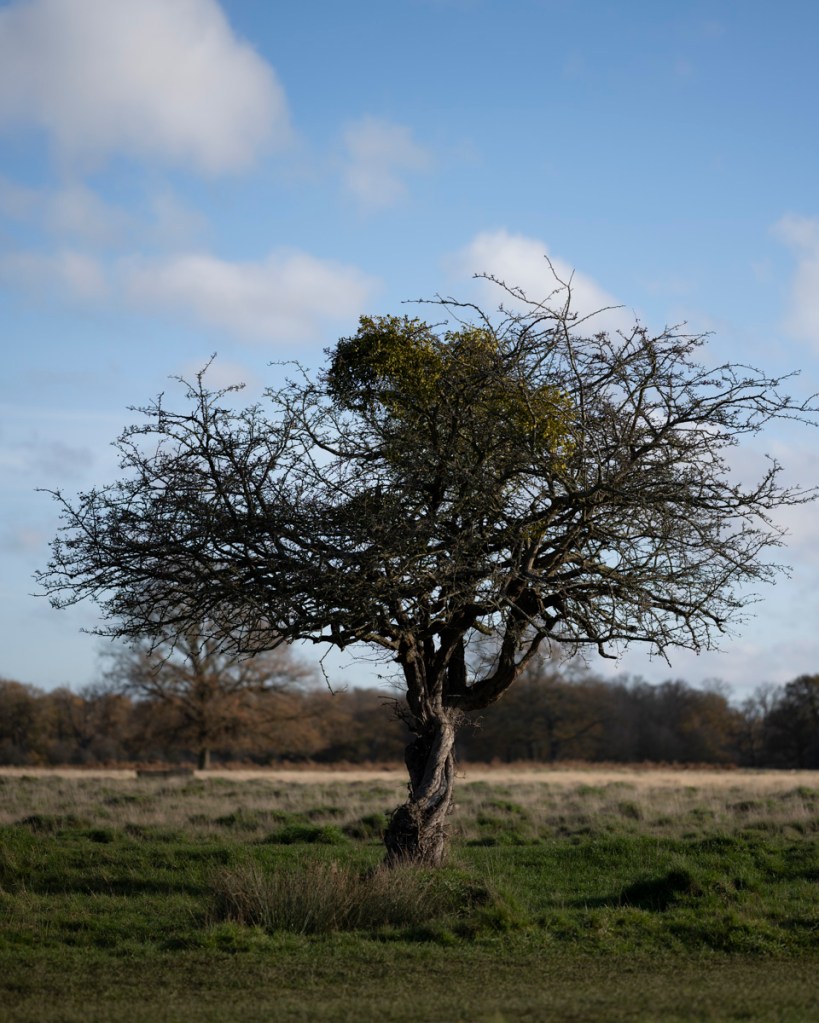
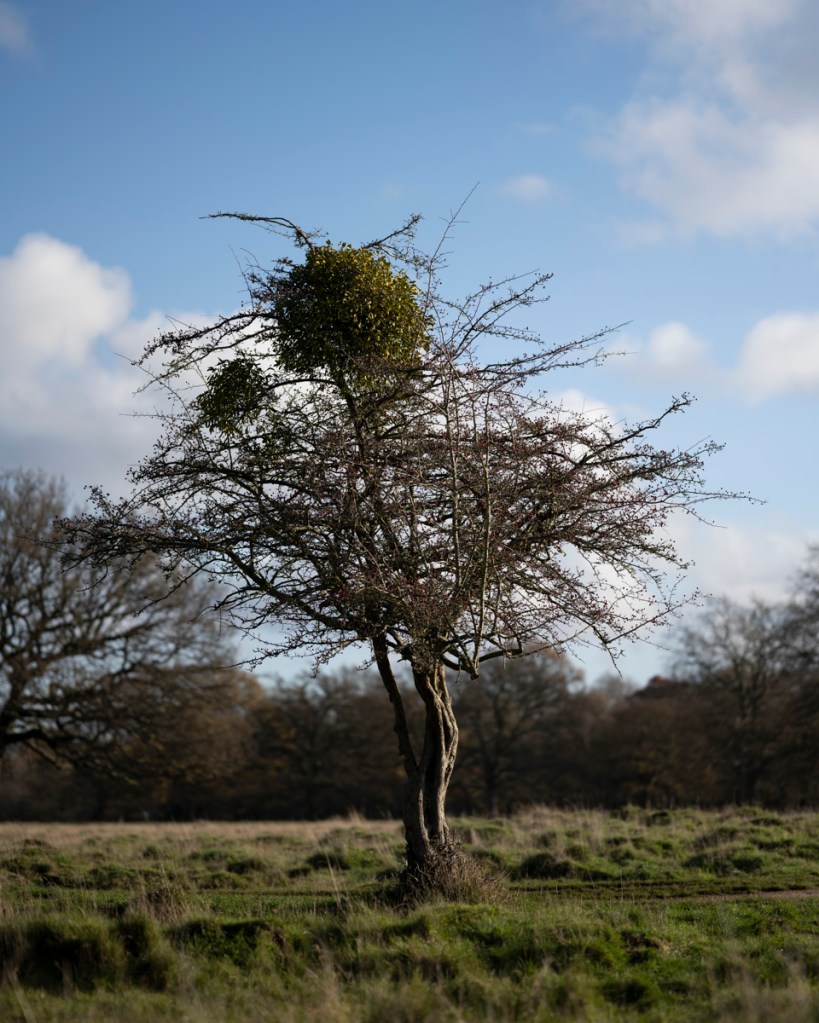
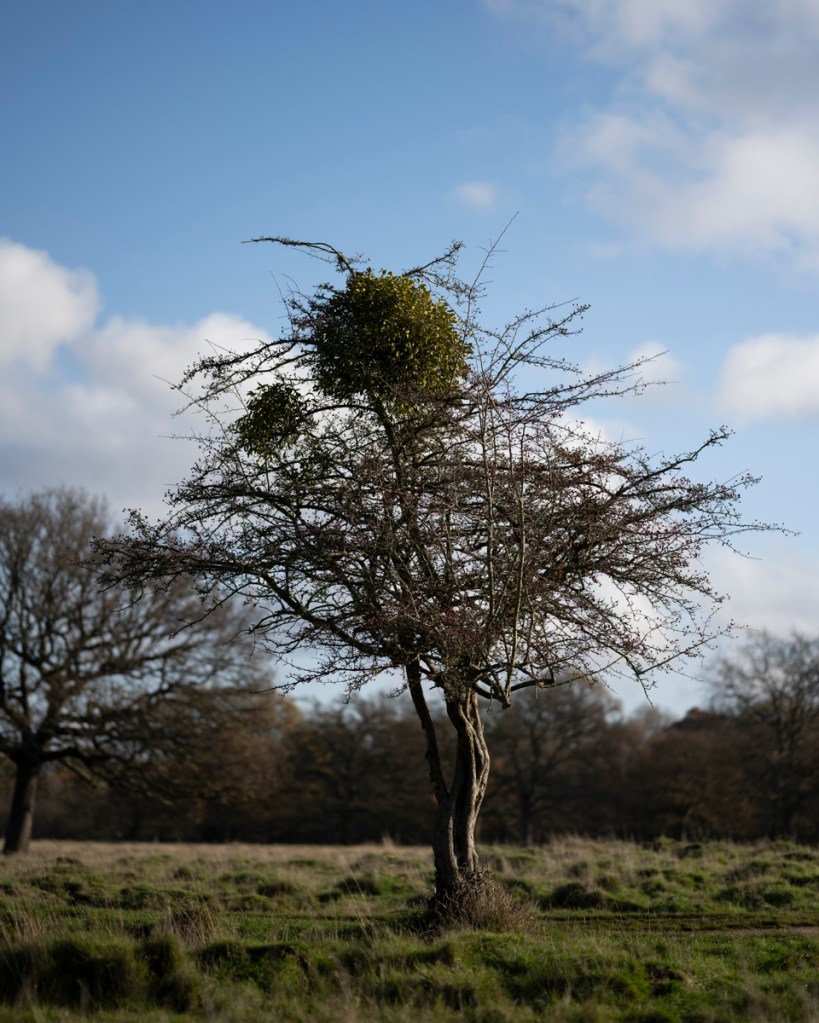
I then moved onto this hawthorn, which I’ve photographed from a different angle previously.
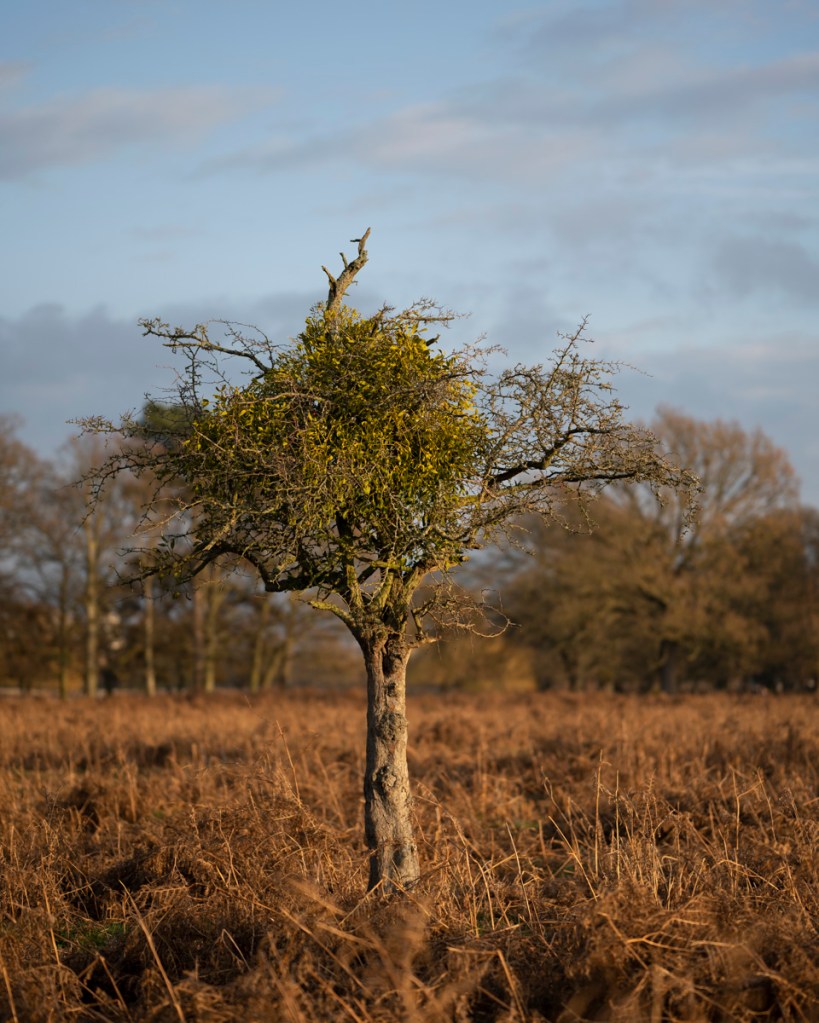
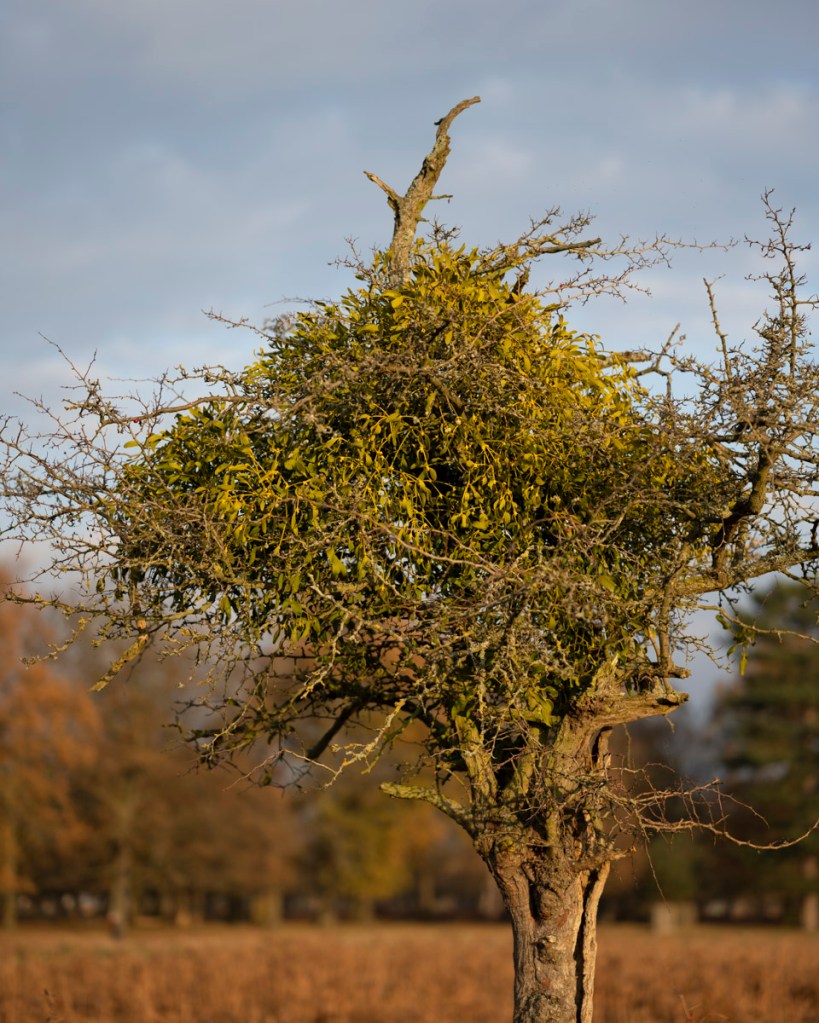
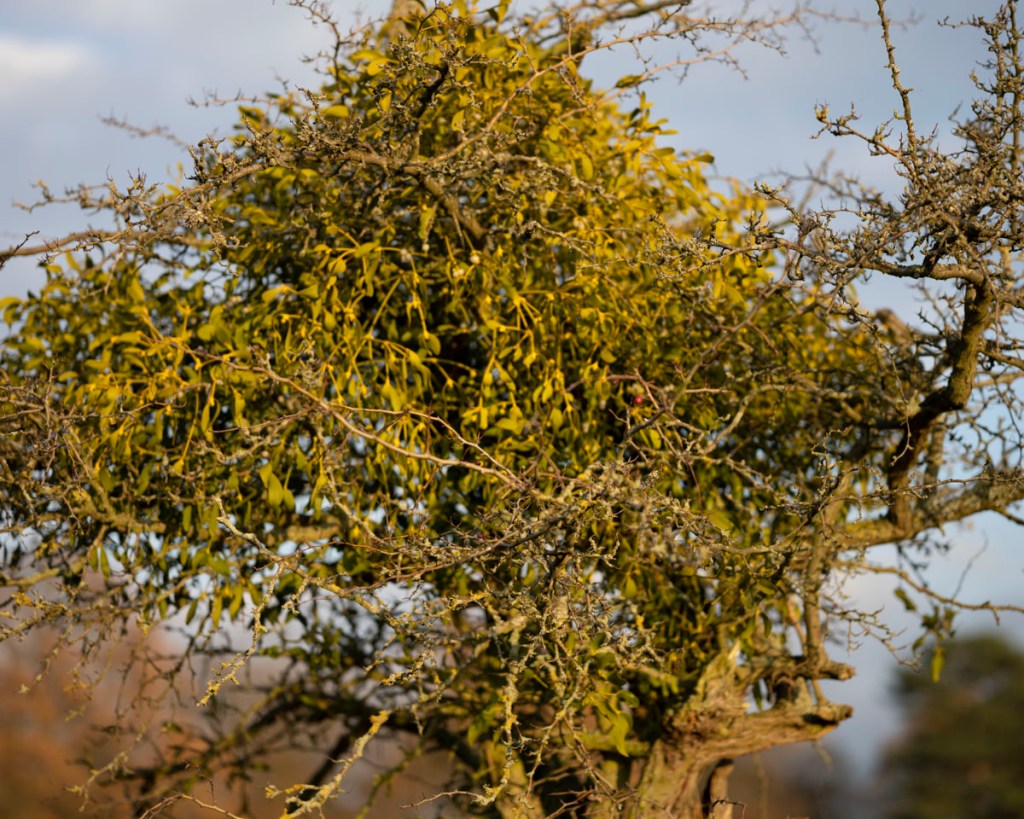
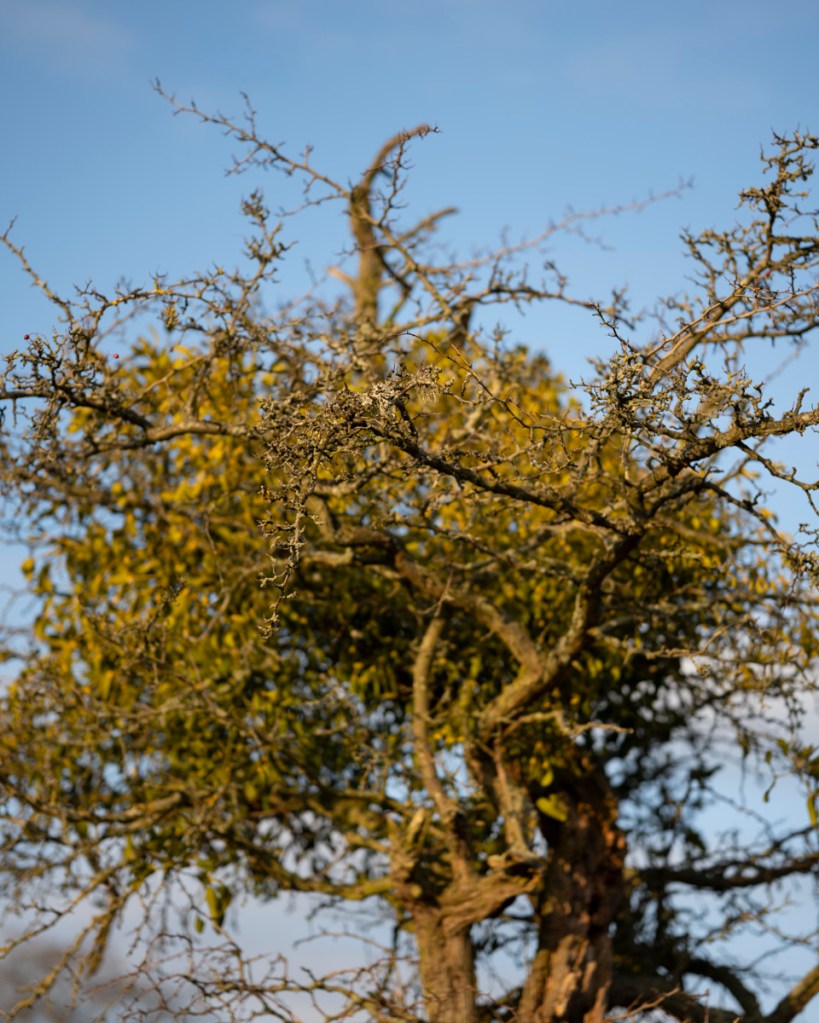
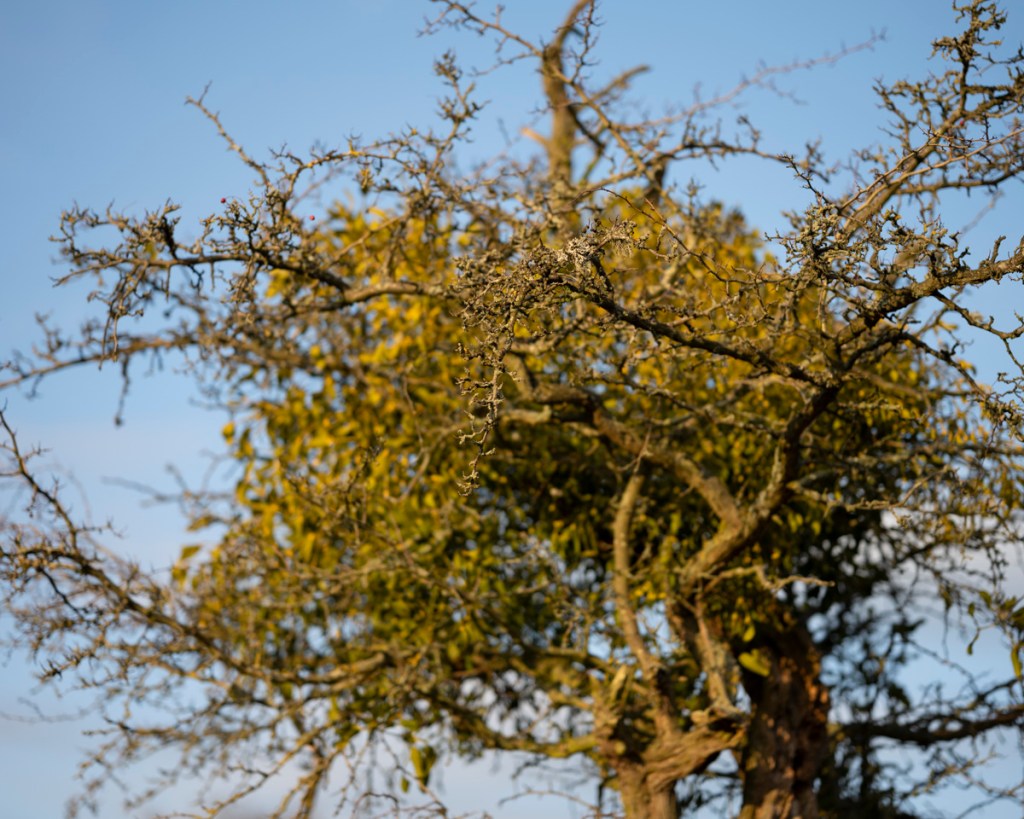
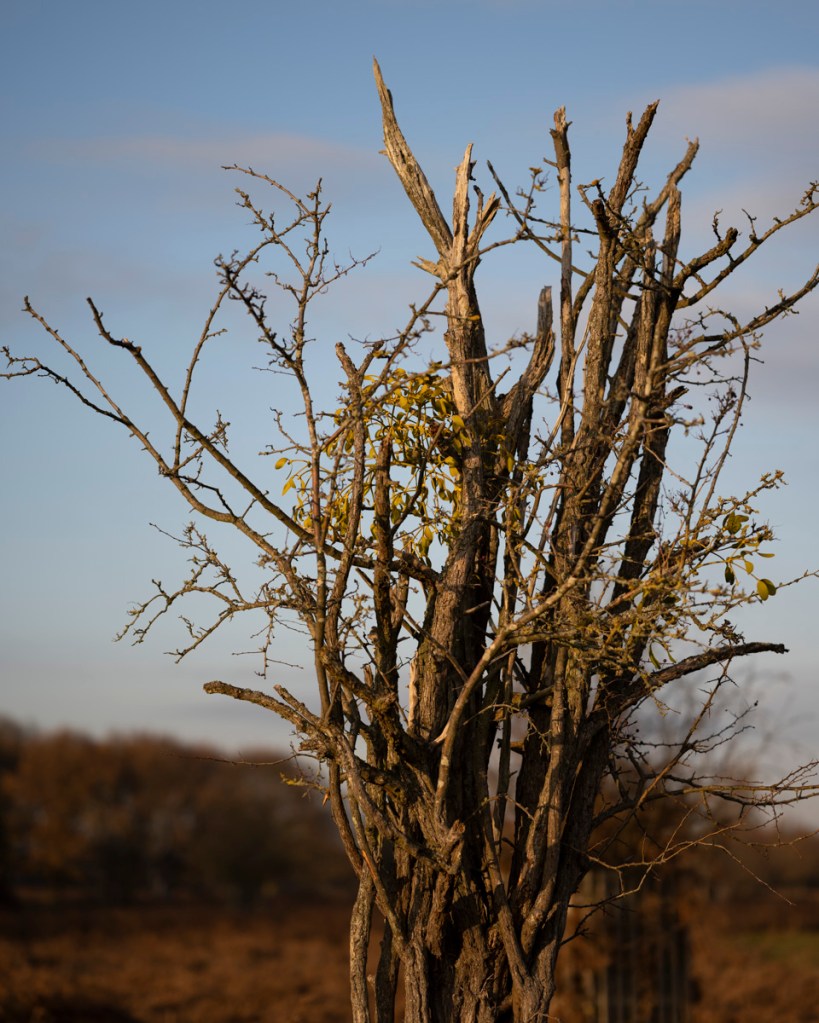
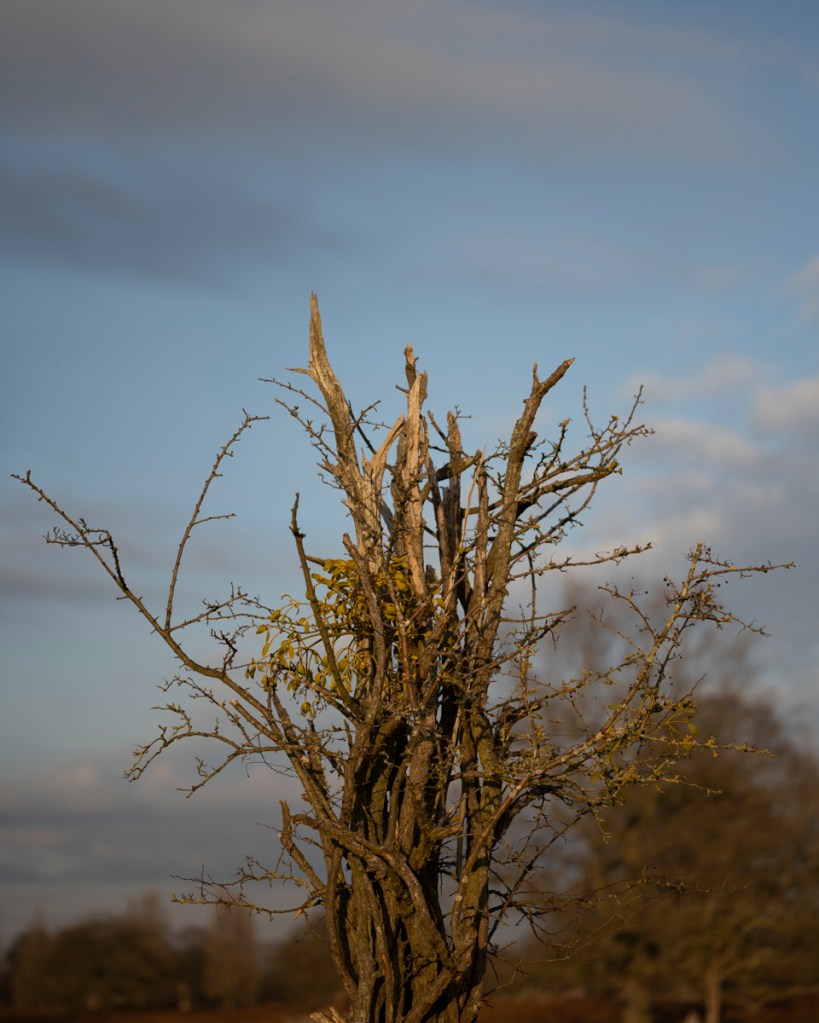
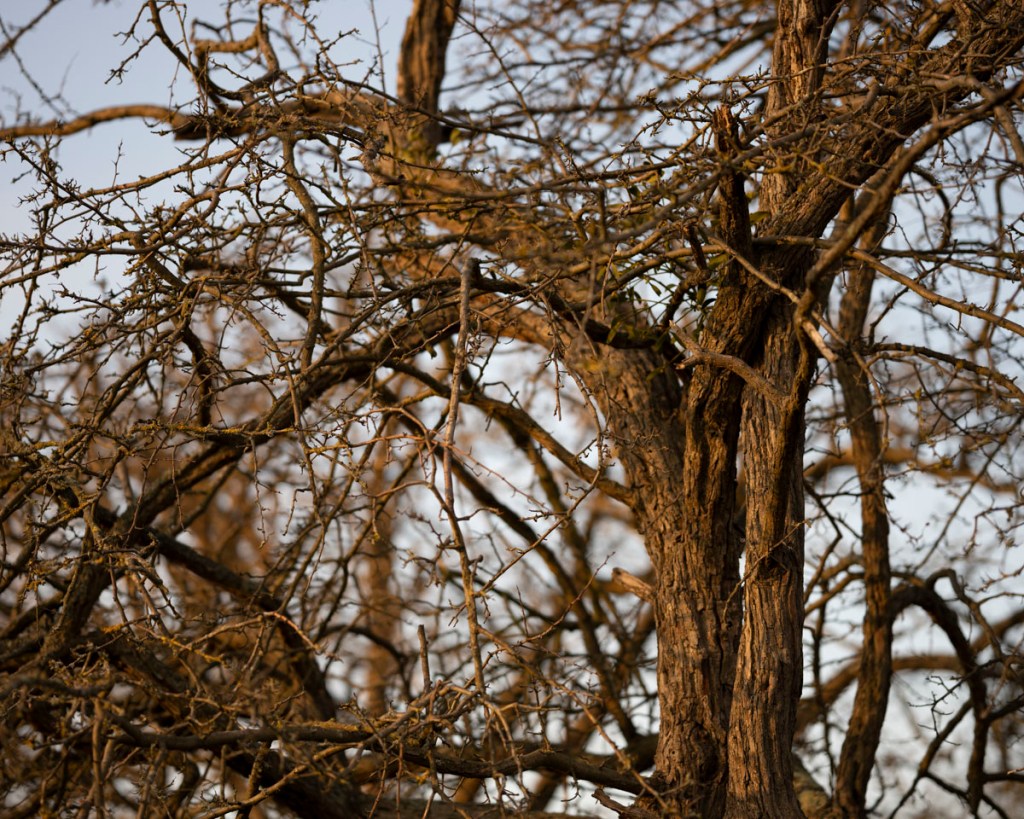
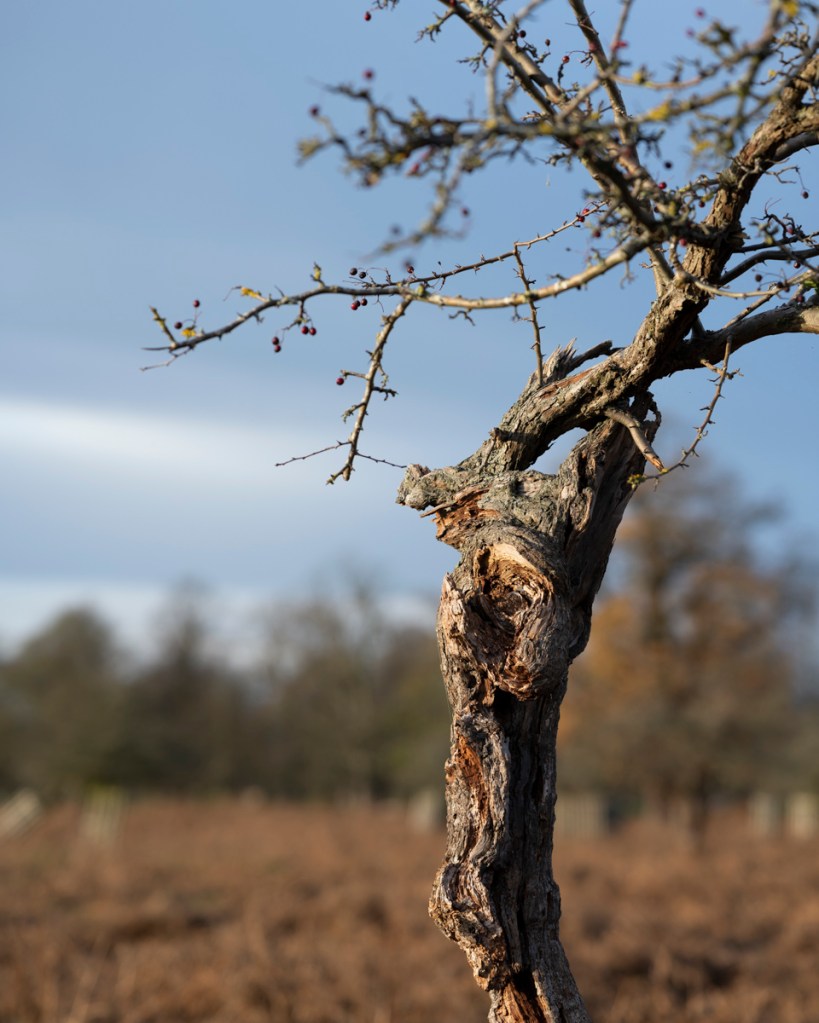
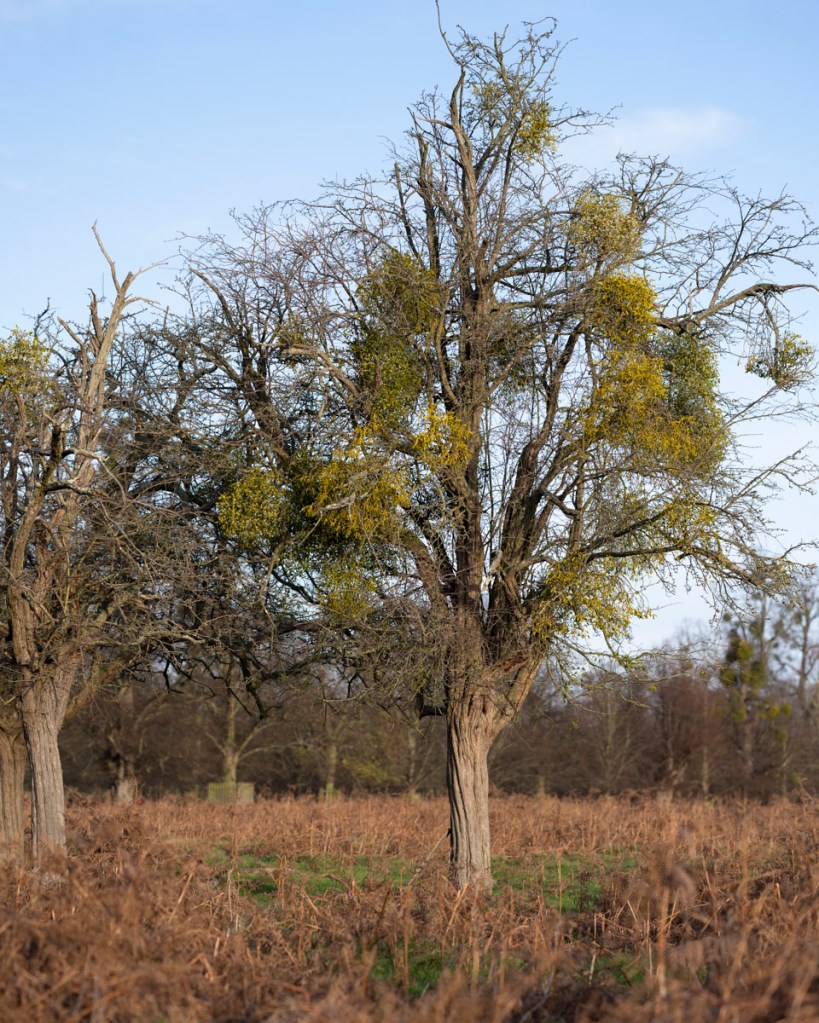
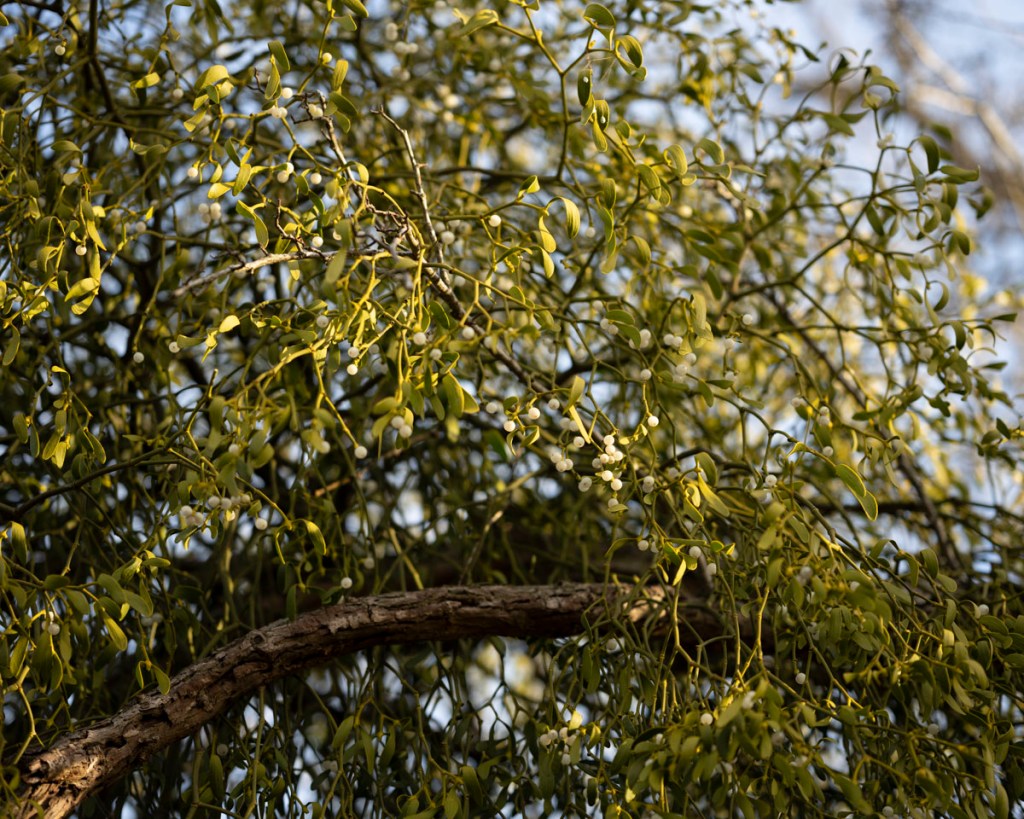
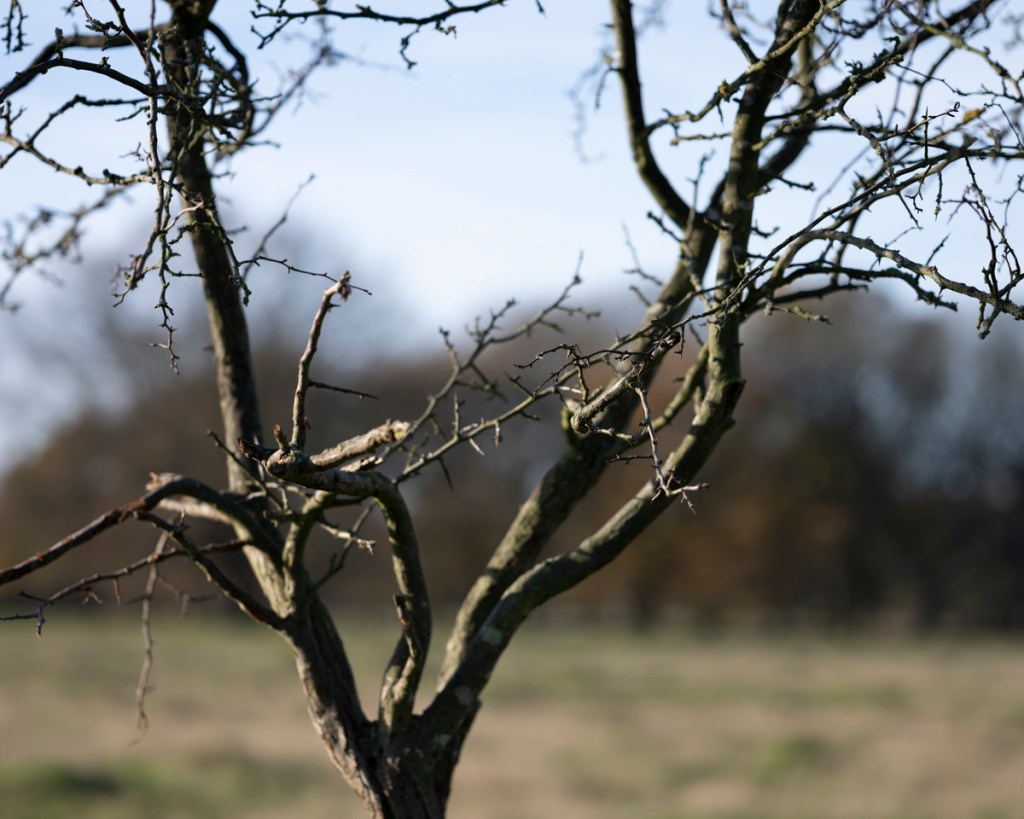
I realised at this point that it felt I was just ‘going through the motions’. So I tried some close ups of the mistletoe.
When looking at the images at home, I noticed how these close ups show the ‘ancient’ features of the hawthorn.
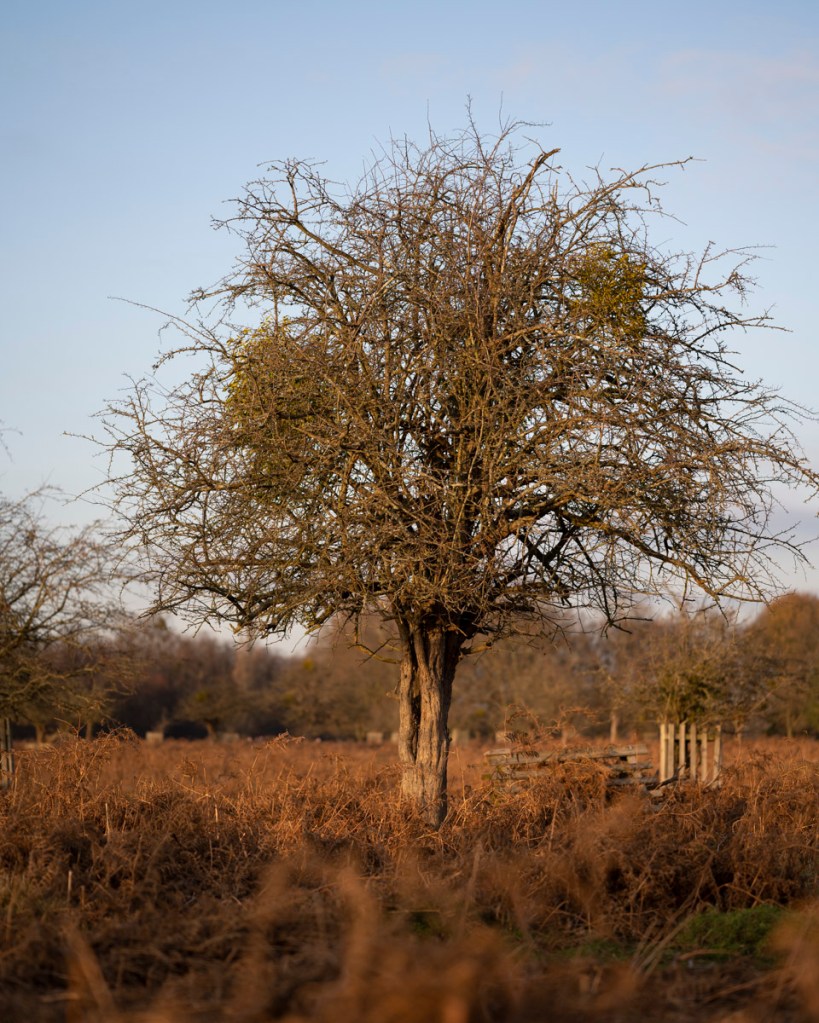
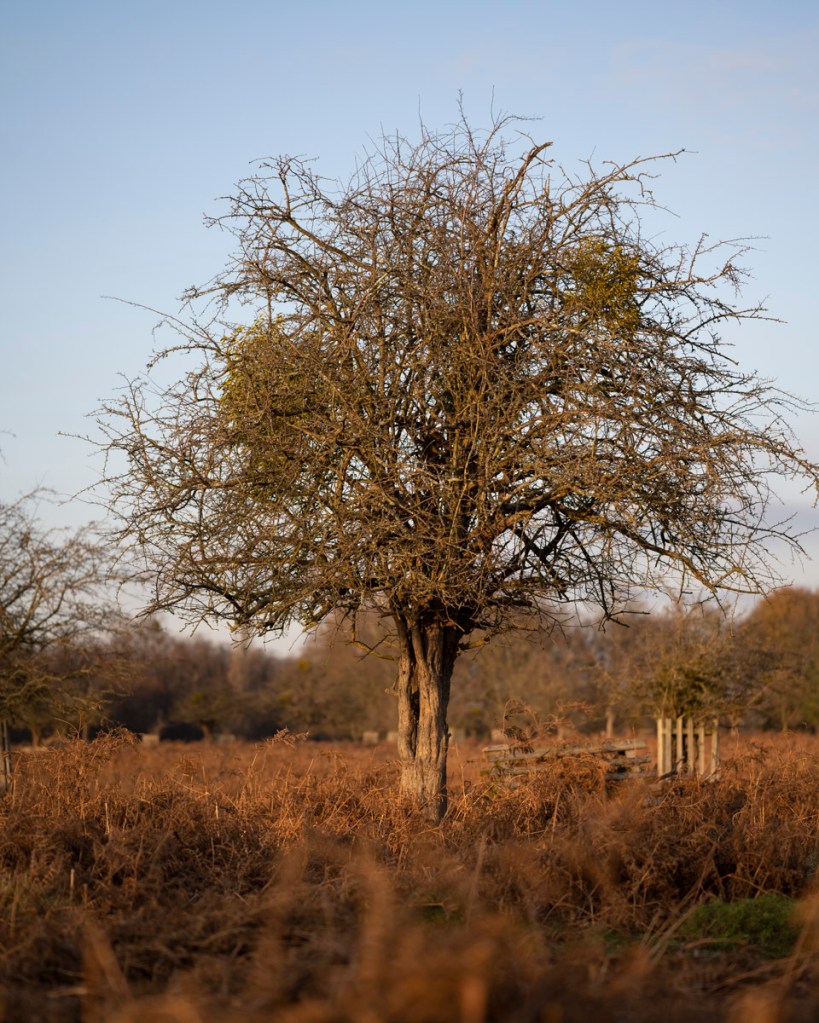
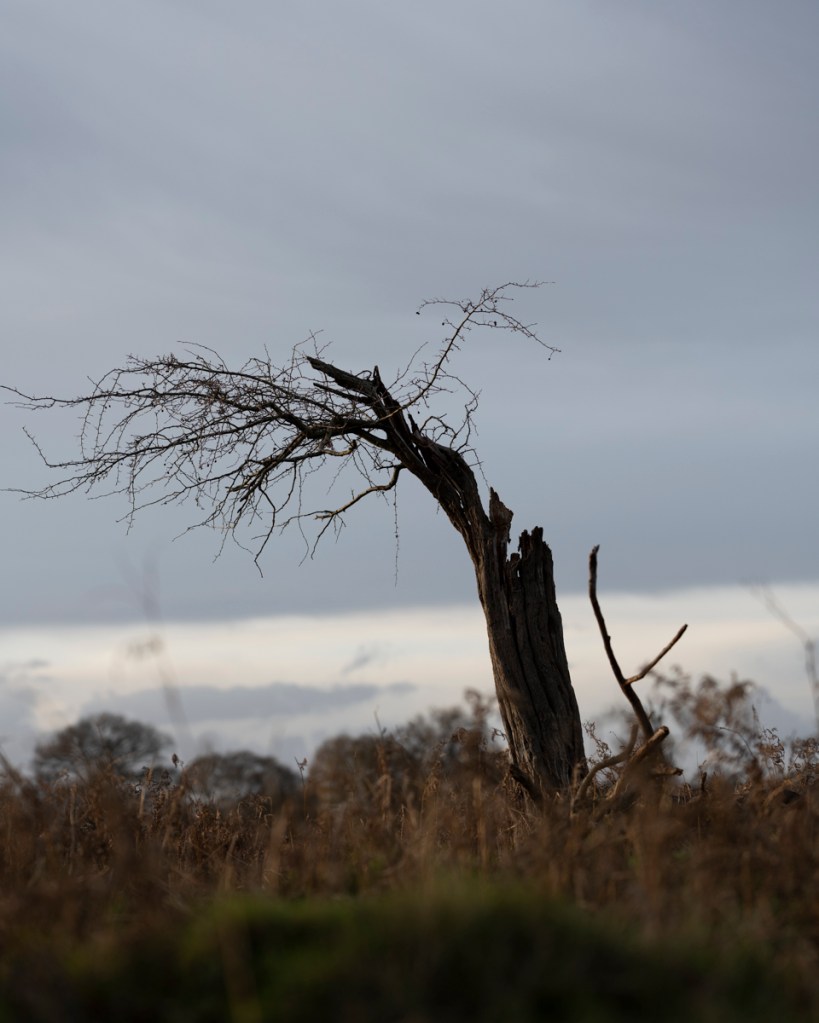
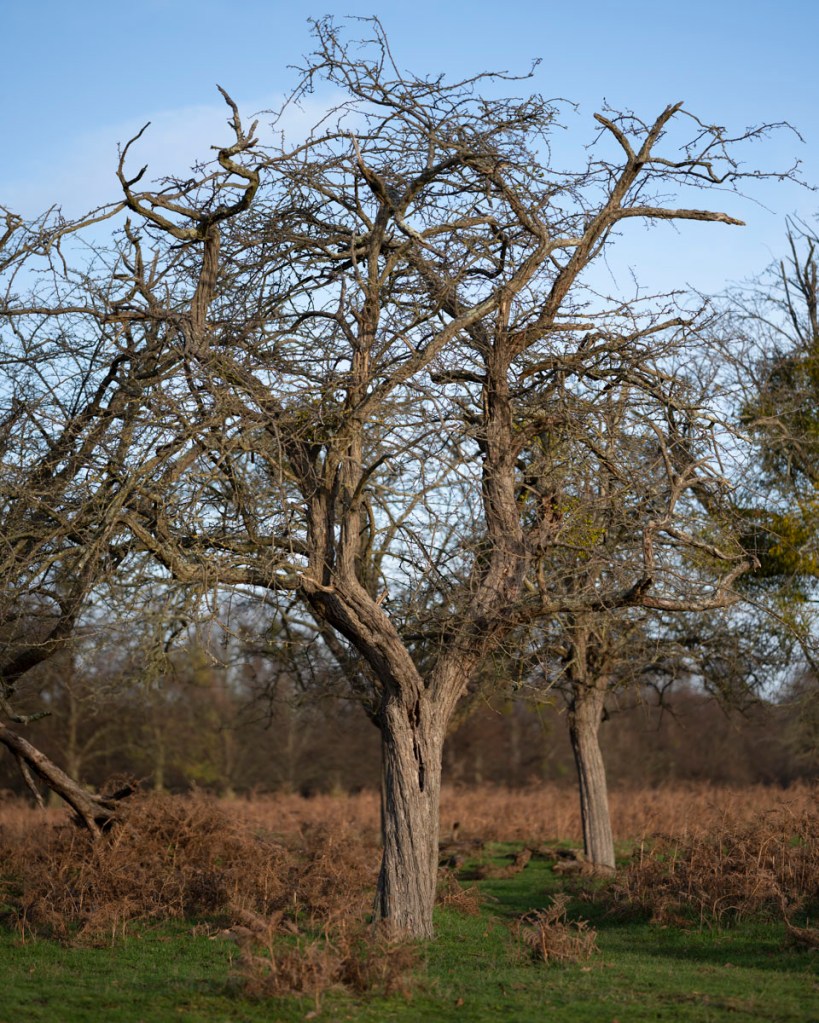
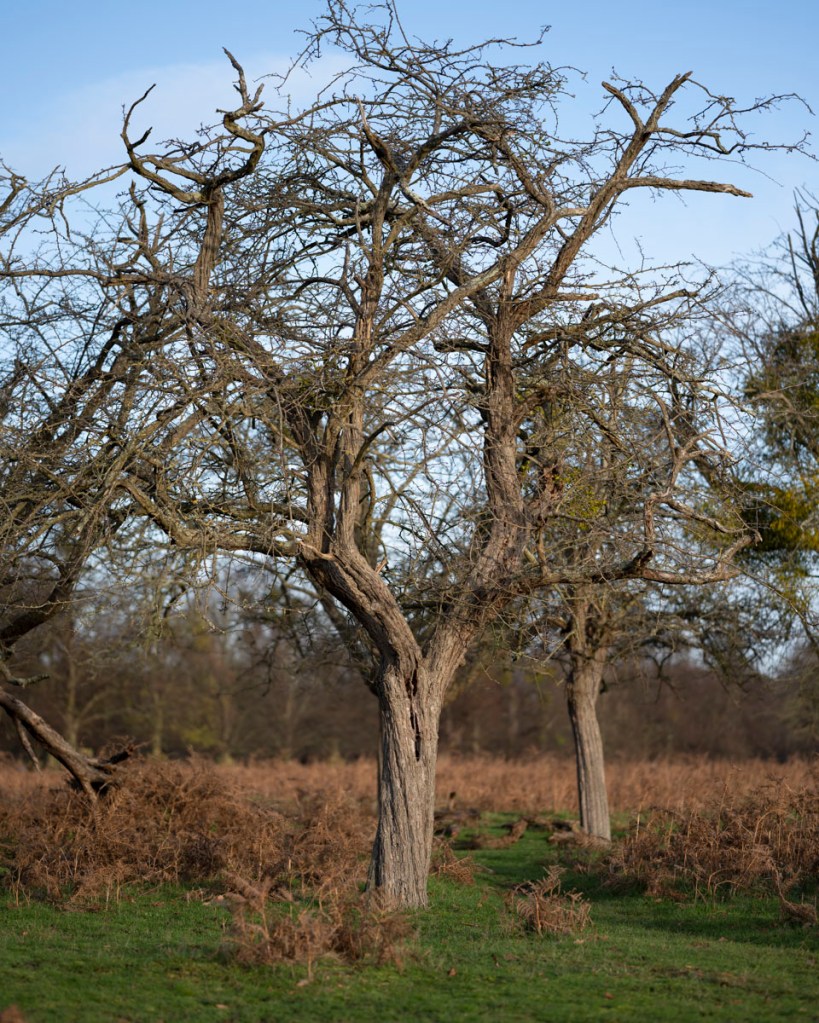
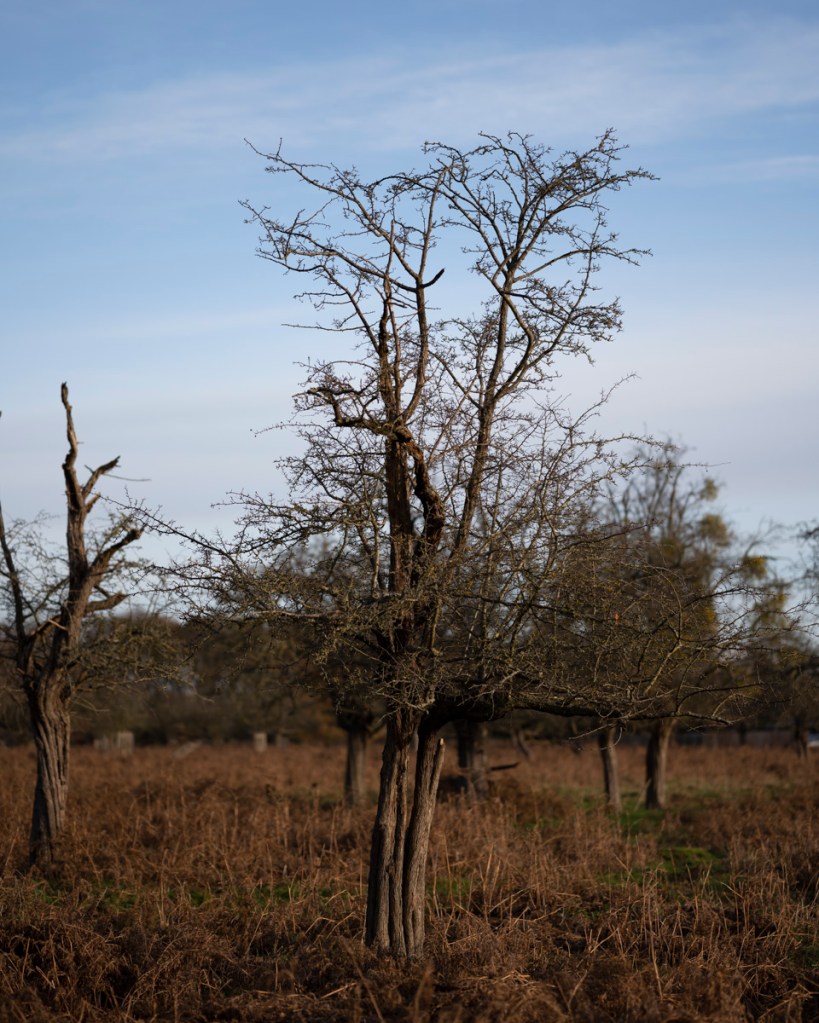
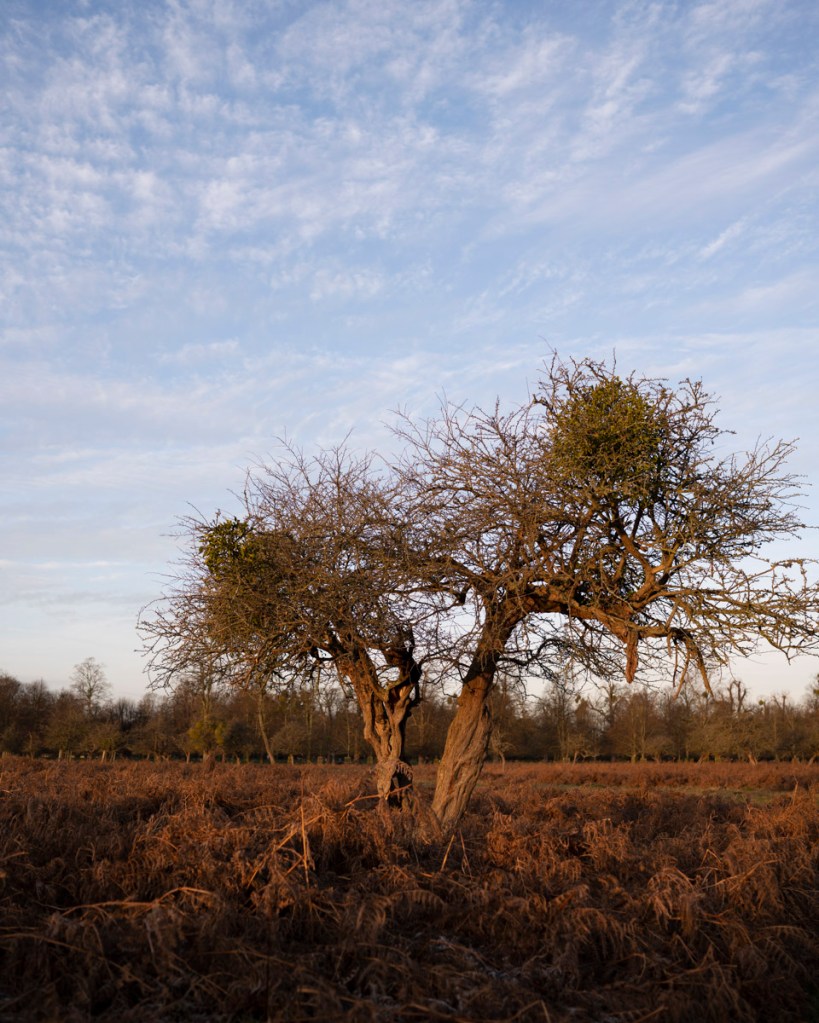
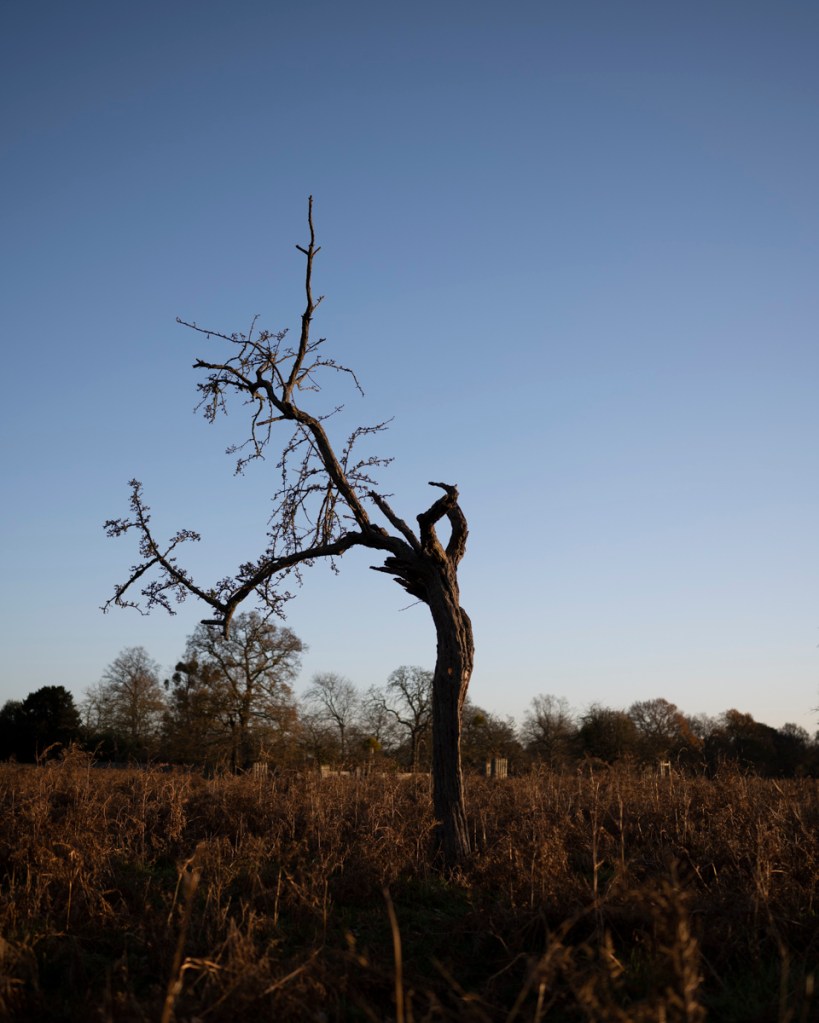
Tree Four
A stunning tree, but for some reason, I couldn’t get the composition just right. I also realised that I had shot it in portrait. In hindsight, it seems best to shoot a tree in landscape when the canopy is over a particular width. This observation was also useful in depicting a tree with missing branches as ‘whole’ (as with Tree One) or focusing on what was actually there.
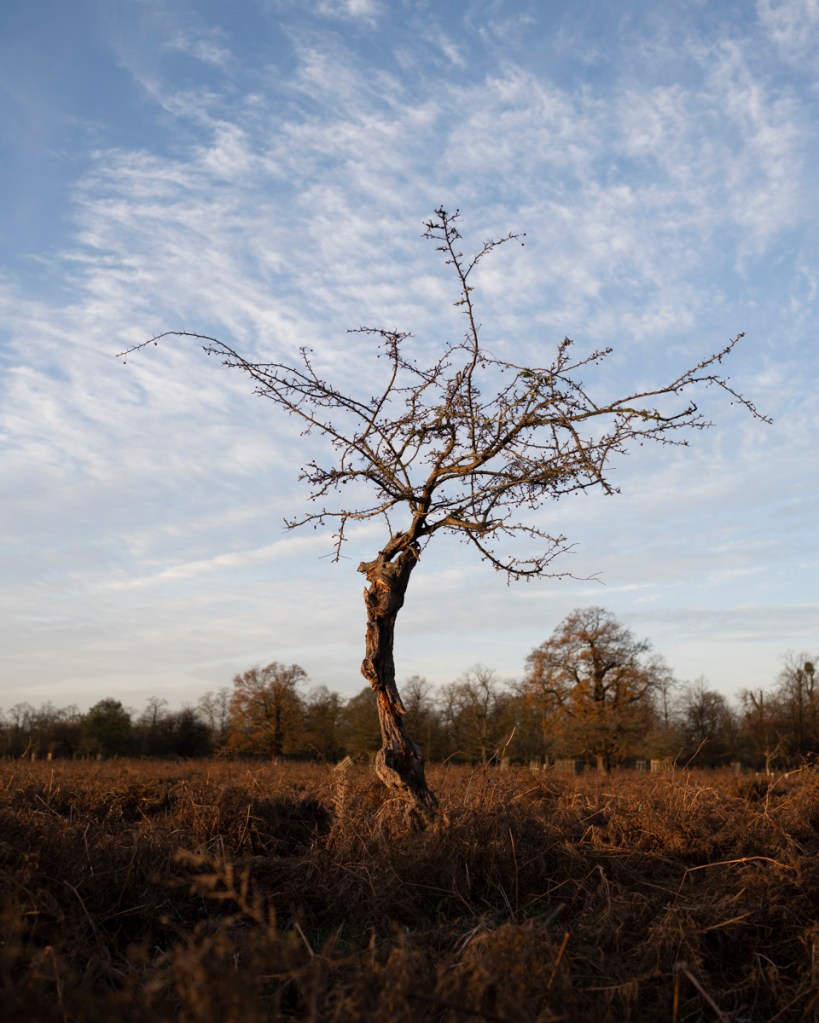
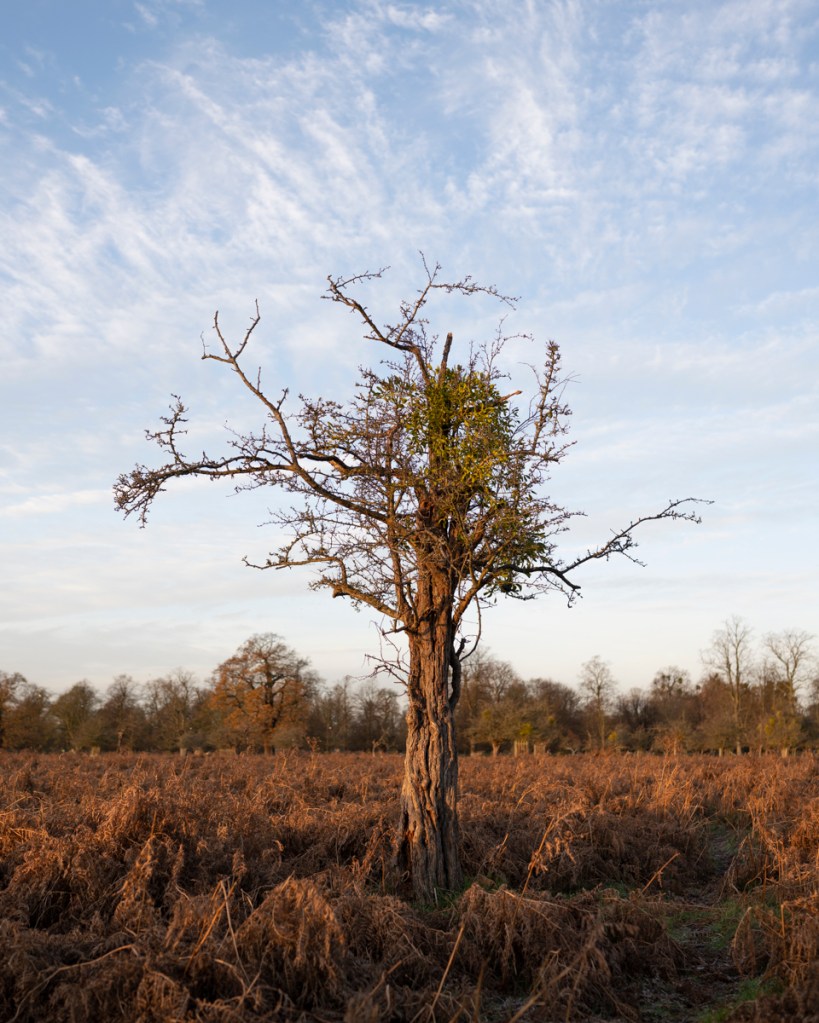
Tree Five
I then tried something different with this hawthorn.
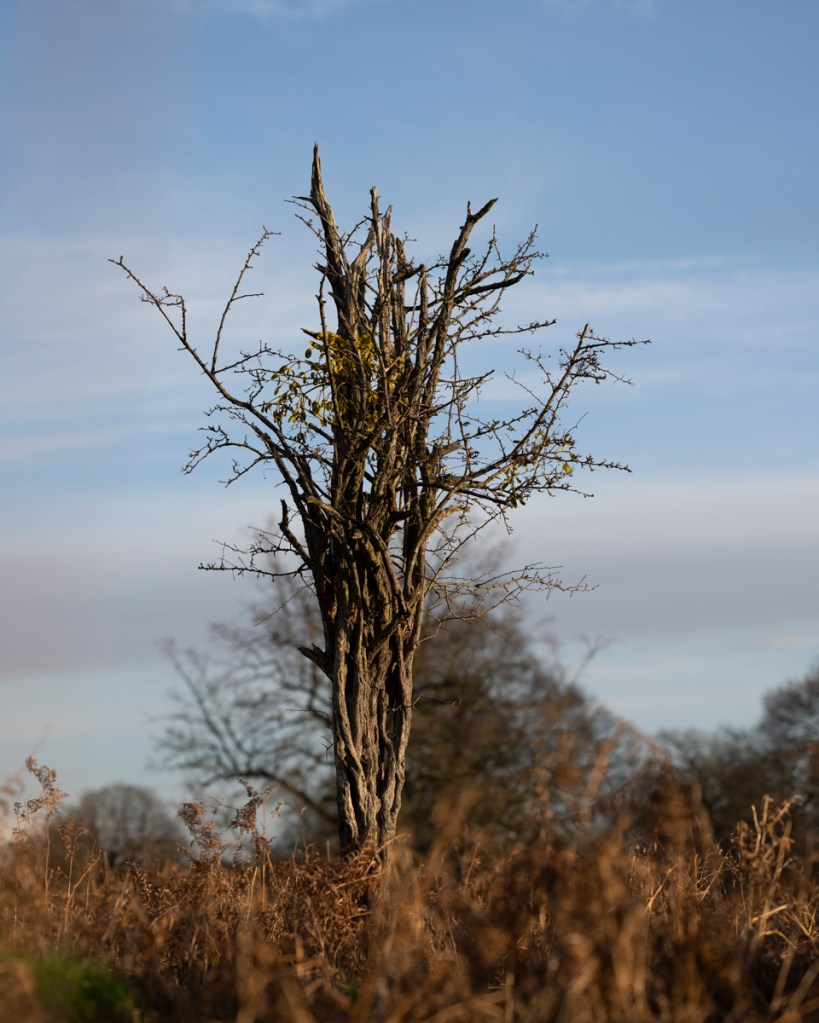
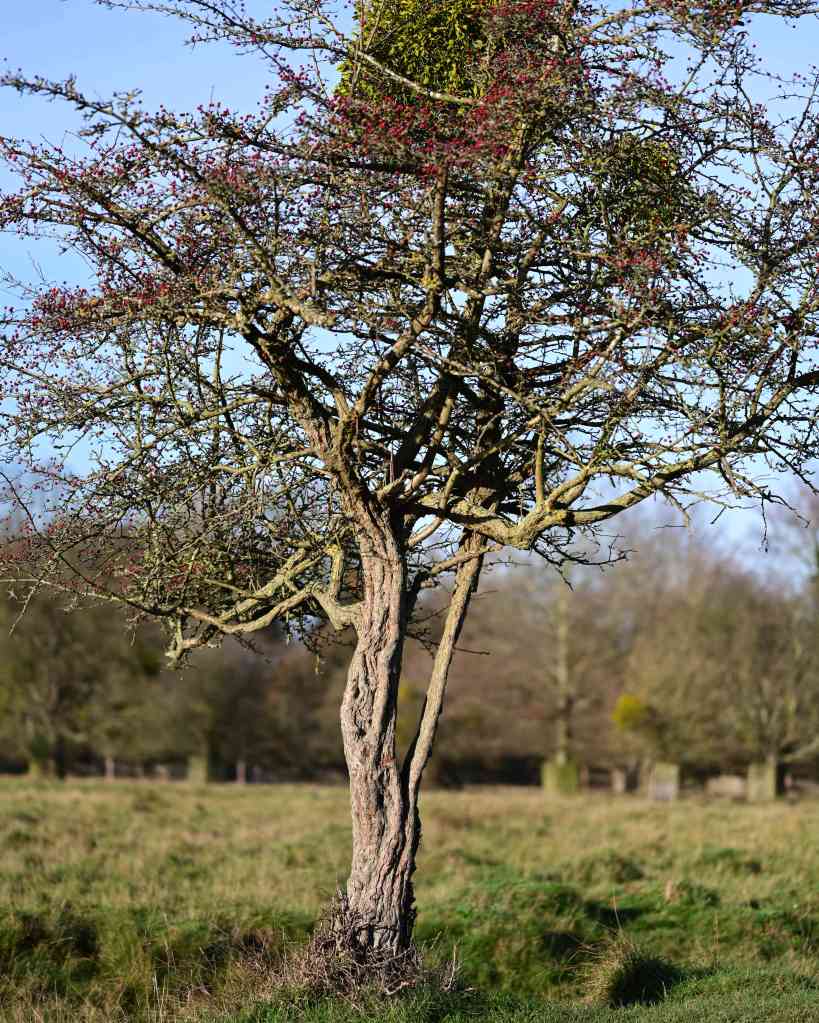
Tree Six
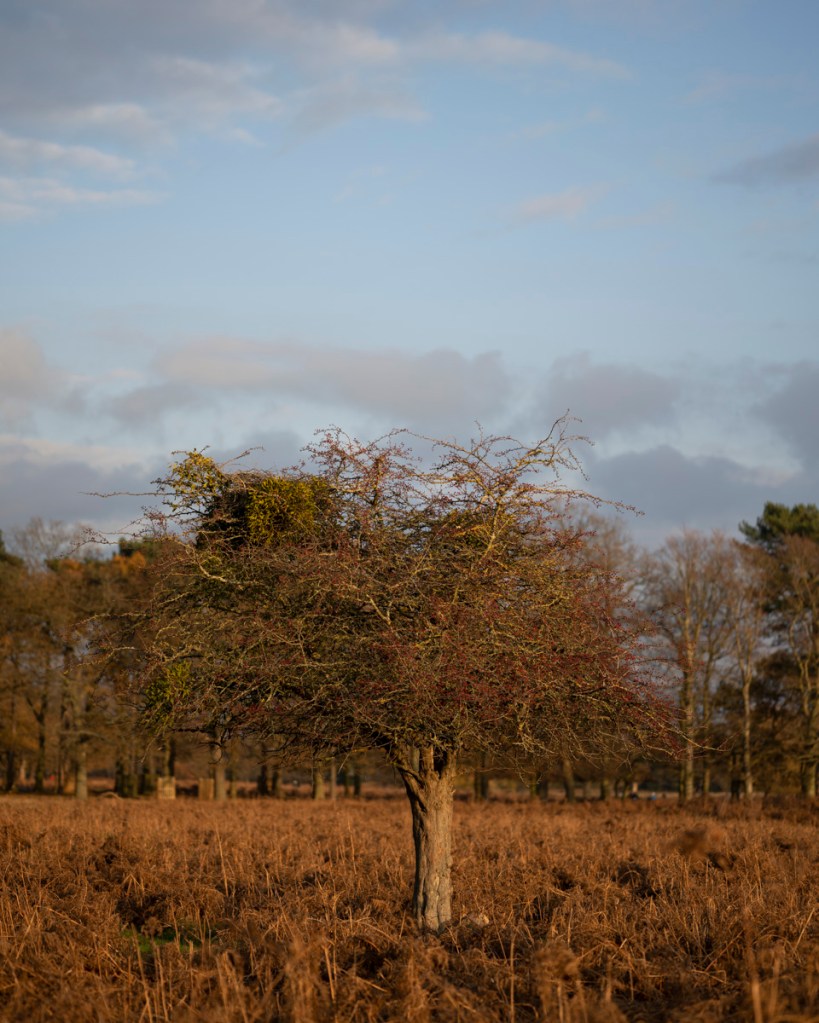
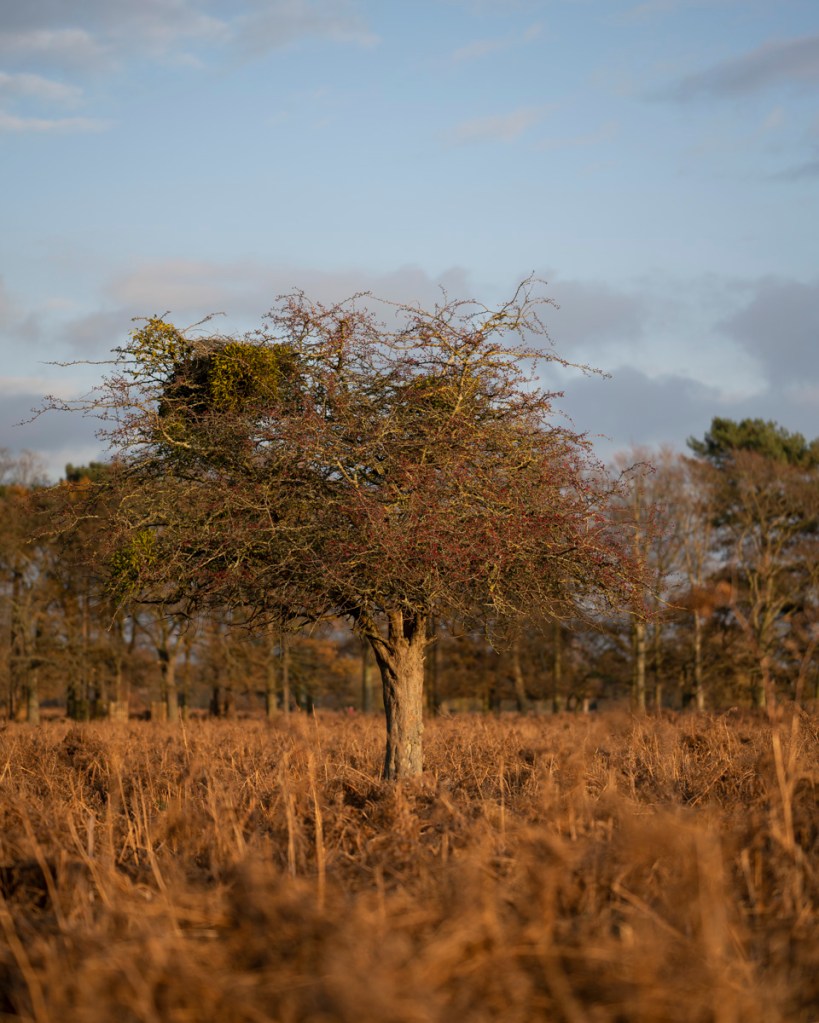
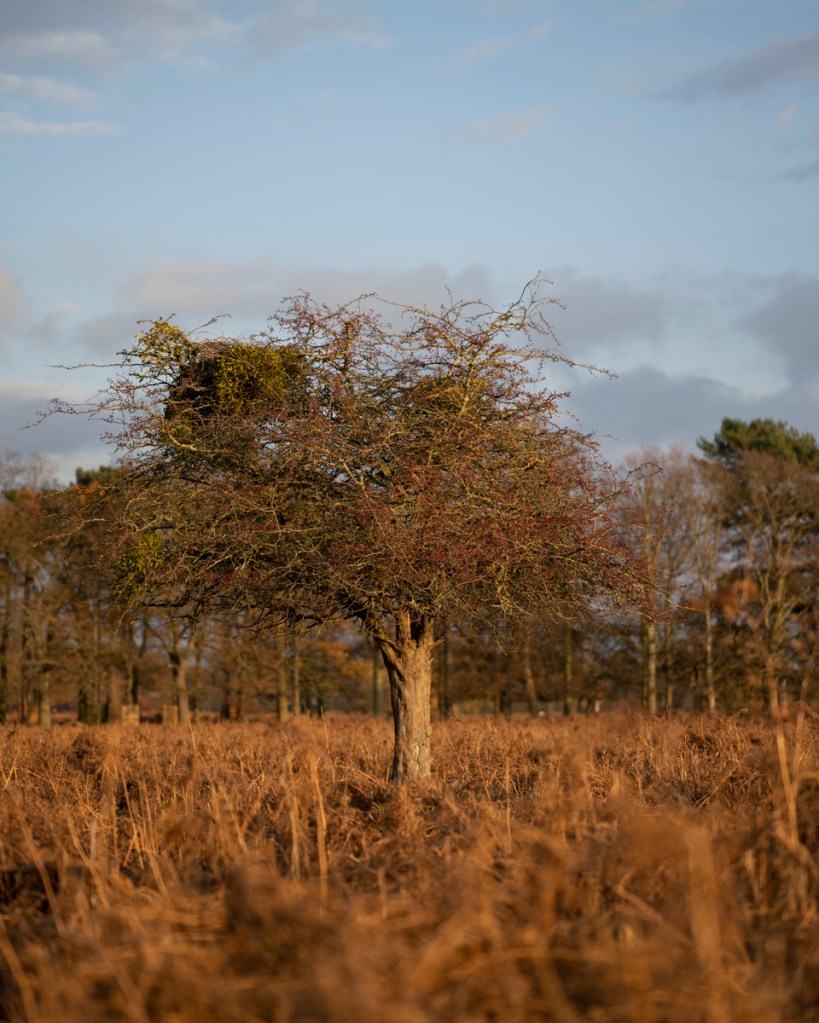
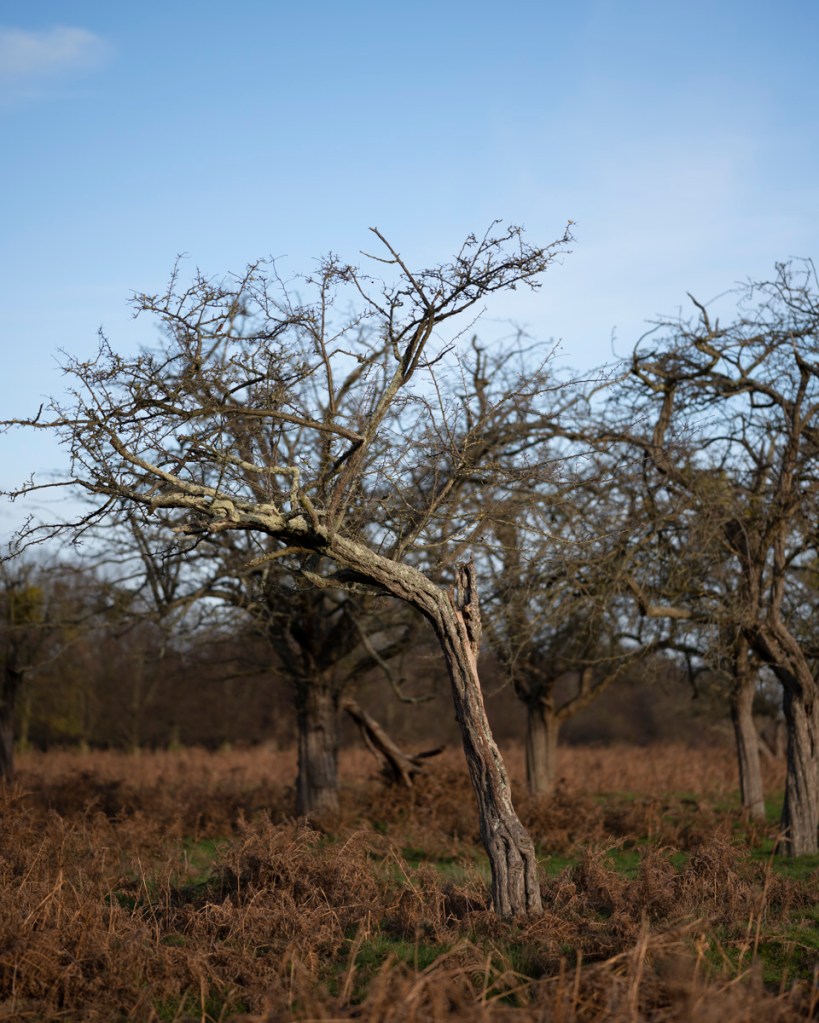
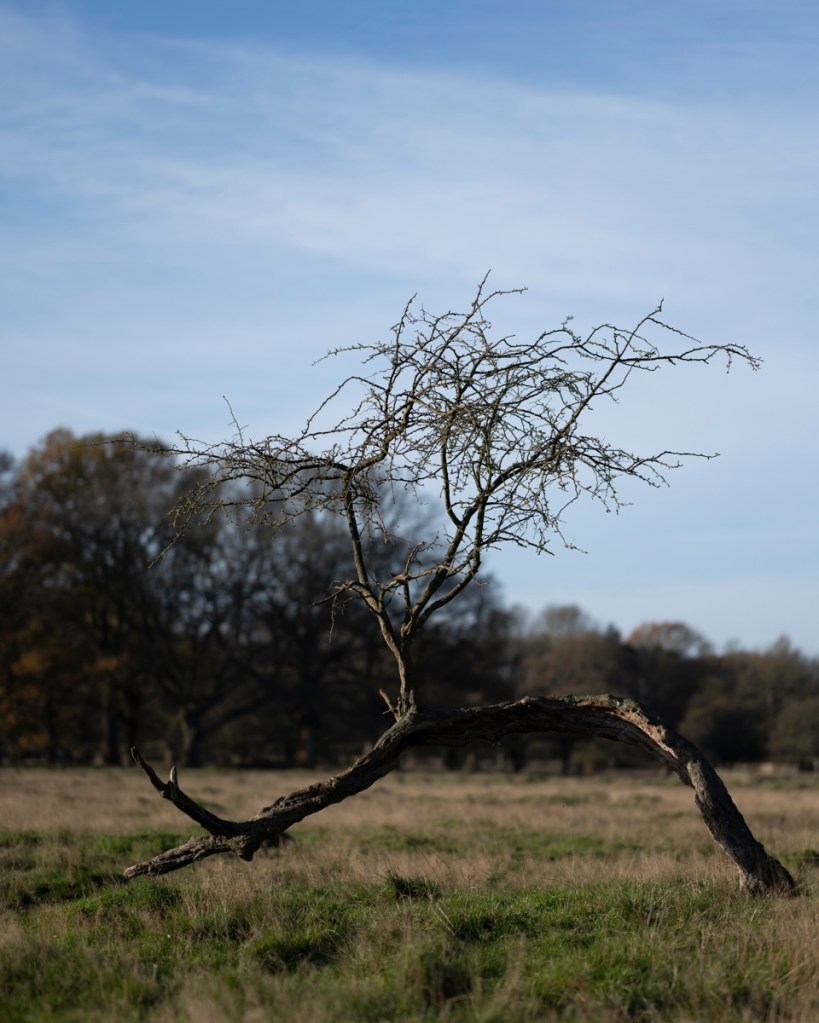
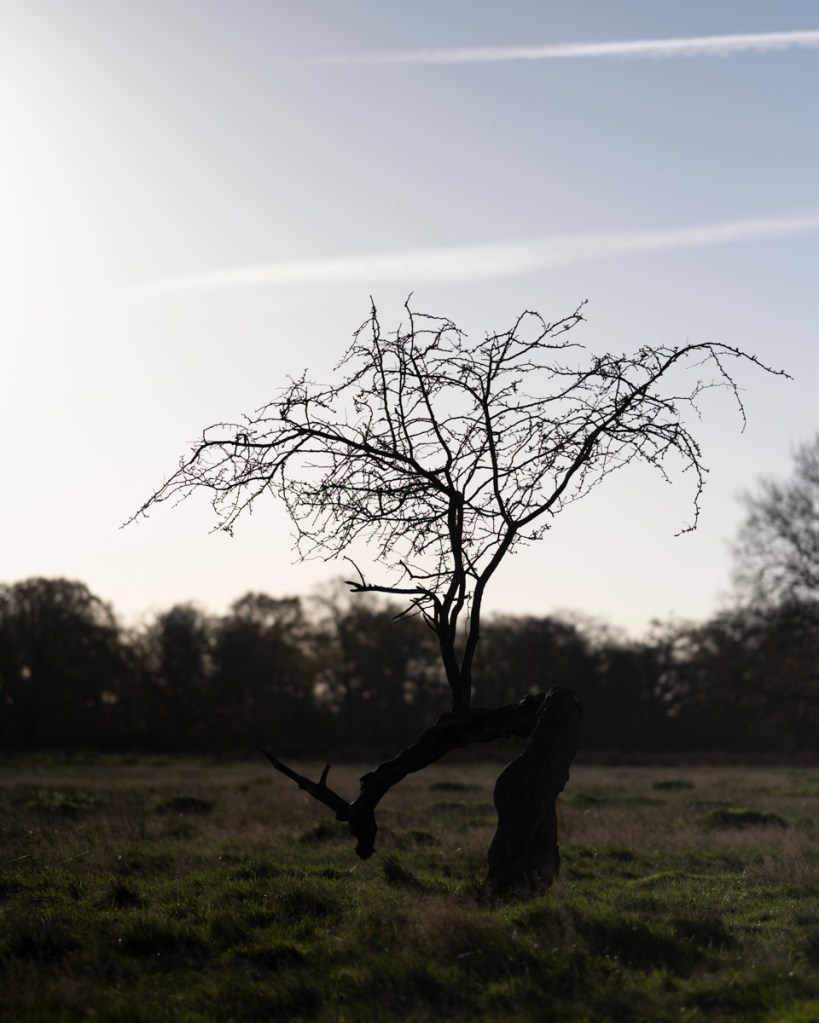
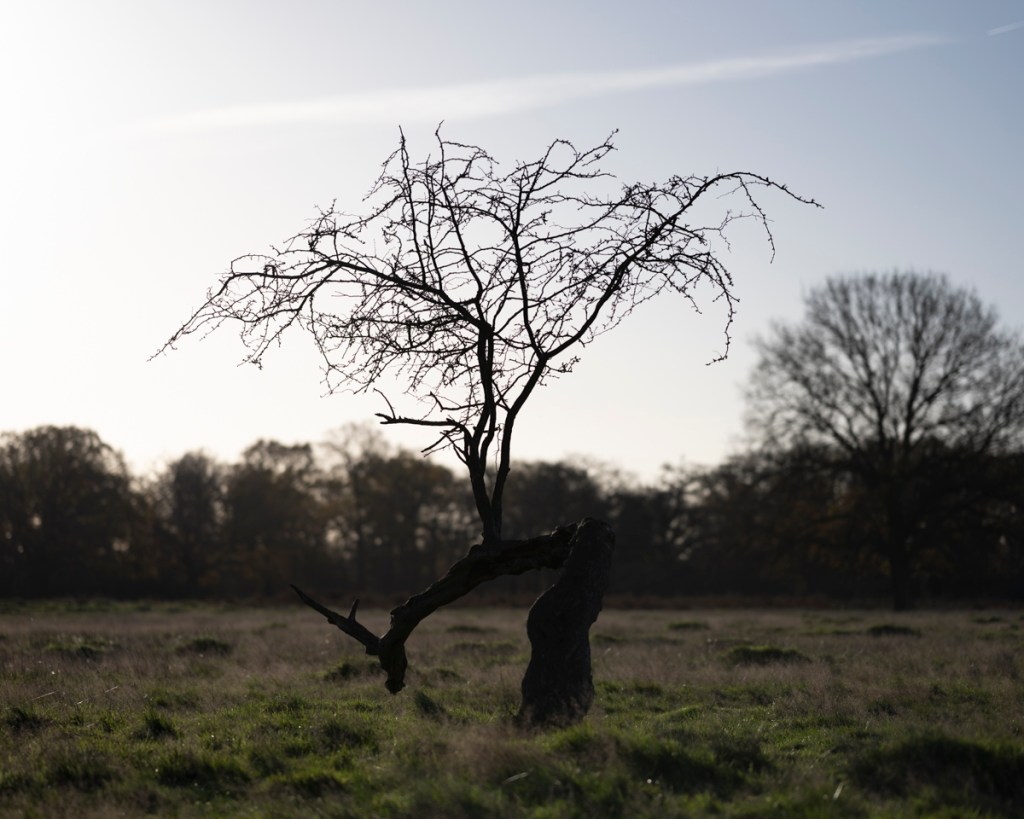
Next, I returned to one of my favourite hawthorns. It was interesting to see how this tree looked from a different angle and with the afternoon sun.
Tree Seven
By this time, I was starting to get tired and my concentration was waning. This can be seen in the following shots.
When looking at these images and some of the above, an annoying aspect was starting to make itself apparent. It was the ‘out-of-focus’ foreground featuring either grass or ferns. This is something that could be a feature of an image or a distraction. Something to consider.
Lastly, I took some close ups of this hawthorn. Still not sure about using this type of shot in the final body of work, but there is scope for their inclusion.
The intention behind today’s shoot was to try out the tripod and different aspect ratios. I also wanted to experiment further with the 85mm lens. The light wasn’t the best, but after three days of being stuck inside, it felt good to get outside.
I initially set up the tripod quite low to get the right aspect, but it was proving difficult to the see the screen. When using the camera in portrait, the viewing screen at the back of the camera doesn’t articulate vertically. This means the screen can’t be seen easily at that angle. The aspect ratio for the following is 5:4.
Despite this frustration, I tried the other aspect ratios settings from one position.
FX 3:2
DX 3:2
1:1
16:9
Note to self, if I change aspect ratio, change the camera position and recompose. Also, looking at the 16:9 image, I need to keep an eye out for passing birds and planes in the sky when taking a shot.
I then set the camera back to 5:4 and took the following using the tripod.
What struck me about these particular trees is the missing branches. In hindsight, what could work is composing the image as if these missing pieces were actually present.
I then focused on one of my favourite hawthorns. This is the first time I used the 85mm lens and tripod capturing this tree. Again, trying to find the right horizon using the tripod at a low angle was getting to be frustrating. As such, I removed the camera off the tripod and took some close up shots.
By this time I was starting to get a bit disheartened. I took these shots, but I didn’t feel particularly inspired. What I was starting to realise that there was no spark of ‘Jennie’ in my shots. Nothing that would ‘identify’ these images with me as the photographer. I also wasn’t experiencing that surge of excitement that I get when being creative. Time to stop and have a cup of tea. Only one place to sit…
While contemplating what I should do next, I remembered that I had installed the Nikon Snap Bridge app on my smartphone. This enables the camera to be connected to the smartphone via WiFi, so you can see what the camera is viewing. The shot is then taken by pressing the smartphone screen, not the camera button. These are the shots I took while sitting on the bench.
I started with a conventional composition then tried different angles just to see what would be the result. One thing I did notice is that there is a slight delay between moving the camera and this adjustment appearing on the smartphone screen. This does help in slowing down the process.
Next, I went for a wander in the Woodland Gardens to finish off my flask of tea with some ginger biscuits. After this break, I went back to the line of hawthorns nearby and took the following shots.
At this stage, I was still trying to work out the best approach. I knew it was probably staring me in the face, I just needed to see it.
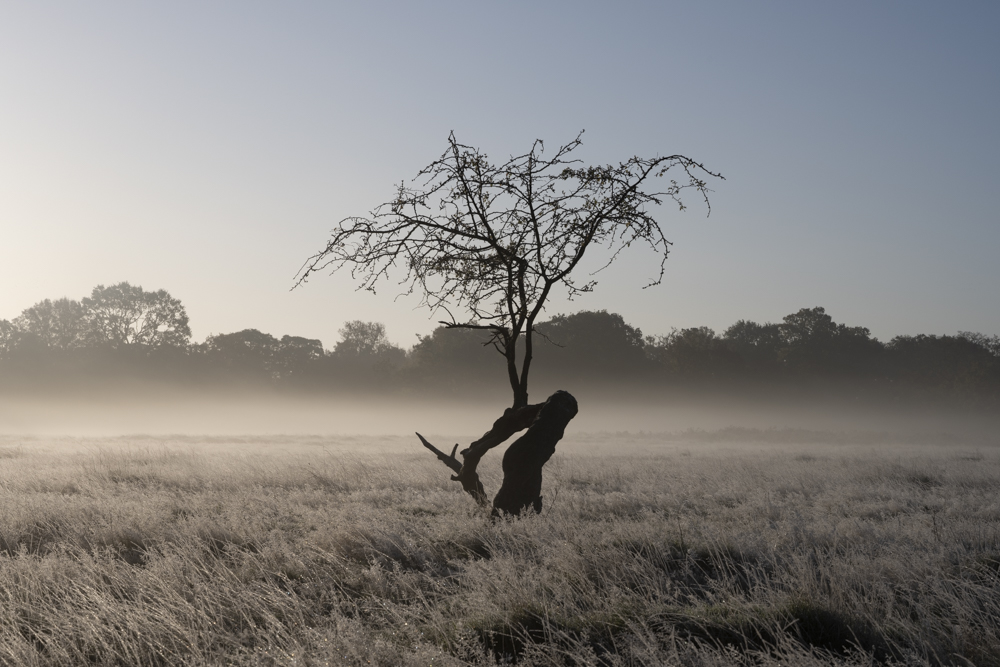
With a day of sunshine forecast, this was the time to get up early and catch the light. I also wanted to try out the 5:4 aspect ratio instead of my usual 3:2. My intention was to follow the tips outlined by Tony Sweet, Elliot Hook and Lindsay Silverman.
Sunrise was due at 7.45am, so I got to the park at 7.30am. This enabled me to both see and experience just how slow the light came up. It also made me look for the light’s direction and how it lit up my subjects and the environment.
My intention was to tryout the 85mm lens. I had returned the 105mm lens to its owner who assured me I could achieve a similar effect with the 85mm. However, I had made the mistake of not checking and packing my kit the night before. The camera had the 35mm lens on it. Annoying, but it would take me about 40 minutes to get the other lens and return to the park in time for the light.
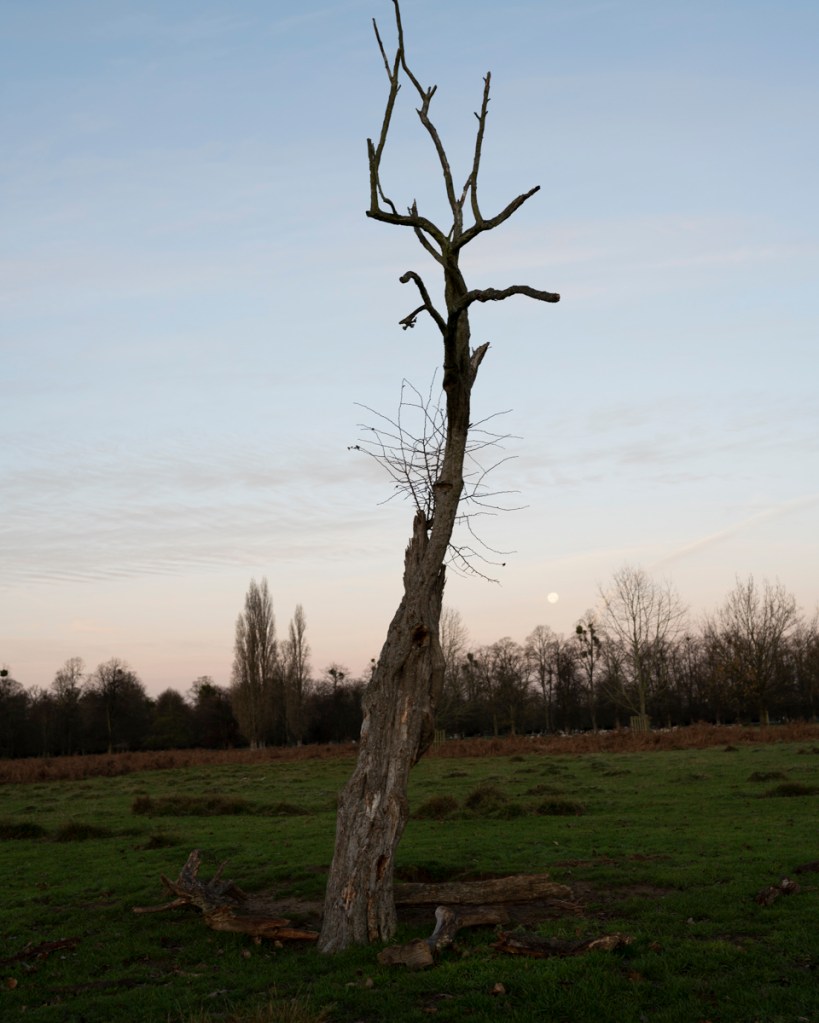
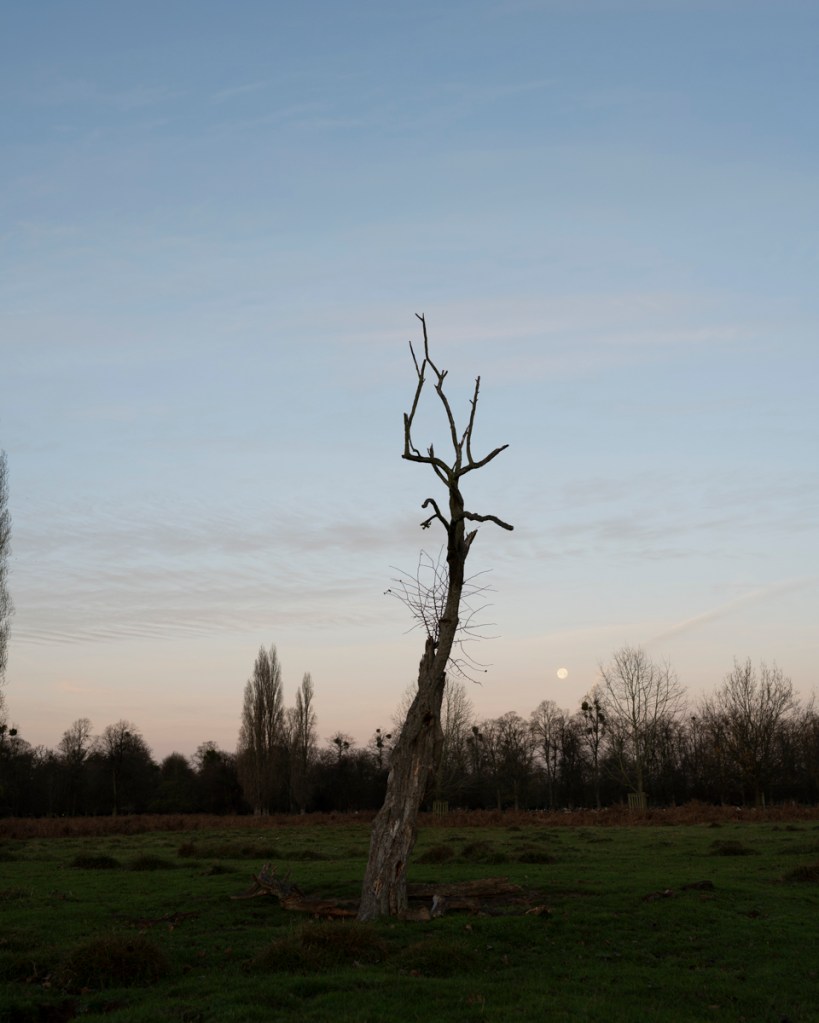
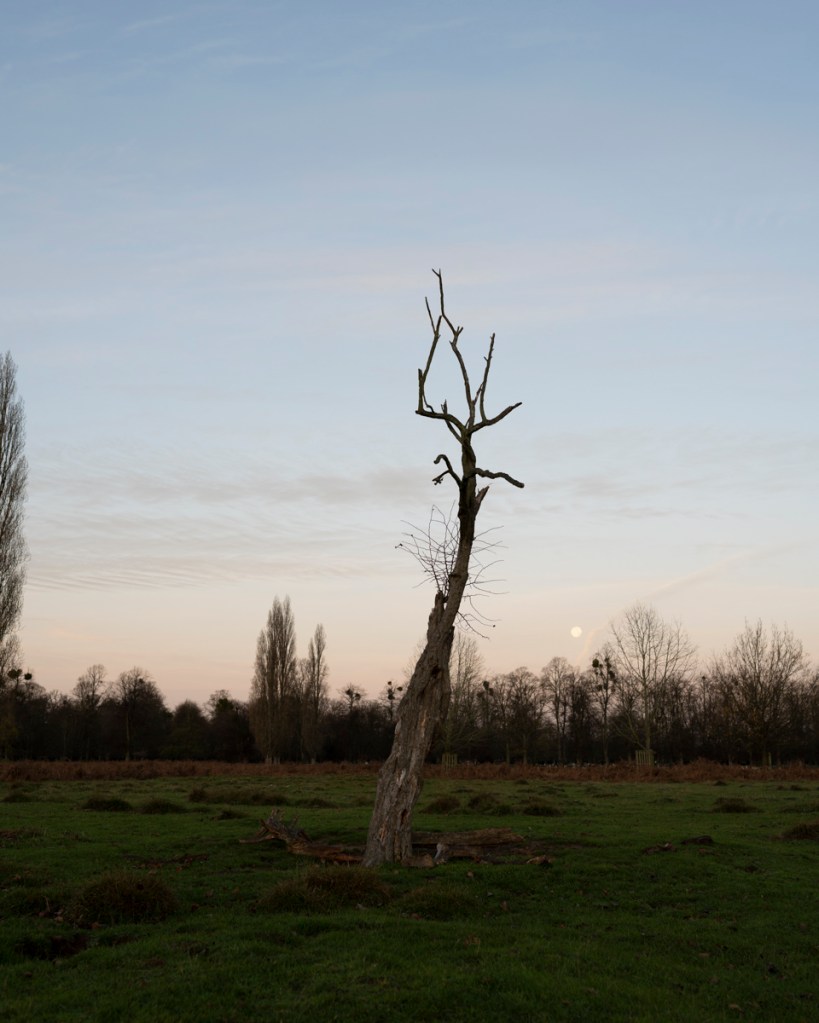
I decided to go to Teddington Gate and start with this tree below. The last time I was in the park on 27 November, there was a large herd of deer near to the tree so this could be the time to capture it from a different angle.
35mm Images – 5:4 Aspect Ratio
These images were taken between 7.41am and 7.50am. The light was still caught behind the trees behind me at this time.
Admittedly, I was finding it difficult to get the composition and angle I was looking for. Realising I was in need of a bit of a warm up (photographically and corporeally) I walked to the patch of hawthorns on the left of Hawthorn Lodge.
The sun was gradually coming up and I took the following shots at 8.00am.
My patience was rewarded a minute later when the sun finally showed its glory.
The light was stunning – it gave a coppery glow that lit up the ferns beautifully. Again, I was having difficulty in getting low enough with the camera to get the angle I was looking for and being able to see the display screen.
These are the two images I think work best (both have been rough edited in Camera Raw. What does need work is aligning the horizon line. I was using the 4 x 4 grid that can be shown on the display screen to help with composition. So that there would be uniformity, I aligned the top of the ferns with the bottom third line as a guide. This seems to provide a good ratio of foreground, subject, background and sky.
When I shared these two shots with my classmate, Mark, he made the following comments:
“I like the way the sun is coming from the side. I think the second image works. Also, if you didn’t know, they could have been taken on safari. I would try to keep then looking the same in the frame so it doesn’t give the viewer the feeling of ‘bouncing’ in and out. Great shots!”
Will take these on board!
By this time, I was itching to use the 85mm and the light was beginning to get a bit harsh.
The decision was made to return home the return to the park with the 85mm.
85mm Images 5:4 Aspect Ratio
Unfortunately, the light had increased in harshness. Despite this, it was useful trying the 85mm lens with the 5:4 aspect ratio. The first tree I tried was this one (image below taken on 4 November 2020 using the 24mm-70mm zoom lens at 70mm and at 3:2 ratio).
These are the results.
I then walked to the row of hawthorns leading to the gap between the Woodland Gardens plantations.
I did manage to get the effect of blurring the background, which I liked. Again, I wasn’t able to get low enough and see the display at the same time.
My next step is to revisit all aspects of this project in light of the feedback and actions resulting from the Interim Review and previous Group Tutorial.
While looking for tips on improving my landscape photography, I came across a useful article on the Nikon website. Featuring tips from fine-art photographer Tony Sweet, I noted the following:
The earlier I get to my location, the more time I’ll have to let the light play with the scene
Sidelight on a scene serves to separate elements
Not all landscapes have to be taken with wide-angle lenses
Pick and choose, zoom and crop, get a high or low angle
Search out the stalwarts of composition:
S-curves
Leading lines
Repetitions
Patterns
Rule of Thirds
Textures
Colours
Juxtapositions
Contrast
Shapes found in nature
Things connected to those shapes
But remember, there are no rules; it’s all about what attracts me
Why does it attract me?
The answer to that will help me frame and compose my picture or pick out from the larger scene the essence of what it is I want to convey
What I see in front of me isn’t enough
Pick and choose, zoom and crop, get a high or low angle
This is where landscape becomes a macro landscape, an abstract landscape, a landscape of elements
Develop a style, not a repetitive approach
I noted the following in greater detail to remind me of some of the key information:
Light – The Key Element
The article asked what should be looked for to make effective landscape images, to which Tony replied:
“Light,” Tony says without hesitation. “See the same scene in great light and lousy light, and it’s like you’re in a different part of the world. If you want to do it right, whatever it is, you have to get the light right.”
For Tony, the right light starts with scouting. “You have to know the time and the circumstances that will give you the best light. The issue is not where the action is, it’s when.”
For Tony, the best time is during the morning. Why?
Morning Light
Get up and out early for first light
Morning gives more time to shoot various levels of light
Gets lighter slower than it goes dark
More light slowly showing up to work with from pre-dawn to sunrise
Morning long exposures work better
Morning time is quality shooting time
The other aspect Tony covered was ‘shooting where you live’. As I had already taken that decision, I thought it pertinent to note ‘why’.
Why Shoot Where You Live
A favored landscape nearby gives the benefit of a quicker early-morning journey
The advantage of this is being able to get there year-round to catch the changes the seasons bring
Tony states that “The same landscape scene in four seasons is a great, under-shot project”. Something that I have already considered in relation to this project and going forwards.
With this information in mind and the information on aspect ratio, it was time for me to put it into practice.
In my quest to improve my technique and skill base in regards to my hawthorn portraits, I realised I needed some external inspiration. To start my investigation, I carried out an initial online search regarding aspect ratios and landscape that resulted in the following findings.
Aspect Ratios
Up until this stage, I had been shooting in 3:2. This is the aspect ratio which matches my camera’s sensor size and, therefore, gives the maximum base for creating images. In addition to this ratio, my mirror-less camera can shoot in the following aspects:
1:1
4:5
16:9
I first came across an online article by Elliot Hook called Aspect Ratios in Landscape Photography. This clearly written and enlightening piece put into perspective the differing ratios in relation to what I was attempting to achieve. By going through the pros and cons of each aspect, I could use this advice in my own work. As Hook points out at the beginning of the piece:
‘The aspect ratio of a photograph can make or break the composition by either emphasising the subject and removing distractions, or by putting the whole scene off-balance.’
(Aspect Ratios in Landscape Photography, 2020)
Within this article, Hook outlines a range of well-defined and familiar ratios. I’ve arranged this information into the following bullet points for my own reference:
1:1 Square Format
Use to simplify an image
Emphasise minimalism
Gives a subject a striking presence at the centre of the frame
Keeping the width equal to the height changes the way in which a photograph is read
Less of a need to move from left to right through the frame
Offers a good opportunity to break the rules (thirds, etc.) and strengthen the composition:
Place the horizon along the centre of the image
Place a subject in the centre of the frame
4:5 Four Fifths Format
Hook hasn’t specifically outlined a list of attributes for this ratio, but his tips involving a 4:3 Four Thirds Format can be applied (this is the default aspect ratio of cameras that use Four Third sensors).
Wider than it is tall
The eye naturally wants to move left to right through the image
The image is still fairly tall in relation to the width
Ratio is perfect for drawing the eye into the scene through leading lines
The relative height to width encourages the use of wide-angle focal lengths
Captures the depth of a scene
Excludes excess details at the edge of the frame
3:2 Format (also called 6:4 & 35mm)
Default aspect ratio for full-frame and APS-C sensors (Nikon and Canon)
Aspect ratio for 35mm analogue cameras
The width is significantly wider than the height
Encourages viewing the image from left to right
Pros
Works well for diagonal leading lines
Suited to capturing scenes where there is little to no foreground interest, especially if using mid-range focal lengths (e.g., 35mm)
Cons
Limitation of this aspect ratio is that the height is that much shorter in relation to the width
Capturing foreground detail using a wide-angle lens is more difficult due to the limited vertical space
3:2 aspect ratio can even cause the subjects within the frame to become too disparate and therefore lose impact
16:9 Widescreen Panoramic
Supported in film by the Advanced Photo System (APS)
Becoming more popular due to the prevalence of 16:9 aspect ratio displays in the home on TVs, computer monitors, and mobile devices
Width of the image is dominant – leading the viewer in from the foreground is difficult
Ideally suited to presenting portions of landscape scenes captured with longer focal lengths (e.g. zoom lenses) from a distance
Portrait Orientation & Ratio
The part of this article that I found most interesting was in relation to shooting in portrait orientation. This is how I intend to photograph the hawthorns for this project. Hook points out that options for the successful presentation of landscapes in “portrait” format are much fewer in number.
Hook suggests that, for a landscape to work, the composition throughout the frame has to be balanced. He highlights that, due to the image being too tall relative to its width, achieving this can be quite difficult. This is what I’ve observed so far in the majority of the hawthorn images.
To get around this, Hook advises on trying a ‘fatter’ rectangle such as 4:3, 7:6 or 5:4.
5:4 Ratio for Portrait-Orientated Landscapes
Heavily used by professional landscape photographers with medium and large format cameras
Aspect ratio allows the eye to be taken through the image from left to right
Reduces excess amount of sky knocking the frame off-balance
This is what could make a big difference to my own work.
In addition to the above, Hook does point out that there is an argument for taking the initial image at the full ratio of 3:2 then cropping it to a custom ratio based on the image’s subject matter. However, this can cause issues with both printing and framing. I would also think this could effect areas of focus and perspective within an image.
In addition to Hook’s article, I came across a piece on the Nikon website which encourages experimentation with the different aspect ratios available with my camera. Also useful was the relevant megapixel sizes for each ratio. Something to consider when sizing prints.
Nikon Z 7 and Z 6 Crops with Megapixel Sizes
FX, the full-frame default mode, is a 45.7-megapixel image for the Z 7, 24.5 megapixels for the Z 6. The image is roughly 36x24mm, the size of a 35mm film frame.
DX crop mode, at a 1.5 magnification factor, produces a 19.5-megapixel Z 7 image, a 10.3-megapixel Z 6 photo.
In 5:4 mode the Z 7 image is 37.9 megapixels, Z6 doesn’t have a 5:4 mode.
1:1 produces a square image at 30.3 megapixels for the Z 7, 16.1 megapixels for the Z 6.
16:9 mode—38.3 megapixels for the Z 7, 20.5 megapixels for the Z 6—is the common aspect ratio for TVs and computer monitors
The stand-out part of this information was in relation to the DX crop. At the time of writing, I don’t know exactly how it could influence this current project, but the following extract may be useful:
Based on his experience, Lindsay feels that the most popular of the modes will be the DX crop. “Let’s say you’re shooting with a 70-200mm or 80-400mm telephoto at a sports event—baseball, soccer, a horse race. There probably will be times you’re not really close enough to the action, or you’ll want to be closer to a detail of the action or a player’s stance or grip or expression. You could come home with the picture, crop and enlarge to get that detail, but I prefer to do that in the field, right there at the event, so I’ll go to DX crop mode with an 80-400mm and effectively get a 600mm focal length.”
(Modes, 2020)
This begs the question ‘How would the use of the DX crop affect the image and composition choices when used with my current lenses?’
My intention after discovering and processing all of the above information was to apply it to my current project.
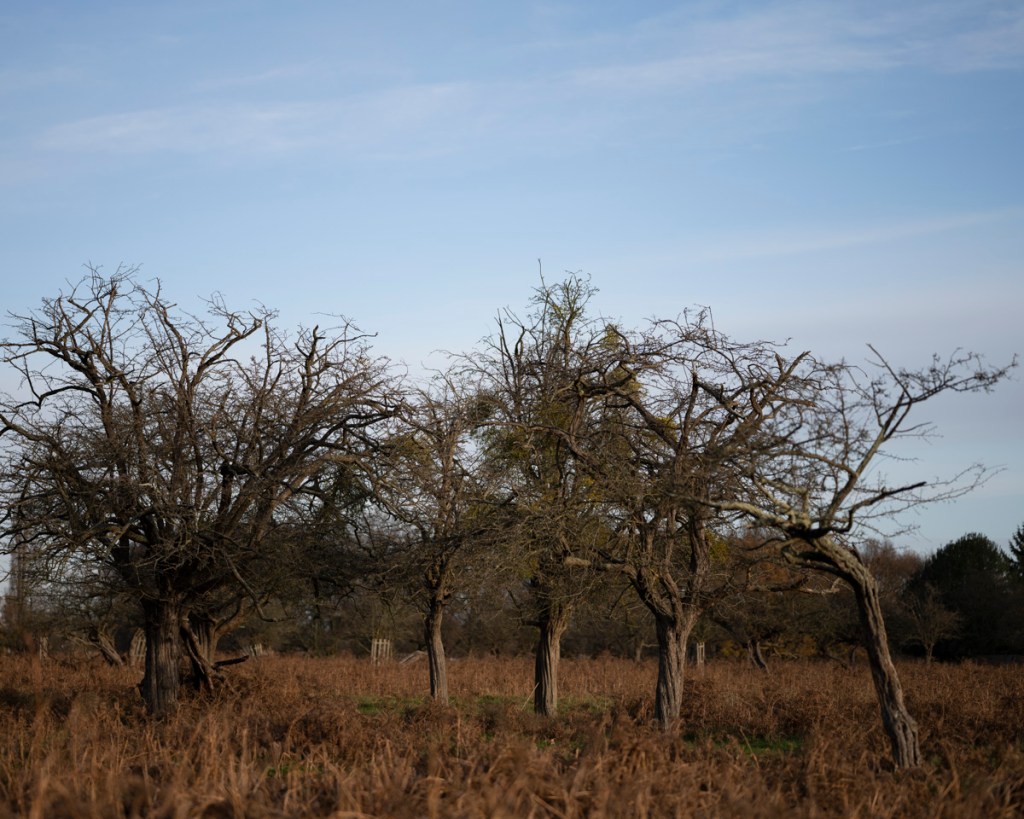
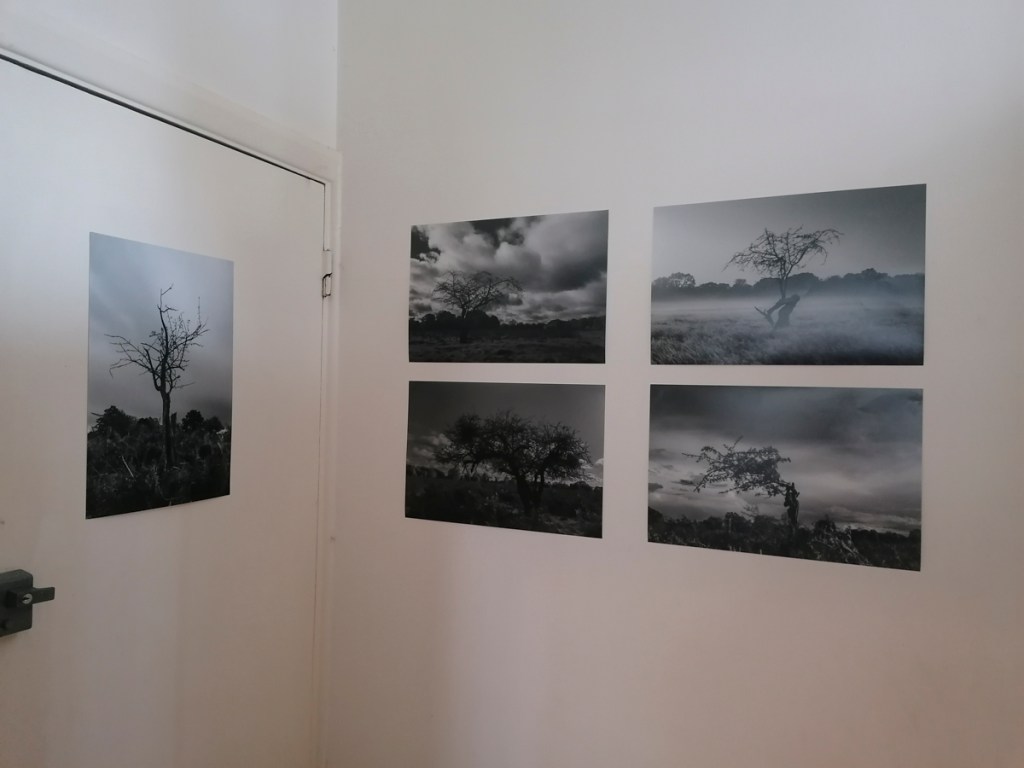
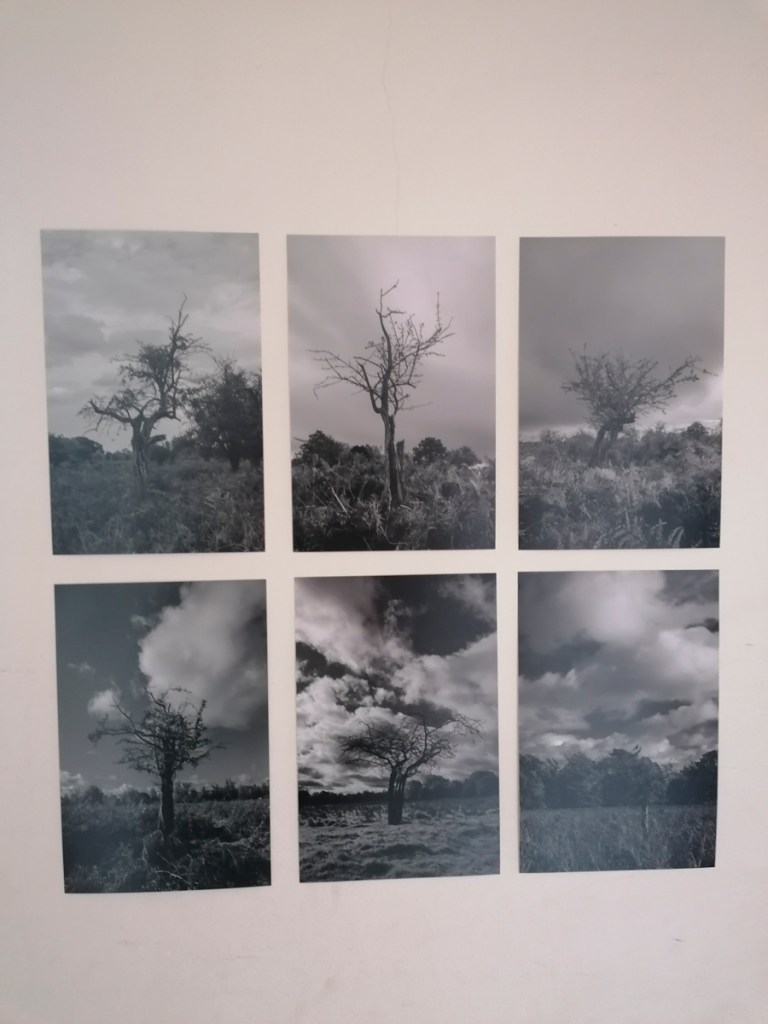
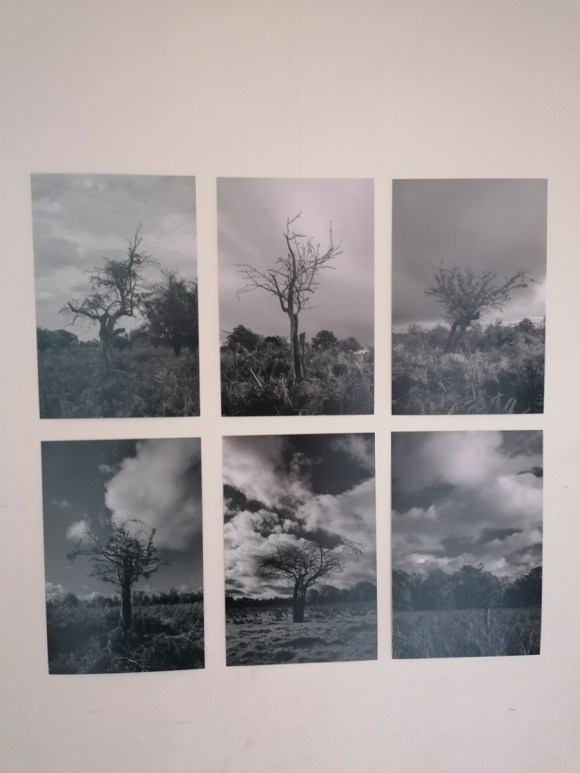
In order to take a closer look of the images I’d produced so far, I put some up in my hall area at home. This helps in recognising both positive and negative aspects of each image and how they work together. This exercise also assists in highlighting possible areas of project progression.
While putting up the prints, I noticed three aspects immediately.
First, the difference the sky tones make to an image. In the single image of the tree with the paler sky, it feels ‘open’. The other images, where the top part of the image are darker, compress the sky. There is palpable claustrophobic sensation. This effect also reminded me of my classmate Mark’s use of a vignette in his images of Waverley Abbey and how it affected these images in the same way. The images need to ‘breathe’.
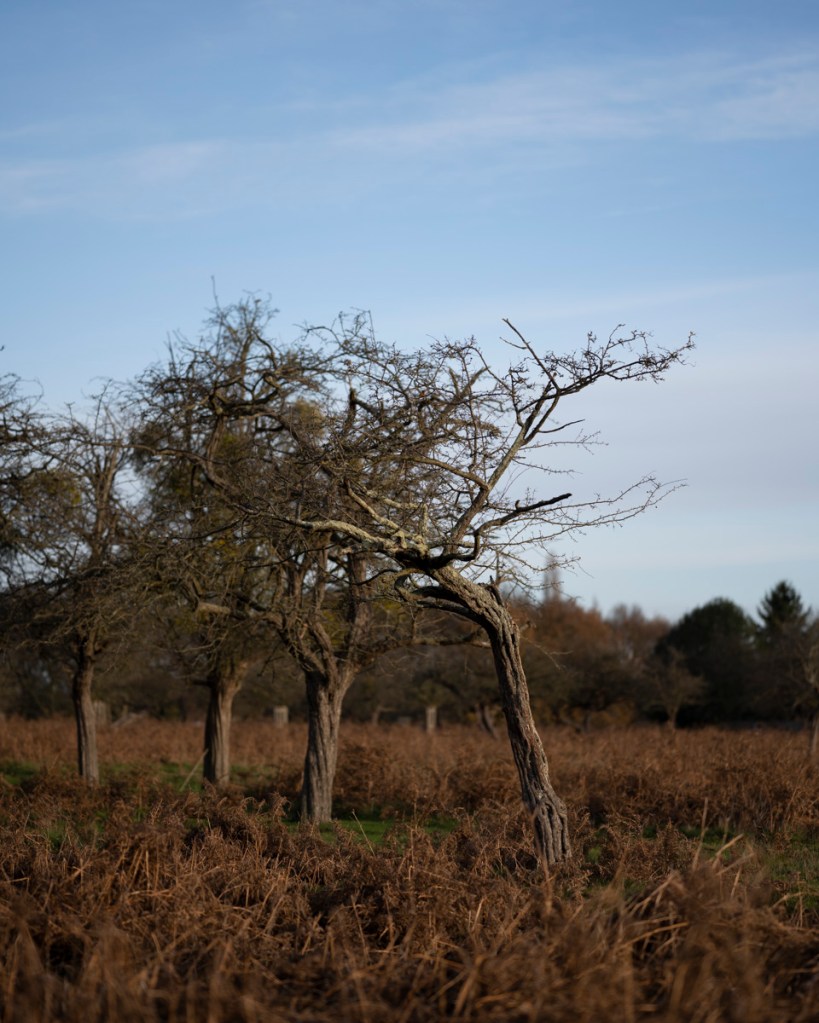
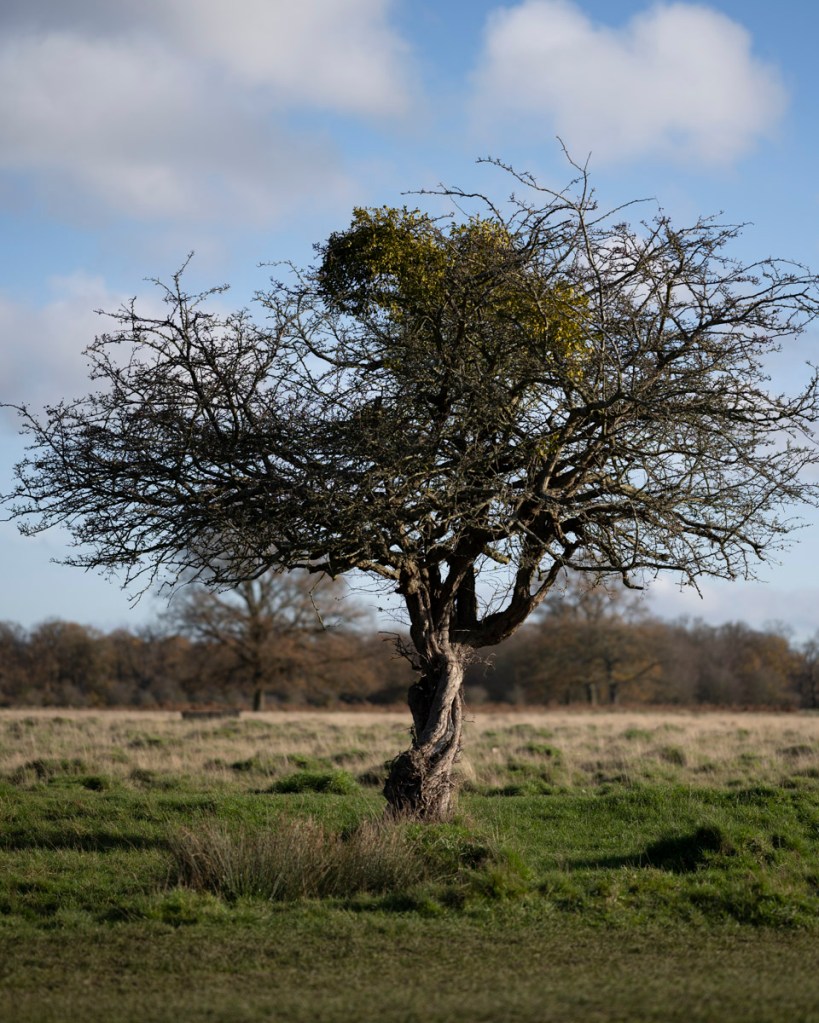
Secondly, the sky in this image had a very soft sheen to it that contrasted perfectly with the spiky thorns.
This lead me to the third observation – the ratio. All of these images were taken at 2:3. This has the effect of ‘stretching’ the scene in both portrait and landscape orientation. One issue I had with this when taking shots of the trees was being able to fit in all of the branches. Also, there was sometimes ‘too much’ sky and foreground resulting in a less satisfying composition. To give me a better idea of what this may look like, I created a 4:5 cropped version of the following image.
2:3 Ratio (Original)
4:5 Ratio (Crop)
In reflection while writing this post, I also noted that the original shot (from on 25 October 2020) was taken at 24mm and at F11. This reflected the feedback that I need to use a different lens and focal length.
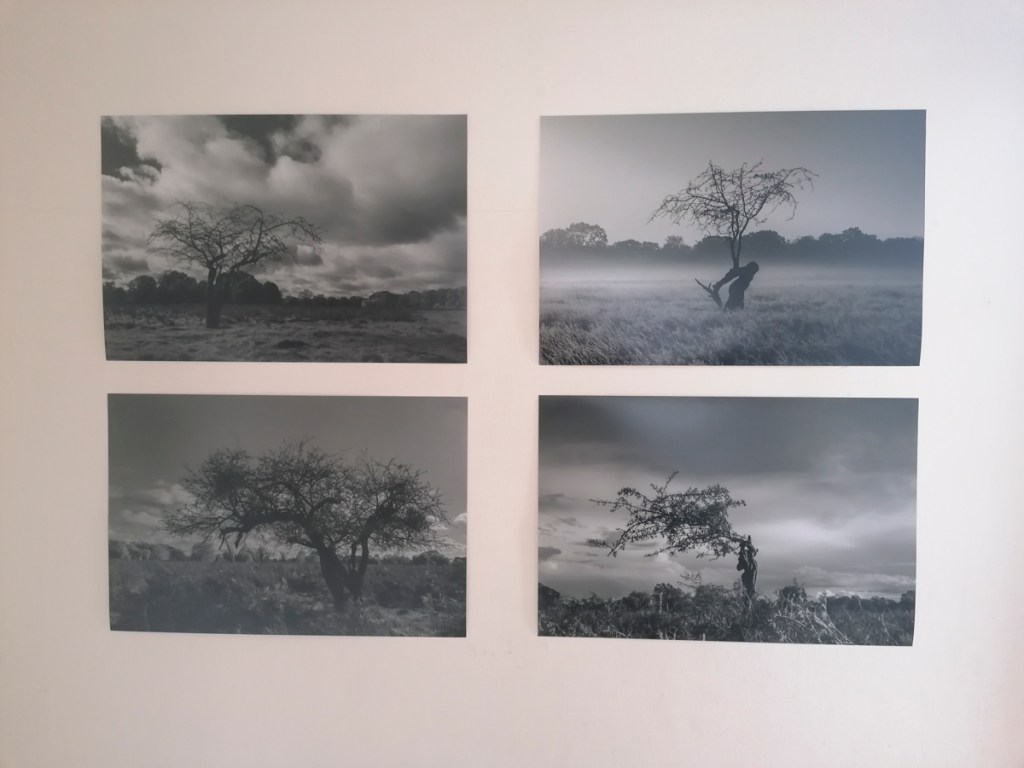
The other main observation was in relation to this configuration of images.
The trees needed a ‘quieter’ sky and a uniformity of the horizon line. This observation and the ones above provided a clearer direction in my goal to formulate a particular technique for this project. It also sparked further areas of practice-based research.
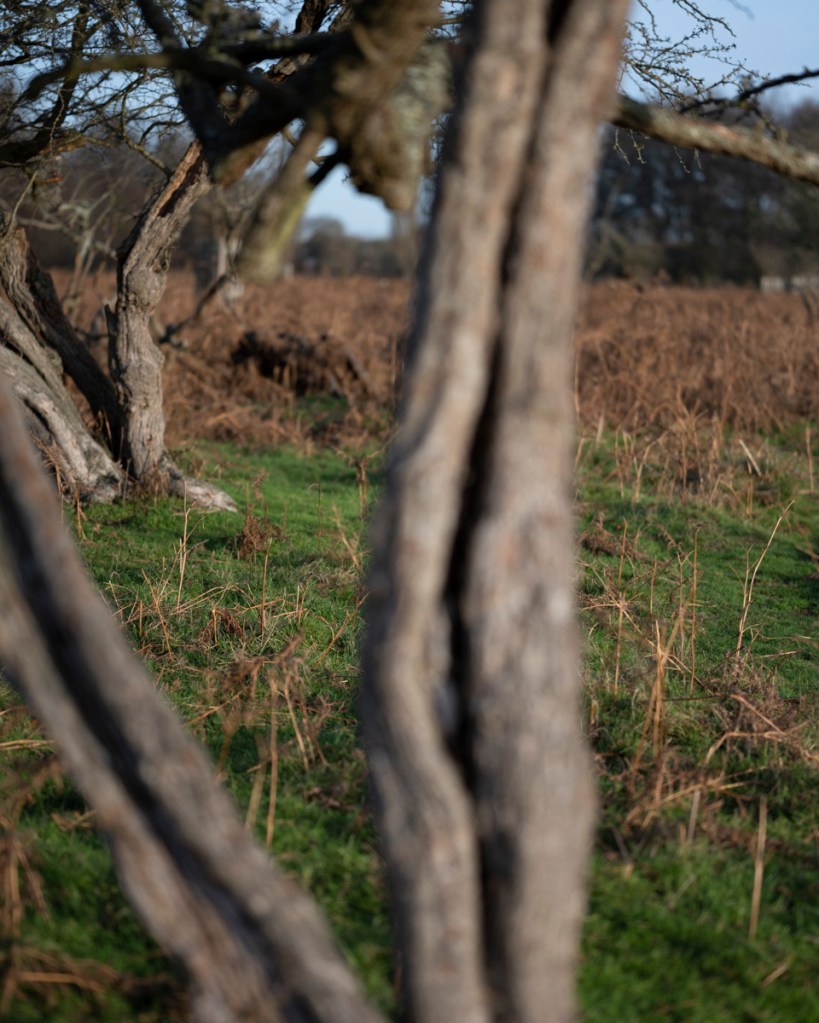
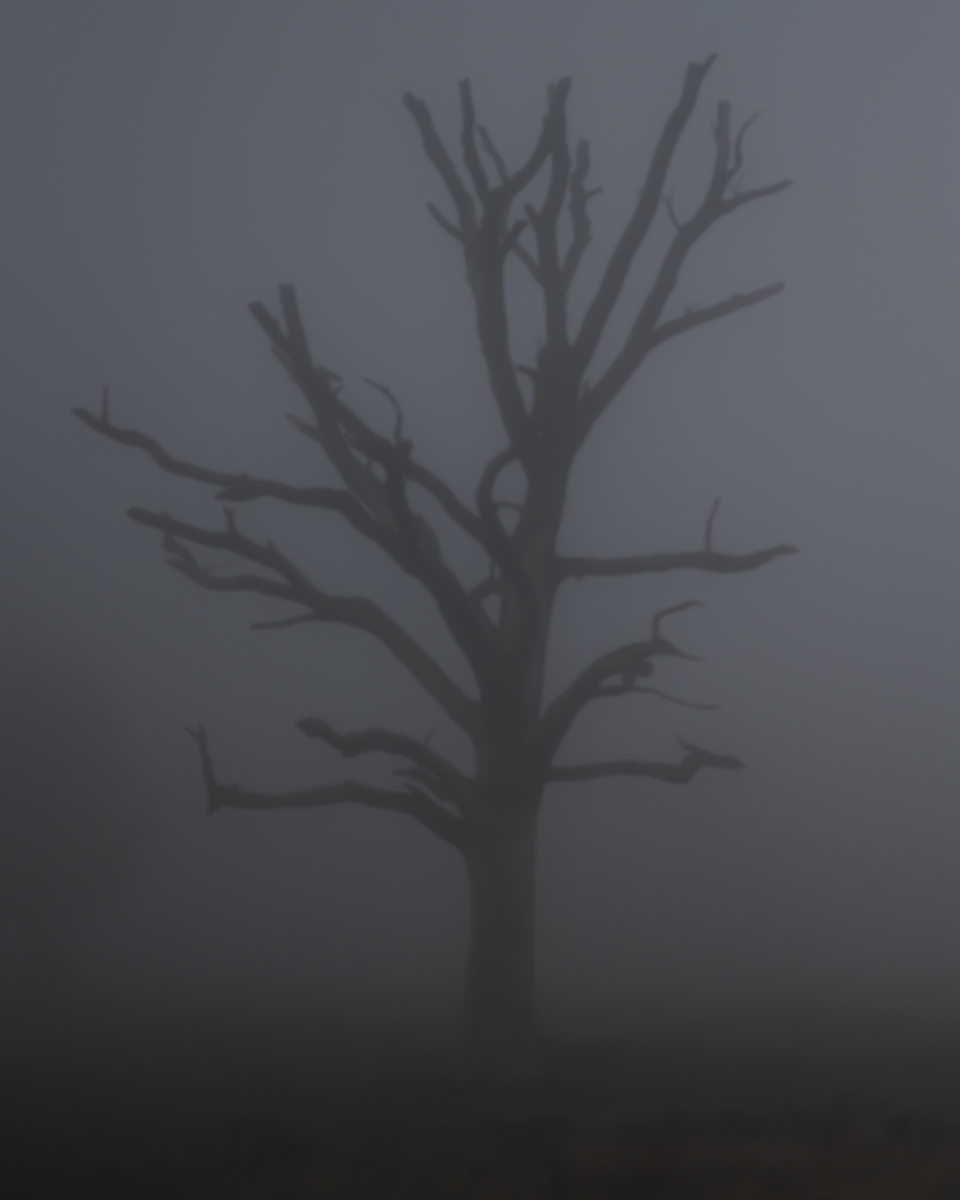
My first foray into the absorption of practice-based research was to use a new piece of equipment – vintage Nikkor 105mm manual lens. I had borrowed this from a photographer friend, who recommended I try it. This would be quite a challenge as it would involve manual focusing. I usually have to resort to auto focusing – being short sighted, I’ve discovered that this helps in making sure the key aspects are not intentionally blurry.
I had to run an errand on the other side of the park that morning, so thought it an ideal opportunity to try this lens. I wanted to use it as it would give the effect of having the tree in focus and the background blurred.
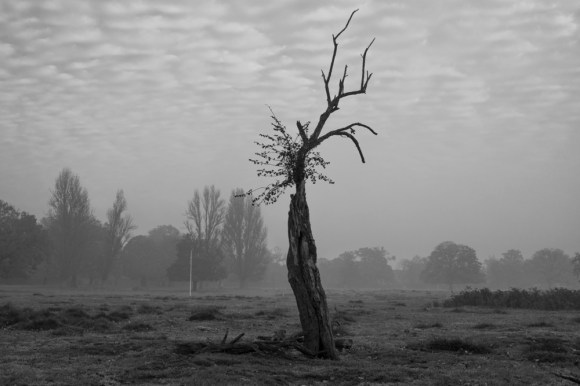
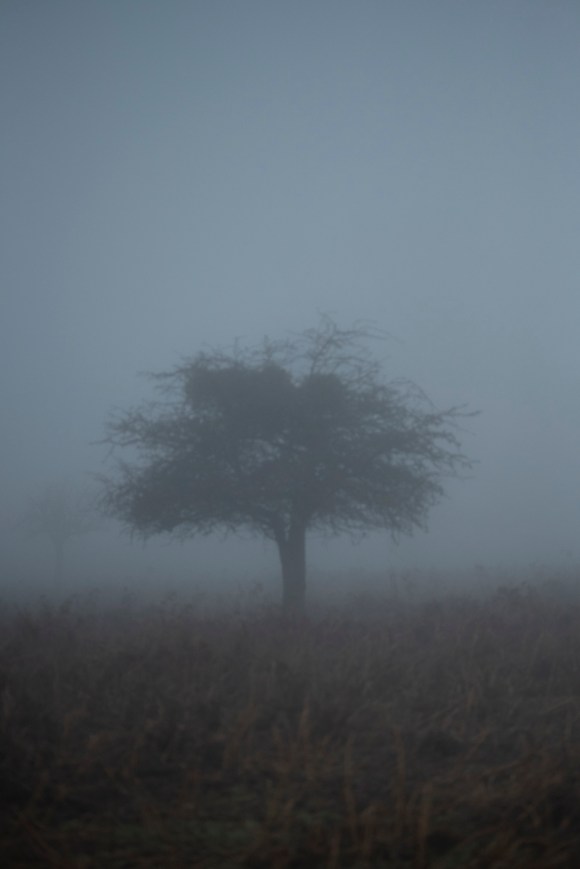
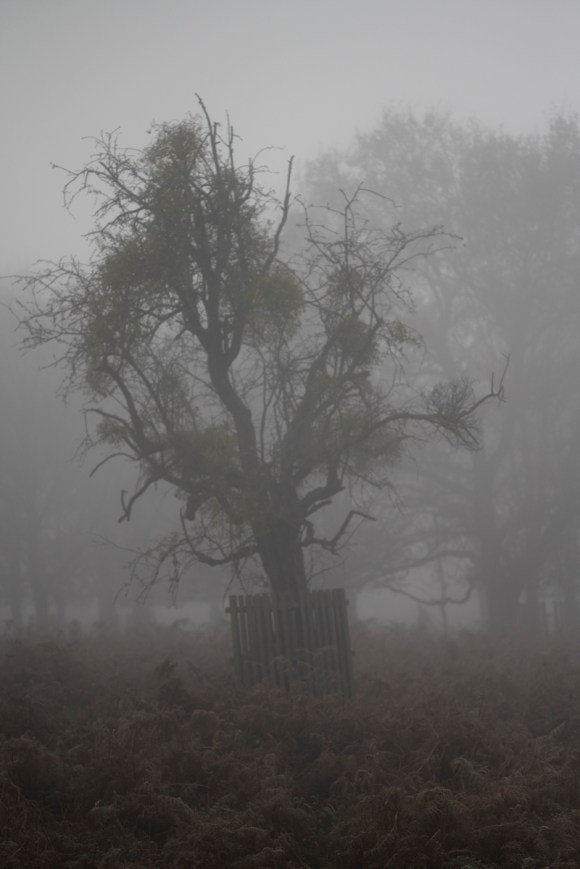
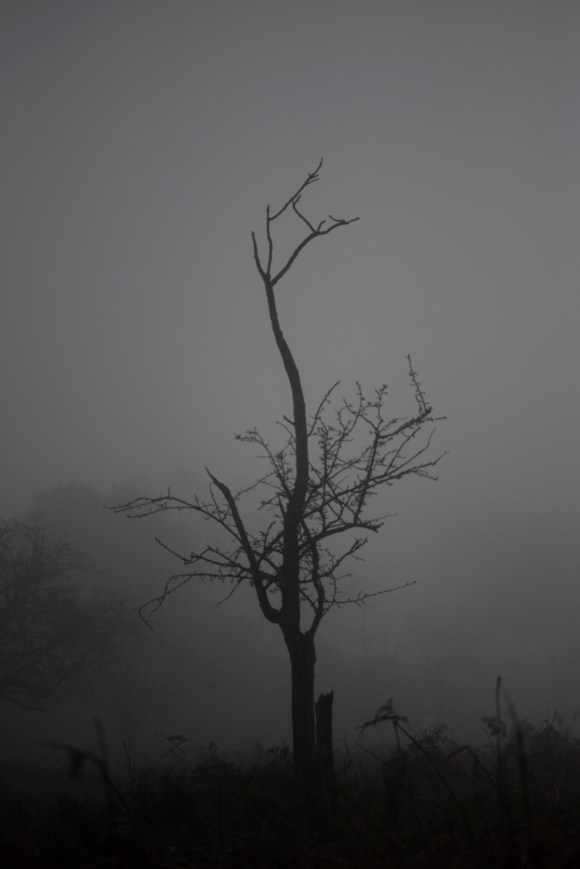
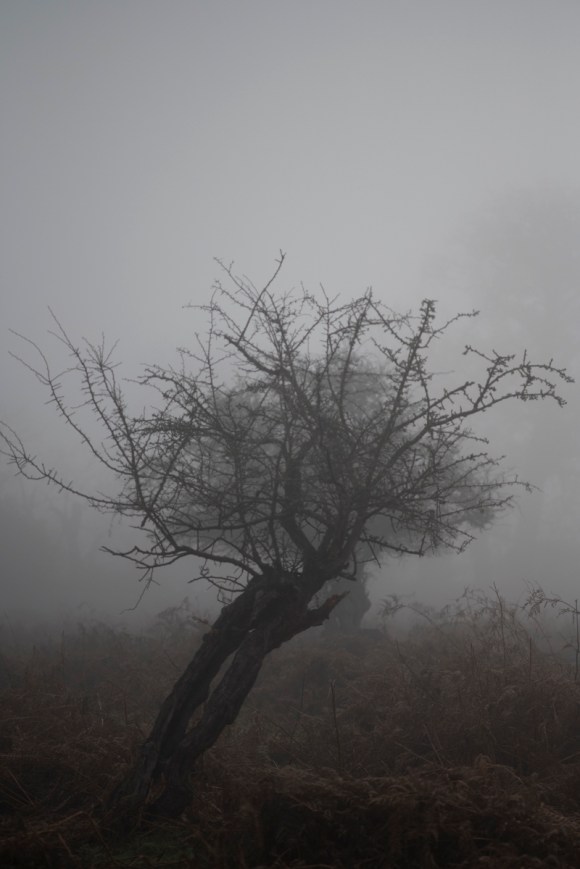
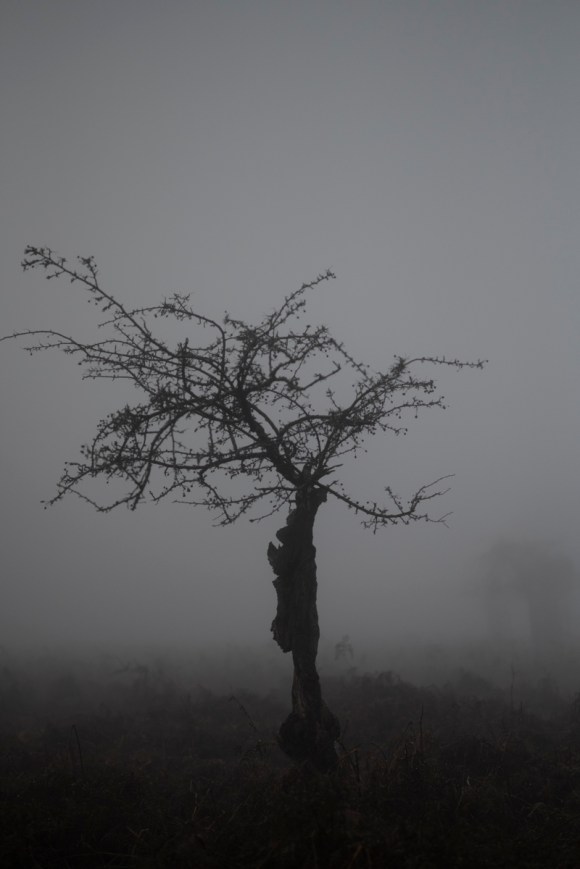
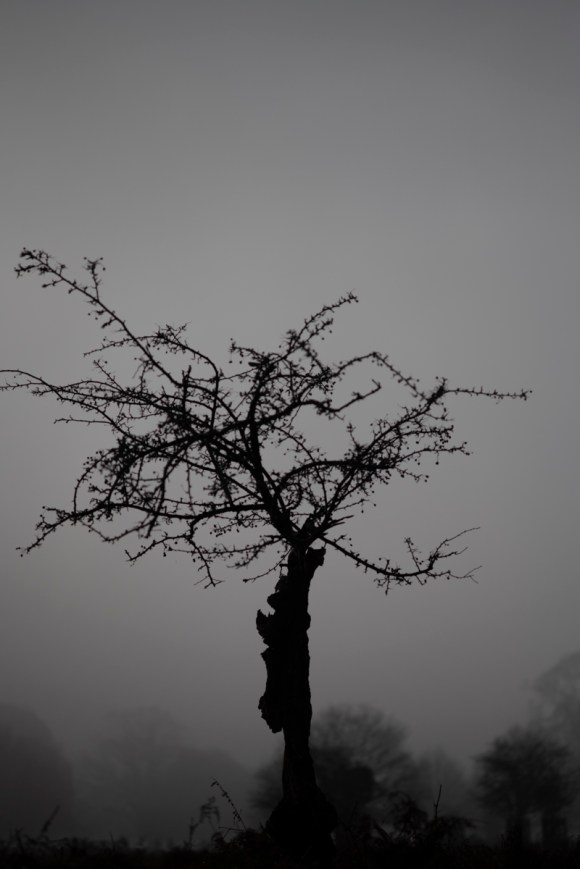
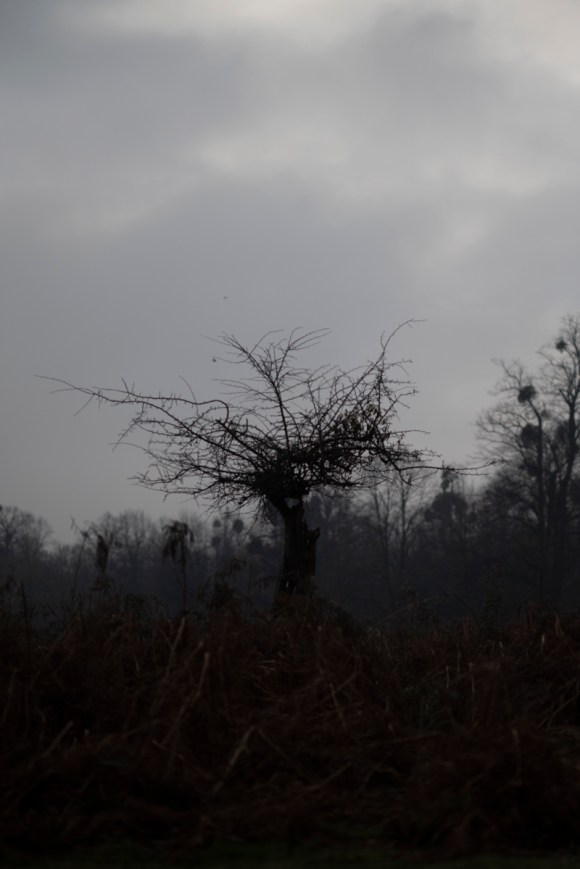
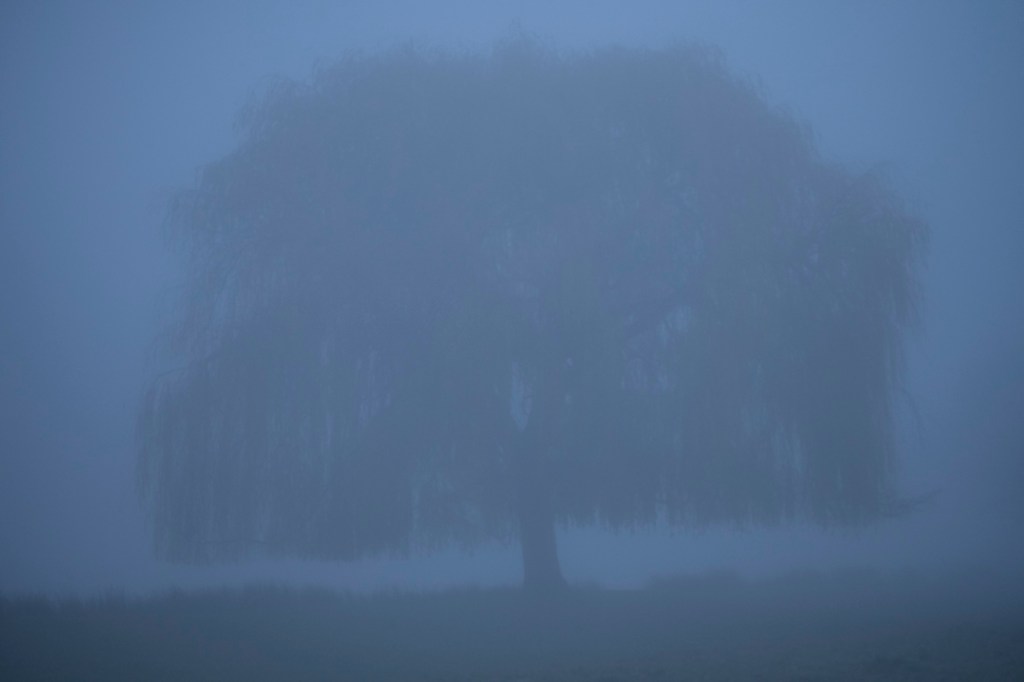
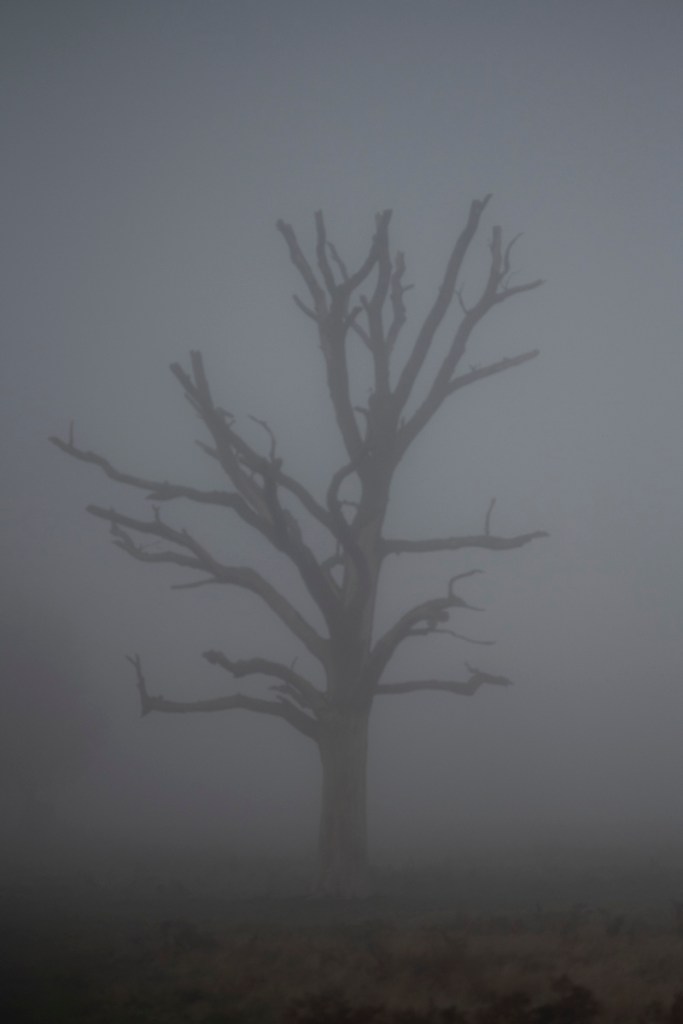
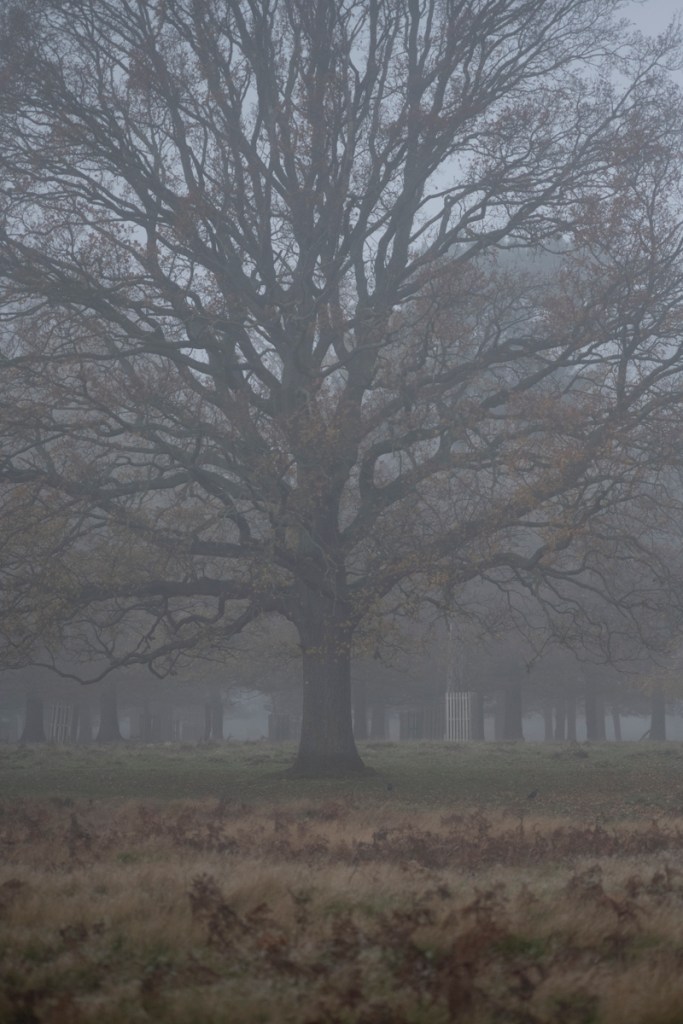
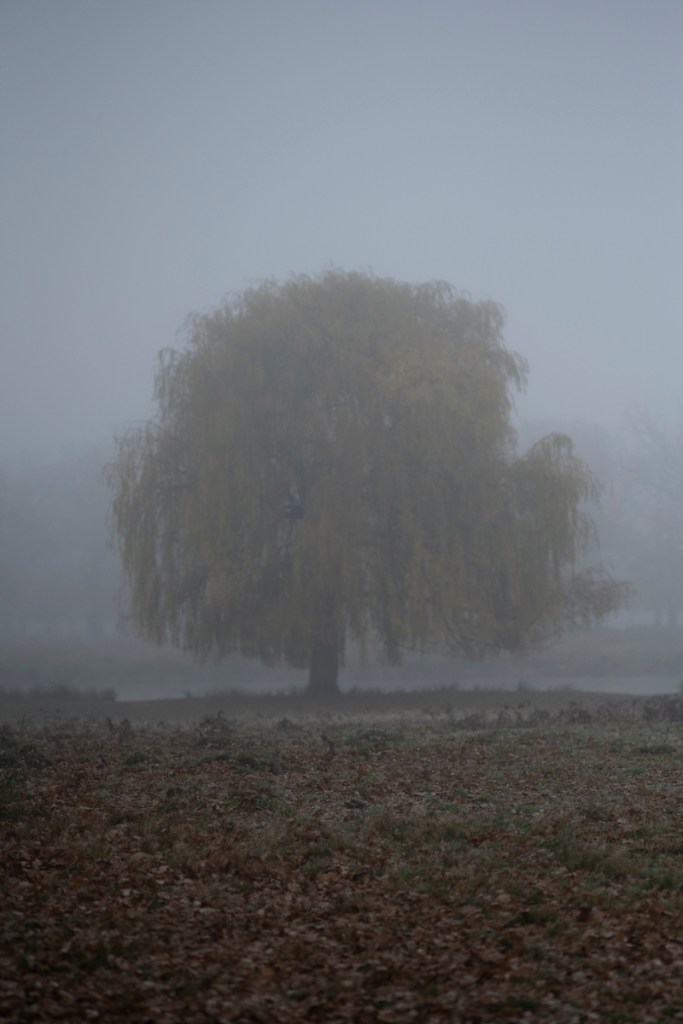
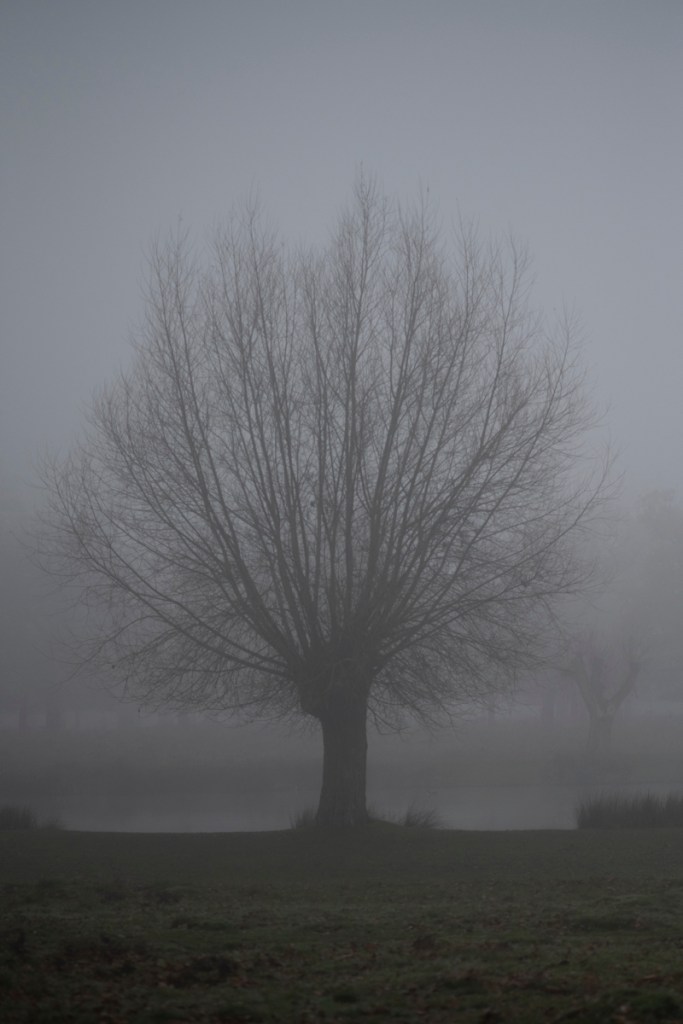
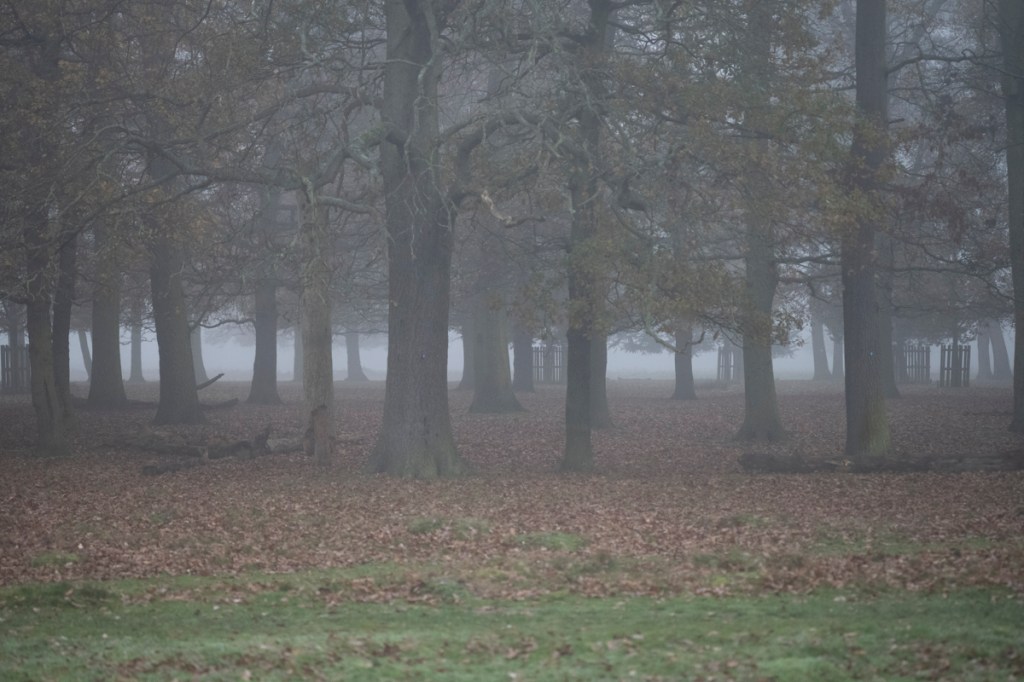
The park was exceedingly foggy that morning – these conditions would also give an opportunity to be creative. I had set the camera at F2.5 and hoped I would get some positive results.
All of the following images are a selection of low-res JPGs taken directly from the RAW file and no colour adjustments have been made.
Hawthorns
To test the lens and capture the conditions, I also took these images.
Other Trees
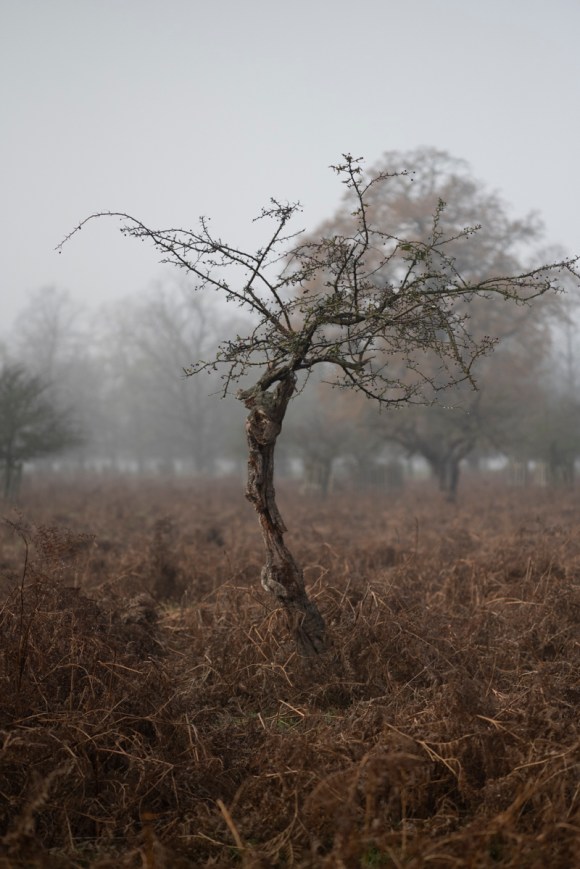
The main difference in using this lens is the distance between myself and the subject. With the 35mm and 24-70mm, it was easy to get closer to each tree. With the 105mm, I had to remember to move further away from the tree to get it into frame.
As for the blurred background effect, this is the image in which it most profound. Unfortunately, the tree itself isn’t in focus and the image is quite noisy.
With regards to the other trees, I made this particular edit. One difference is the crop, which was at a 4:5 ratio. This was an aspect I was contemplating and will be looking further into how different ratios effect the resulting image. I’ve also made minor adjustments to the contrast, highlights, shadows and whites.
After using this lens, I realised that I would need lesson in how to get the best from this very good piece of kit. I also realised that I’m best suited using a lens with automatic focus in these kind of conditions.